HCL AppScan CodeSweep
HCL AppScan CodeSweep enables you to scan your source code, view and assess scan data from HCL AppScan on Cloud and HCL AppScan 360º.
Supported Languages
The HCL AppScan extension supports scanning files of the following types:
- Android-Java
- Angular
- Apex
- ASP.Net
- C
- C++
- C#
- Cobol
- ColdFusion
- CSS
- Dart
- Golang
- Groovy
- Infrastructure as Code
- Docker
- Kubernetes
- Terraform (AWS, Azure, GCP)
- Ionic
- Java
- JavaScript
- JQuery
- Kotlin
- MooTools
- Makefile
- NodeJS
- Objective-C
- Objective-C++
- Perl
- PHP
- PL/SQL
- Python
- React
- React Native
- Ruby
- Rust
- Scala
- Secrets
- Swift
- T-SQL
- TypeScript
- VB.Net
- VueJS
- Xamarin
Pre-requisites
Before installing the extension, ensure the following pre-requisites are met:
- VS Code 1.53.0 or later
- Java Runtime (JRE) 17 or later.
Installation
Install the HCL AppScan CodeSweep latest extension by clicking the Install link on this page, or install from the Extensions tab in Visual Studio Code.
Alternatively, you can perform an offline installation by following below steps:
- Download the extension via Download Extension link under Resources section.
- Install and open Visual Studio Code.
- Press Ctrl+Shift+X or Cmd+Shift+X to open the Extensions pane.
- Click More Actions… (on the top right in Extensions pane) > Install from VSIX…
- Find hclappscancodesweep-1.3.0.vsix on your local file system and click Install.
- Restart VS Code to activate the extension.
Once you install the HCL AppScan CodeSweep extension, an AppScan icon is visible on the VS Code side bar.
Settings
Below Settings are available for HCL AppScan CodeSweep in VS Code User preferences section.
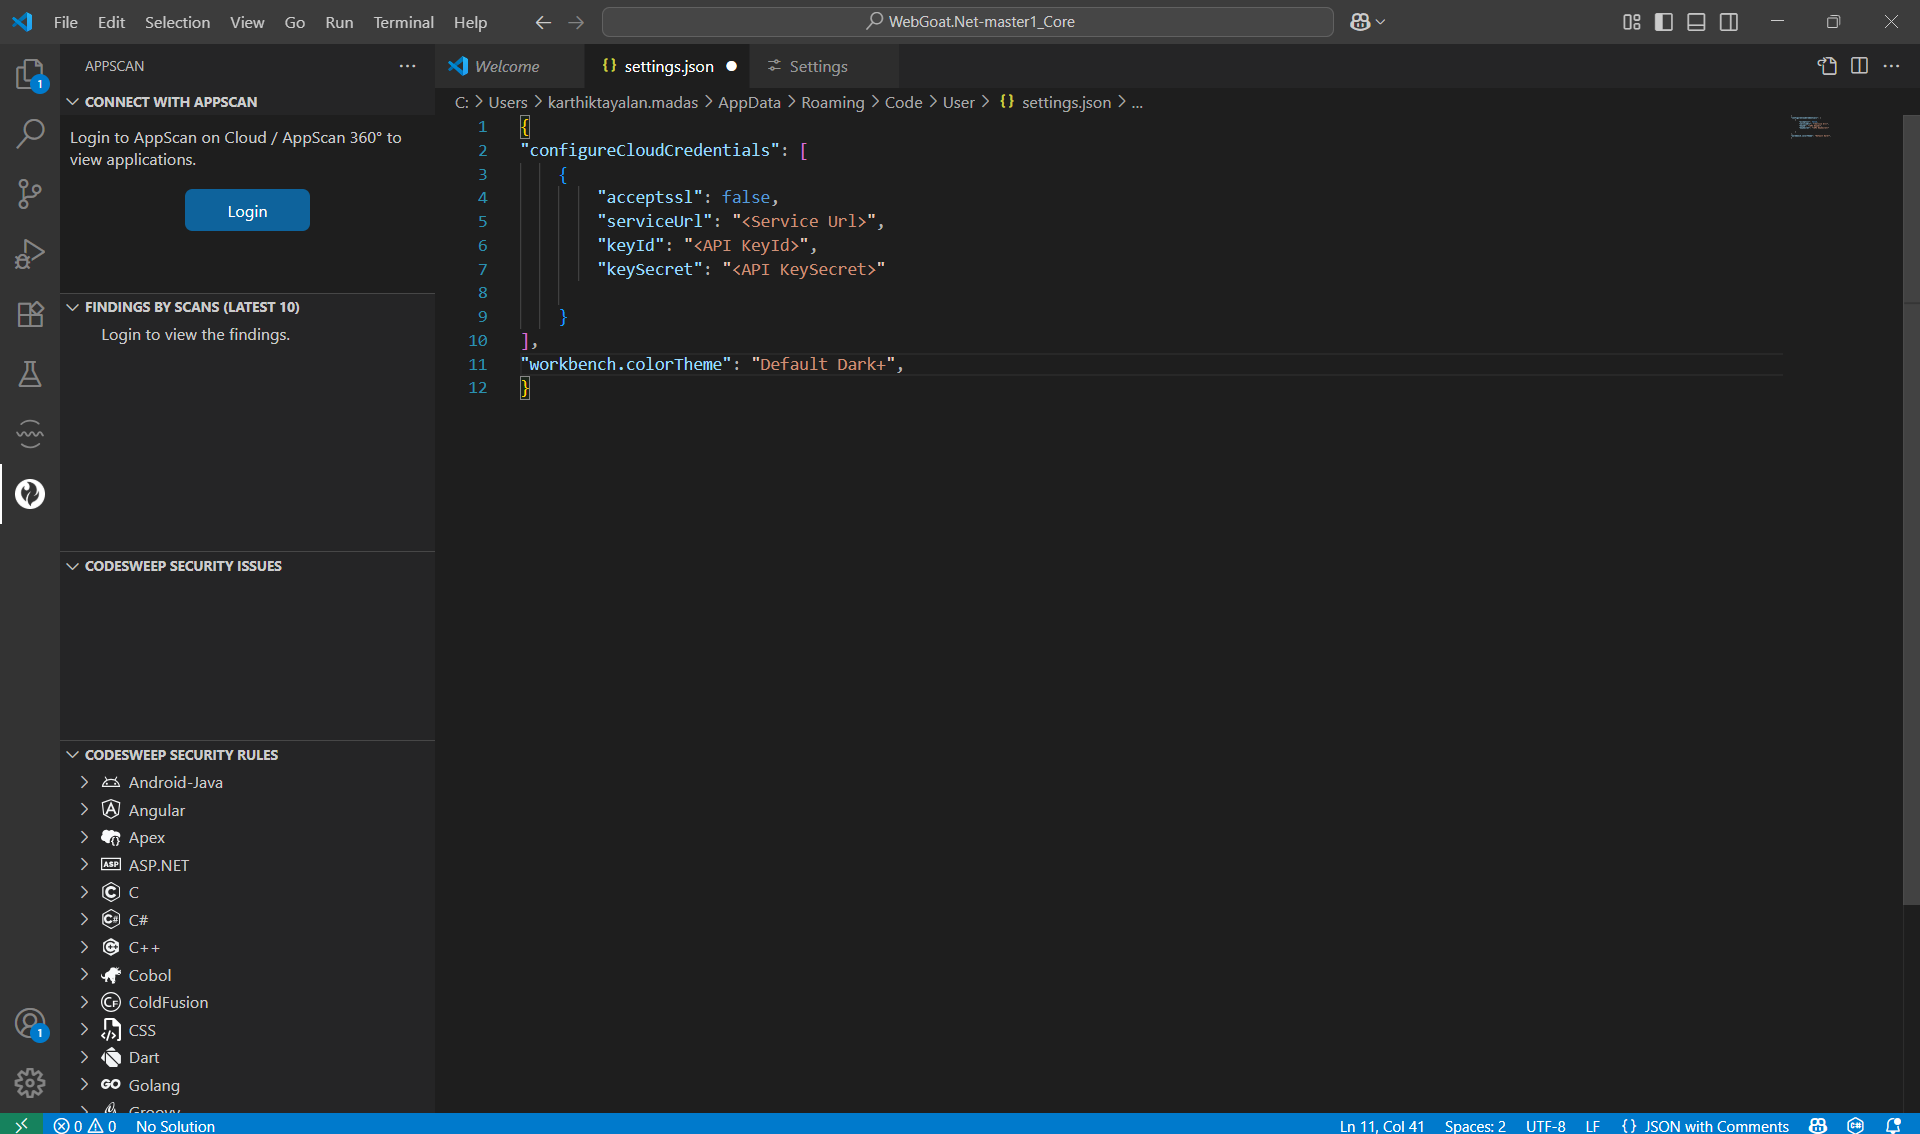
Configure Cloud Credentials
You can connect HCL AppScan CodeSweep to HCL AppScan on Cloud or AppScan 360°.
To configure CodeSweep connection details:
- Go to Settings > User > Extensions > AppScan.
- Click “Edit in settings.json.”
- Enter the serviceUrl, keyID, keySecret and acceptssl. If you don’t have
a key ID/Secret, create one by following the steps
here.
- Click “Save.”
Once connected, the issues marked as “Noise” in AppScan on Cloud or AppScan 360° will not appear in CodeSweep.
Example:
{
    "configureCloudCredentials": [{
        "serviceUrl": "<Service Url>",
		"keyId": "<API KeyId>",
		"keySecret": "<API KeySecret>",
		"acceptssl": "<Accept SSL>"
    }]
}
serviceUrl: Required for AppScan 360°. The AppScan 360° service URL without a trailing backslash. Not applicable for AppScan on Cloud.
acceptssl: Ignore untrusted certificates when connecting to AppScan 360°. Intended for testing purposes. Not applicable to AppScan on Cloud.
To remove the connection to AppScan on Cloud or AppScan 360°, remove the credential information from the settings.json file and restart VS Code.
Enable Telemetry
We are collecting telemetry data [rules ignored, rules info viewed, file types scanned,] to give you a better user experience with our future releases. No information about specific issues is captured or stored. In case you want to opt out, please uncheck this opton
Manage Vulnerable Code Highlight
This settings enables you to choose the code highlight option for issues identified in a scan.
Select the Don't Highlight option if you don't want to highlight the vulnerable code in the editor on file save. You can verify this selection in status bar with AppScan Marker Off text.
Select the Highlight All Issues option if you want to highlight all the security issues in the file immediately after the file save. You can verify this selection in status bar with AppScan Marker On text.
Select the Highlight When Selected option if you want to highlight the issue only when it is clicked in the Security Issues tree view.
You can toggle between Don't Highlight and Highlight All Issues selections just by clicking AppScan Marker On/Off text in the status bar.
By default Highlight When Selected option will be selected.
CodeSweep Security Issues View
Work with files normally. Upon save of supported file types, AppScan scans for vulnerabilities and reports the issue count in the status bar. If you have enabled integration with AppScan on Cloud or AppScan 360°, any issues marked as Noise in AppScan on Cloud or AppScan 360°, will be filtered out by CodeSweep scans.
To view the issues, click on the issue count on the status bar to open the Security Issues view. The Security Issues view lists files with issues along with exact line numbers of the issue.
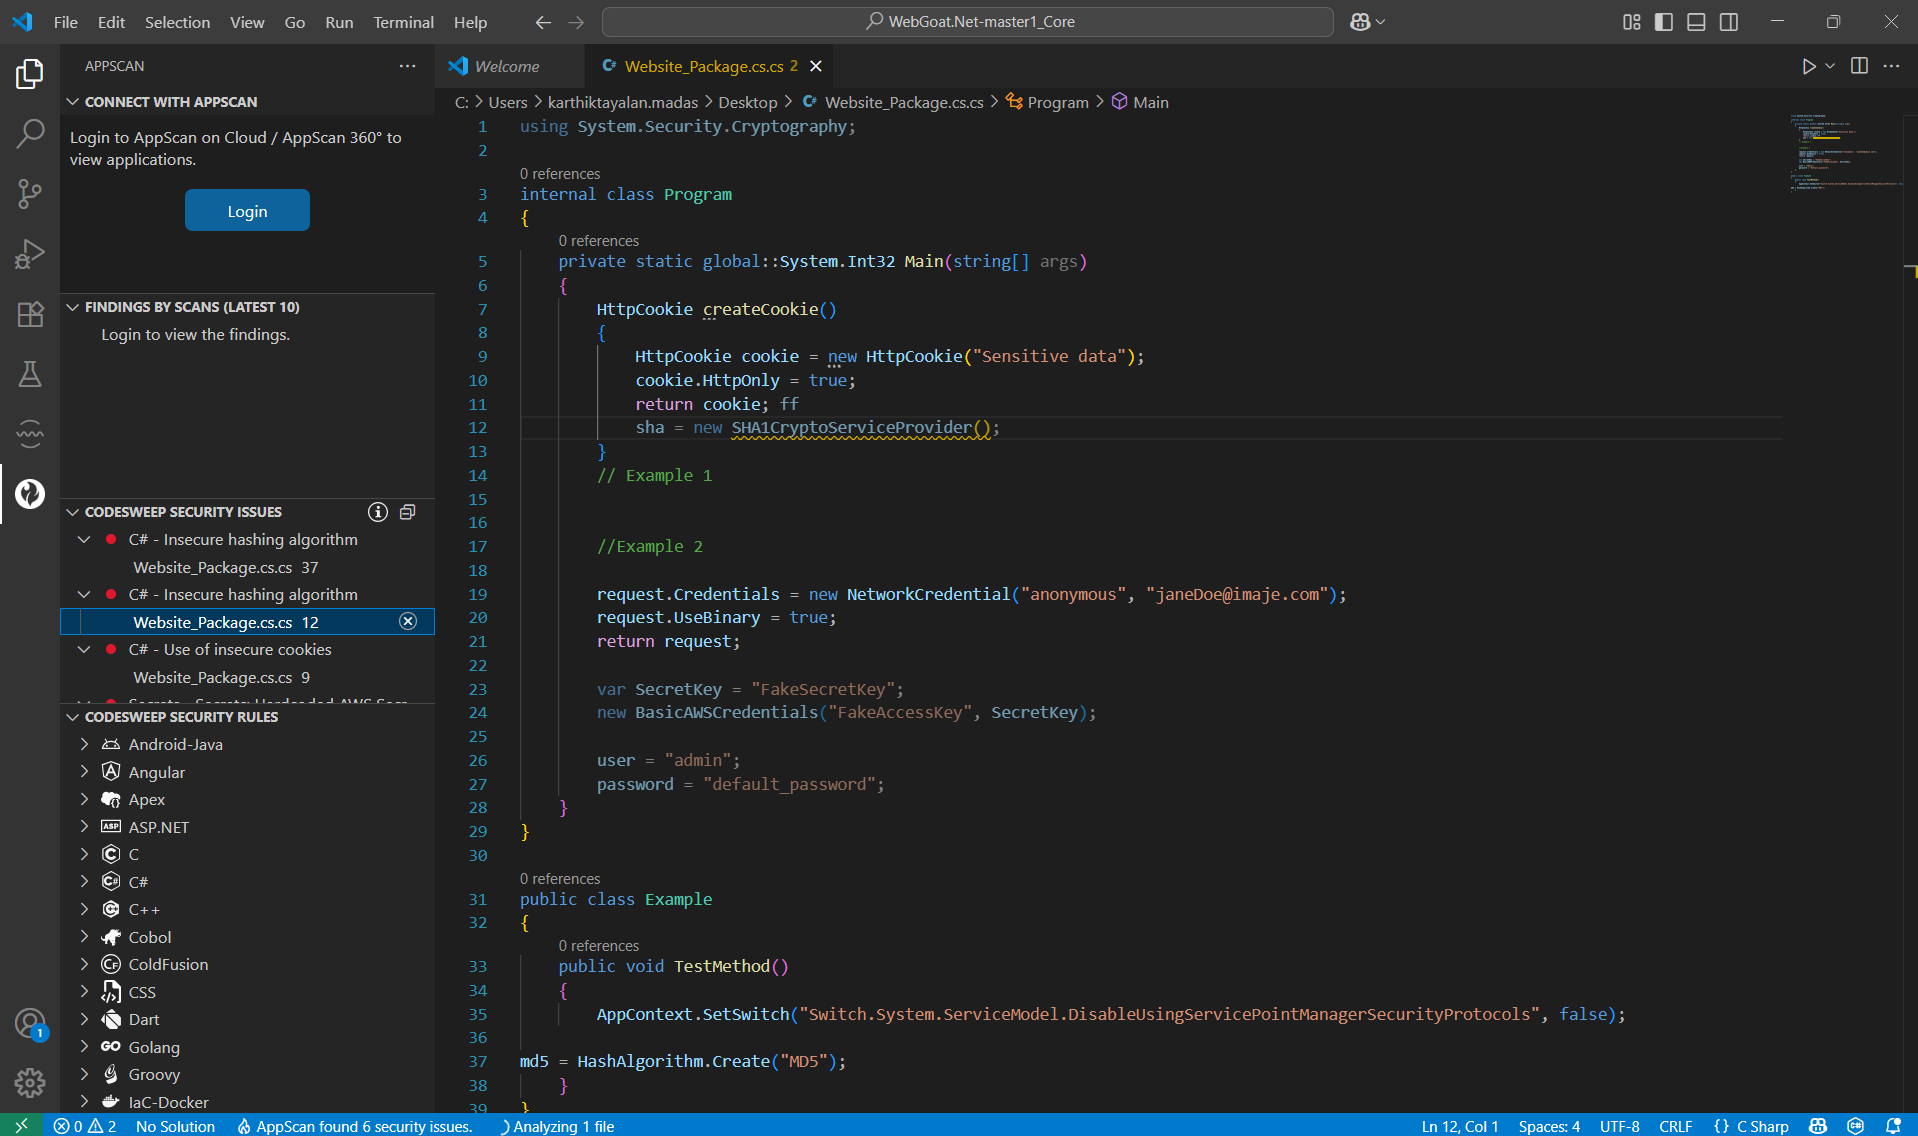
If your code highlight preference (Manage Vulnerable Code Highlight) is Highlight All Issues, all security issues in the saved file will be highlighted.
Click on the file name to navigate to the line number in the VS Code editor. If your preference is Highlight When Selected, security issue will be highlighted when you click on file name in the Security Issues view.
Once you hover over the highlight, you can see 2 options - Peek Probelm and Quick Fix.
The Quick Fix will have below actions:
- In-Context Code Fix Option : Replace the context of the issue with recommended code fix.
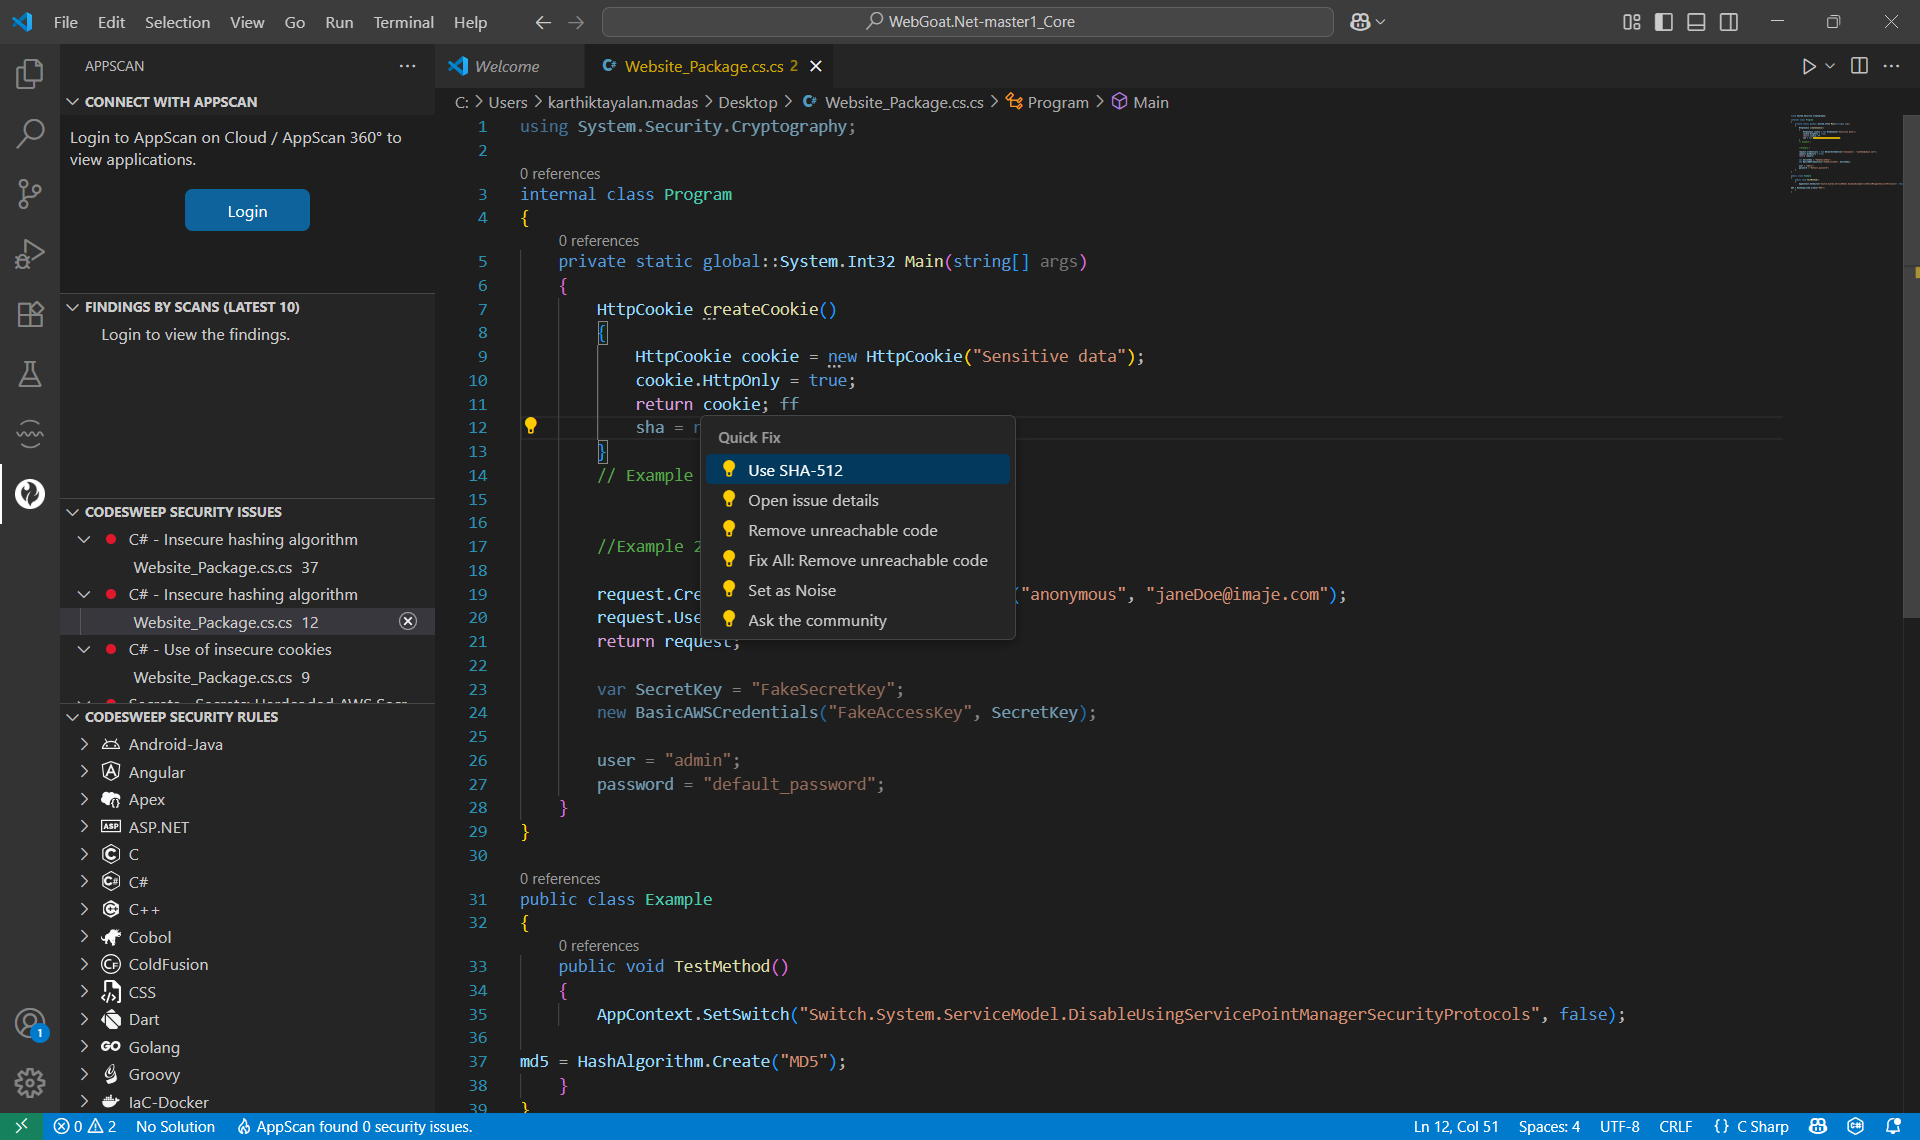
- Open Issue Details : Opens rule info in a split editor.
- Set as noise : Marks issue as noise.
- Ask the community : A dialogue box asks permission to open our community support channel link.
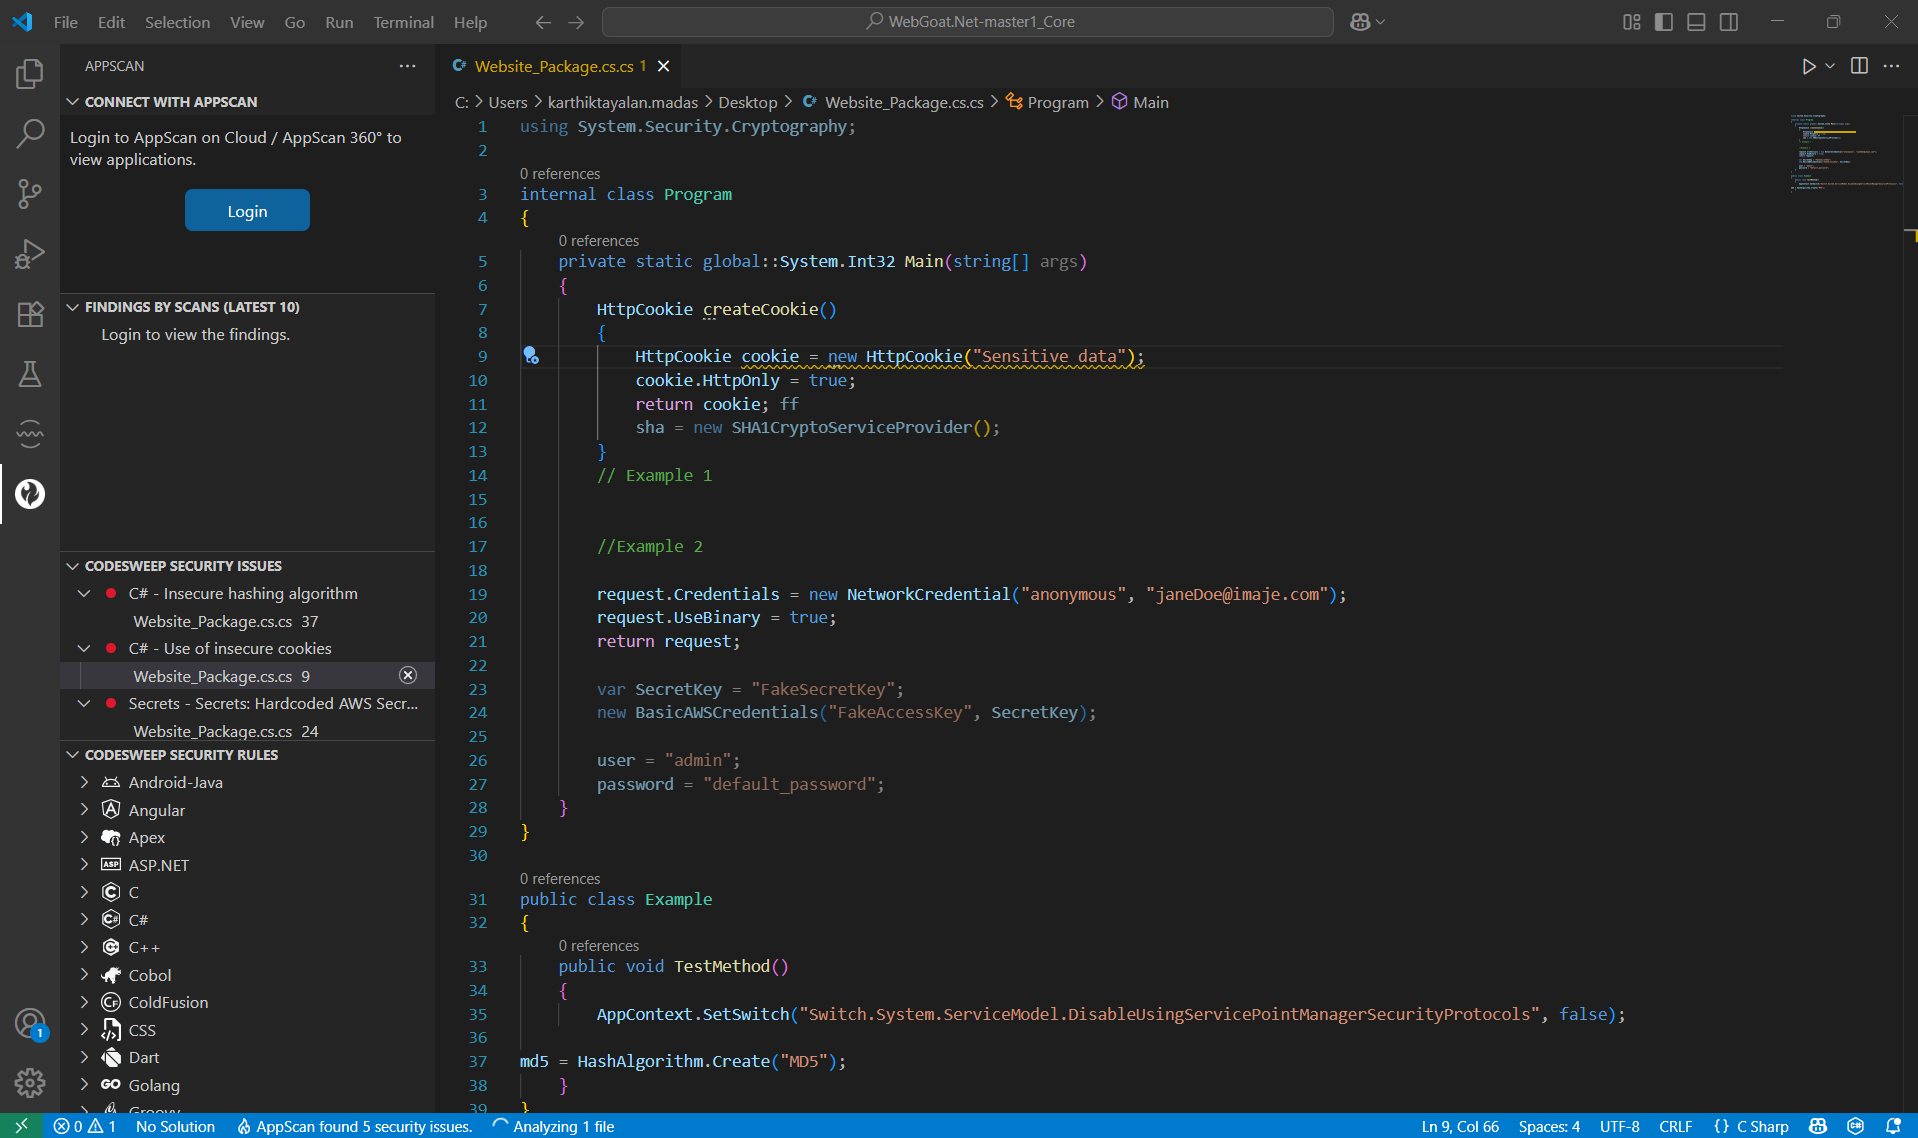
Security issues are categorized based on rules, and rules are ordered based on their severity. All issues belonging to a rule share the same severity.
From the Security Issues view, you can perform the following actions on listed issues and associated rules:
Issues Operation
Mark Issue as Noise
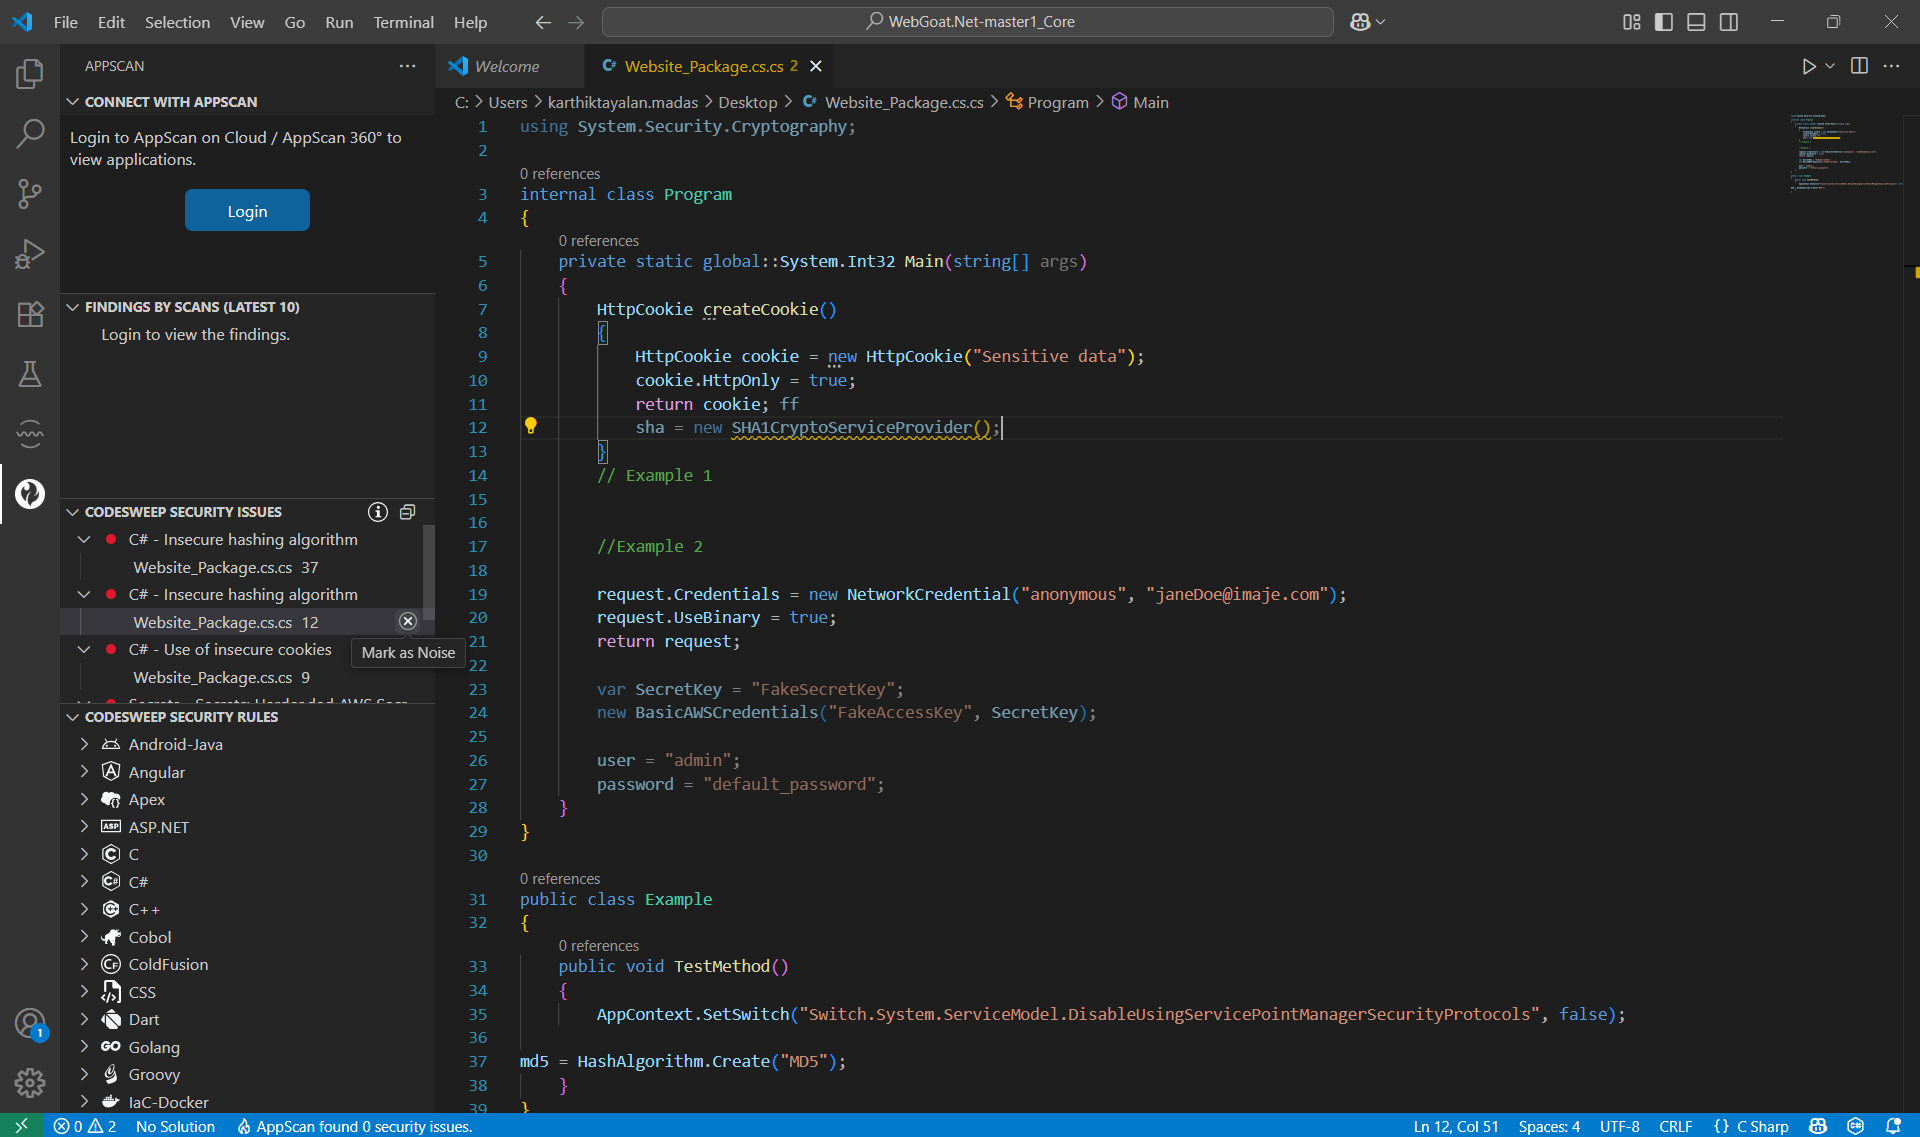
Marking an issue as “noise” indicates it should be ignored now and in the future; it will not be reported in future scans of the file. Once an issue is marked as noise, it is labeled as such. Issues marked as noise are displayed in Security Issues view until the next save of the corresponding file or an editor restart, whichever happens first.
To mark an issue as noise, hover over the file and click on x icon
Important: Once you save a file or restart VS Code after marking an issue as noise, there is no way to restore the issue to the issue list.
Unmark Issue as Noise
Unmarking an issue as noise ensures that the issue considered in future scans. You can clear the noise status only for issues marked as noise in the current session provided the file has not been saved since being labeled as noise. To unmark an issue as noise, hover over the files labeled “Noise” and click on plus icon to clear the status.
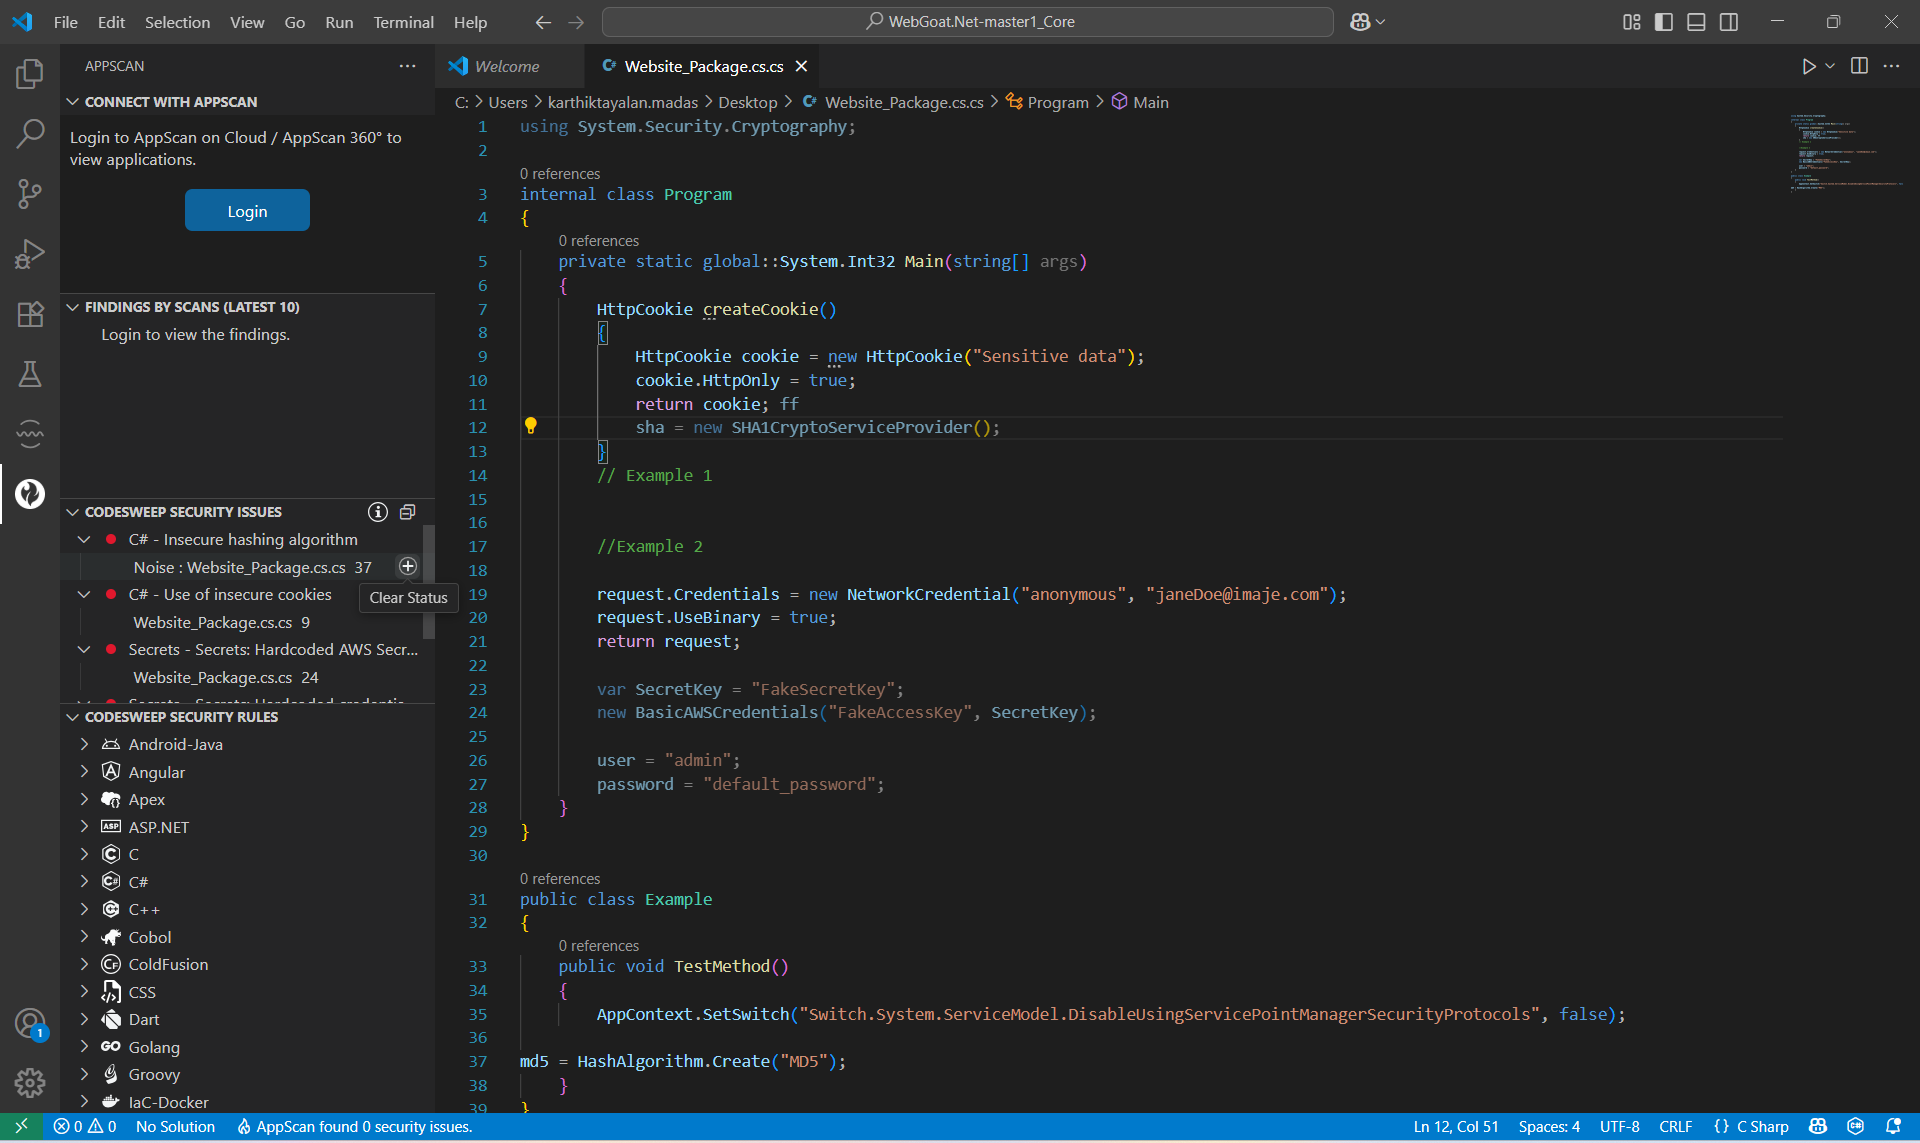
Rules Operation
Disable Rule
Disabling a rule means it will not be considered for future scans. Once disabled, the rule name is annotated with “Rule Disabled” label and the severity icon changes to note the disabled status. Once a rule is disabled, issues listed for a rule are no longer be displayed.
To disable a rule, hover over the rule name and click on the eye cross icon.
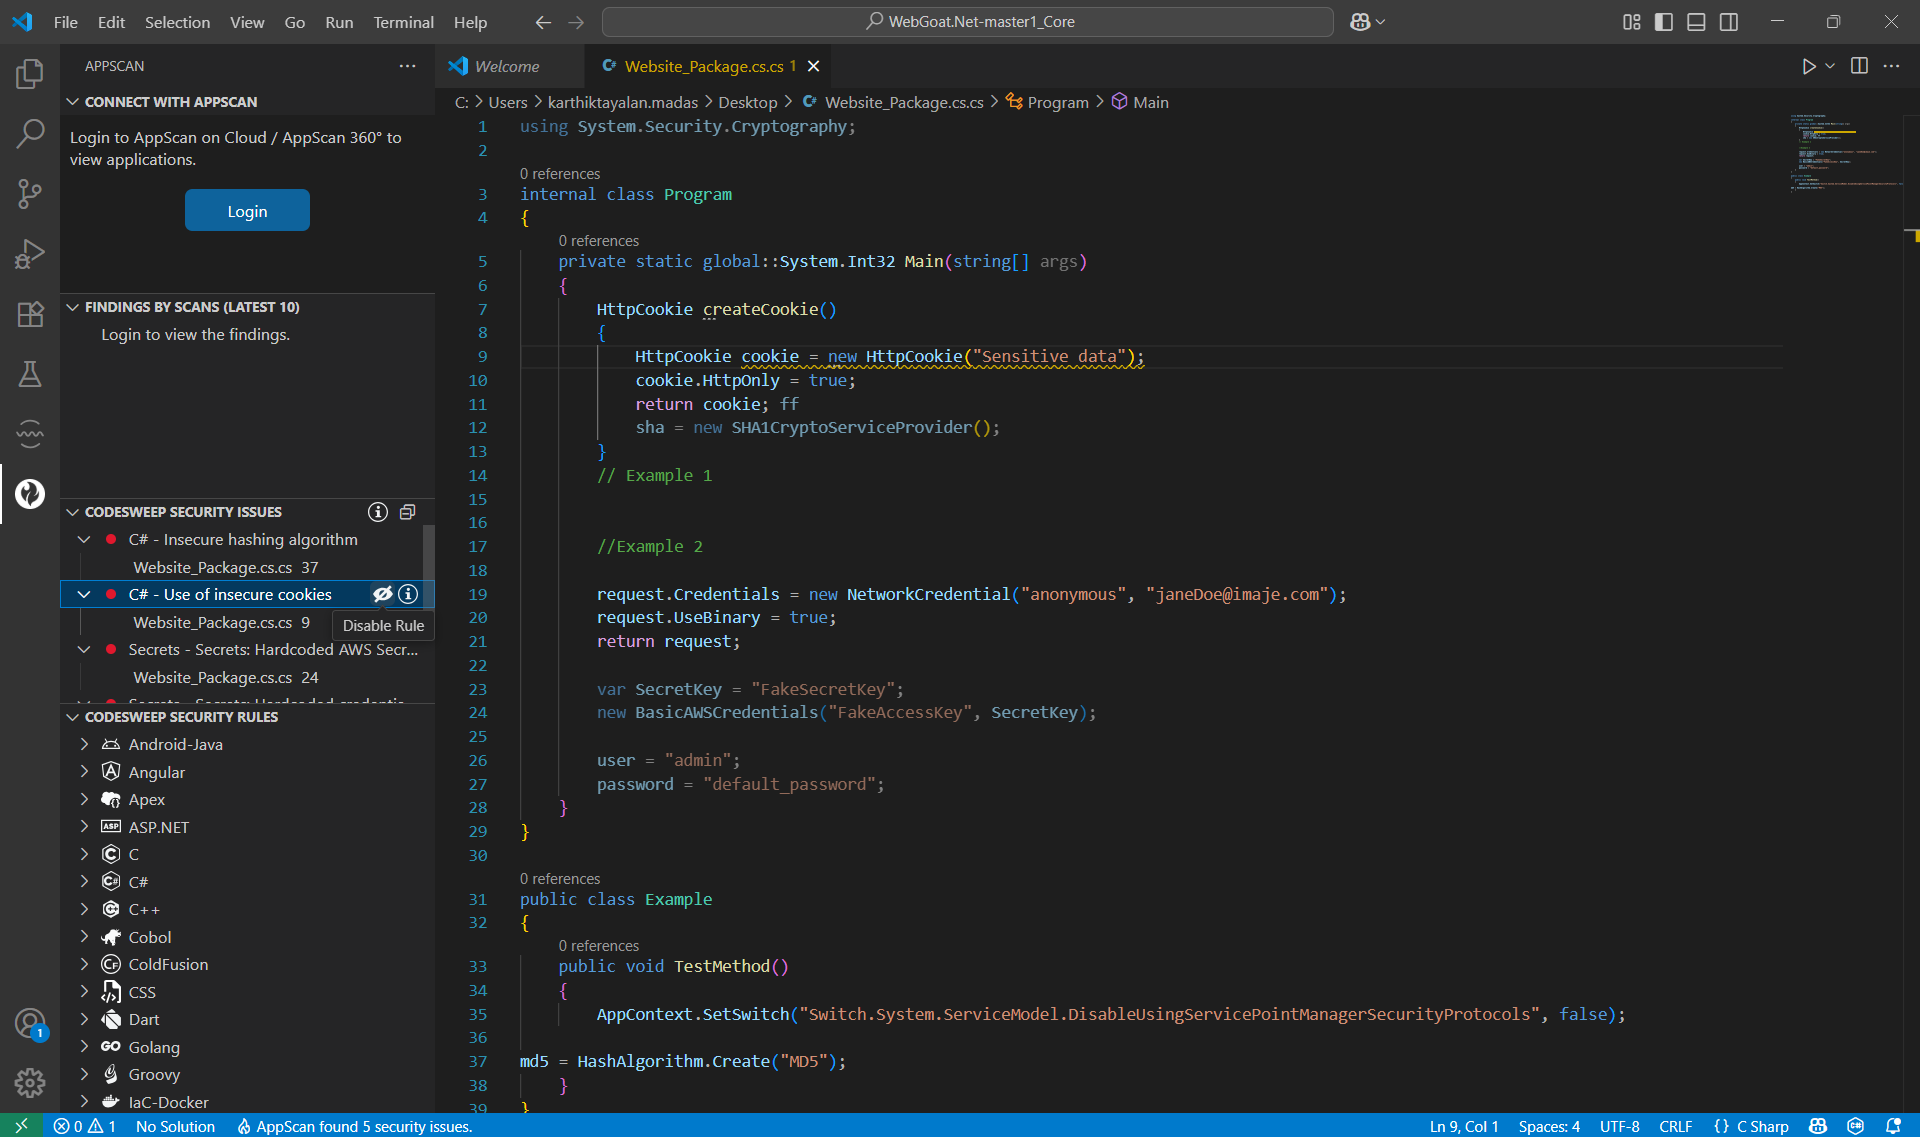
Enable Rule
Enabling a rule mean that it will be considered for future scans. Enabling a rule will not display any issues belonging to that rule reported earlier in the same session; they are listed after you save a file which has issues corresponding to that rule.
To enable a rule, hover over a disabled rule name and click on the eye icon.
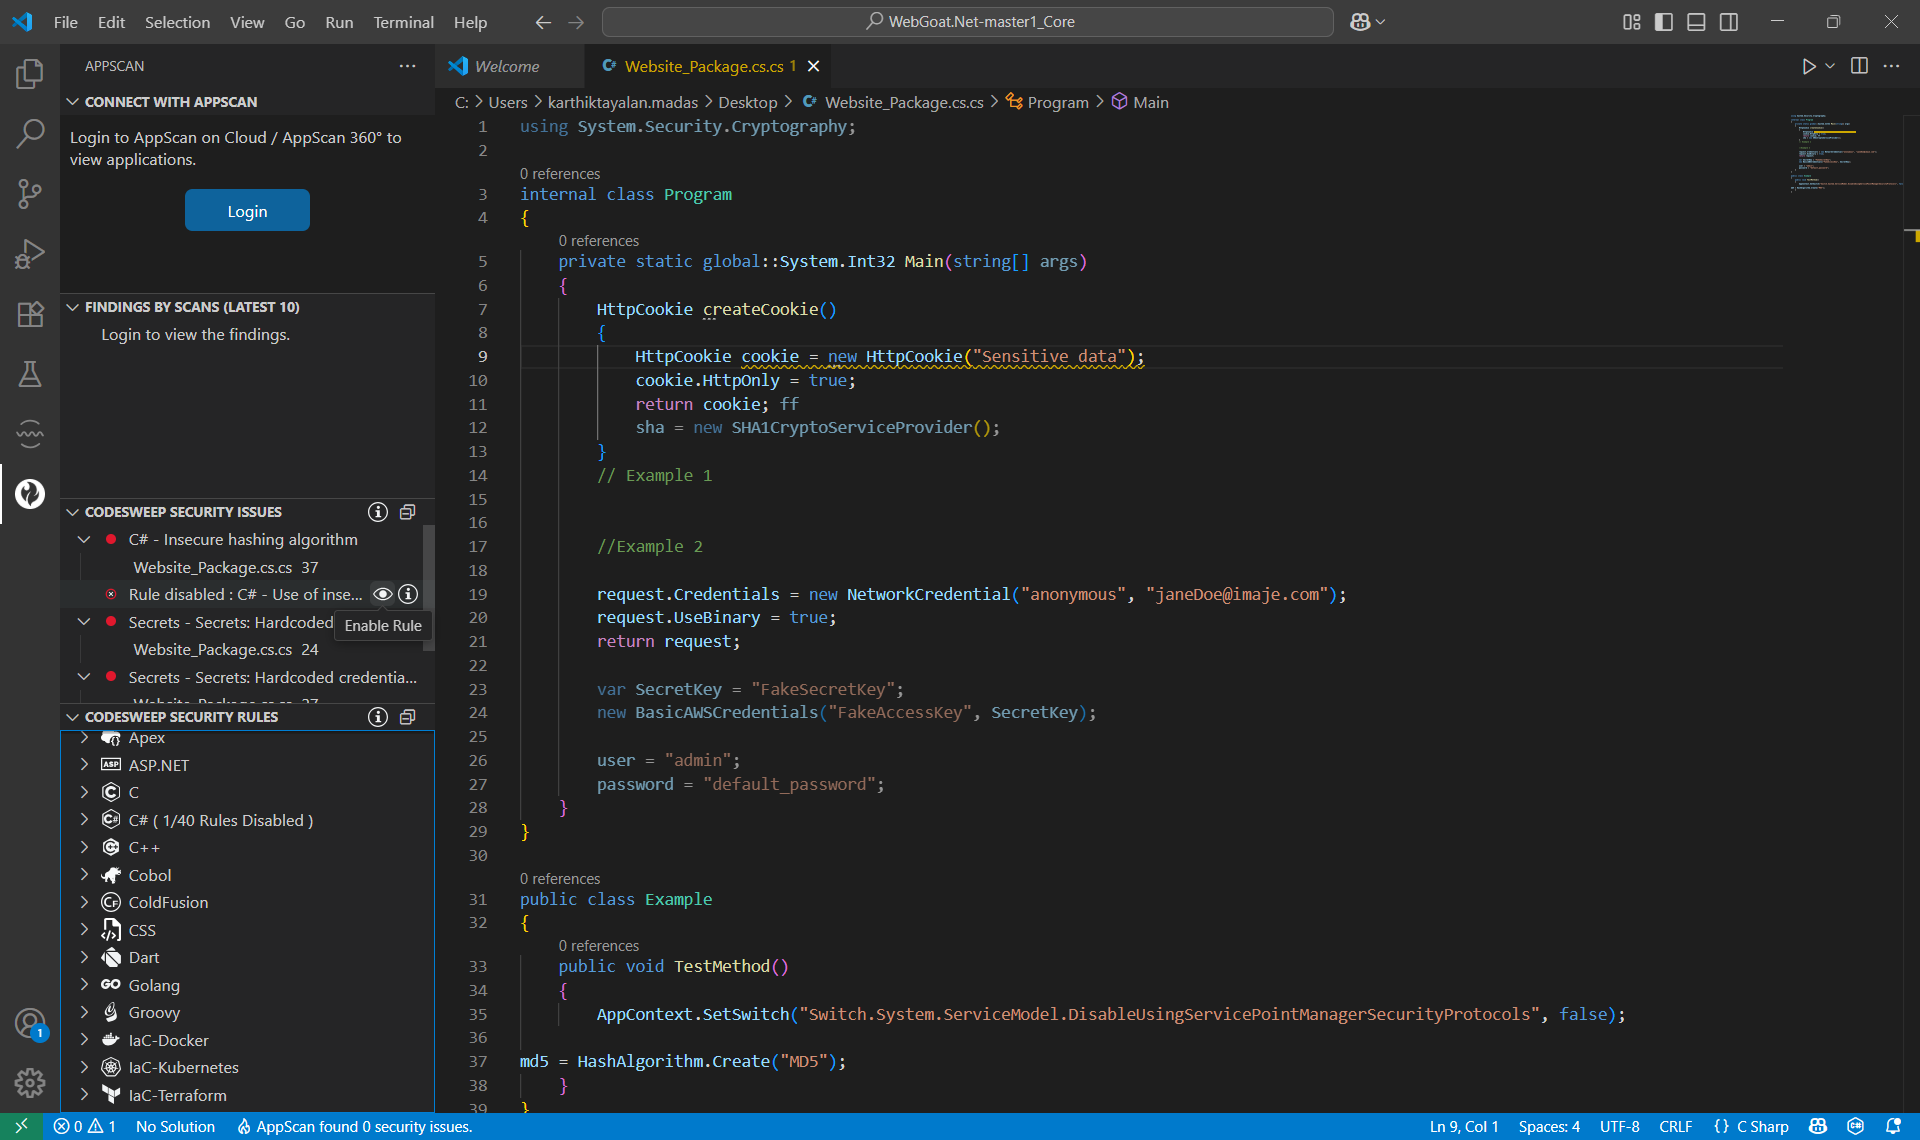
Rule Info
To view the advisory and remediation information for a rule, hover over the rule name and click on info icon. This opens an AppScan Rule Info pane in the VS Code editor with relevant information. Rule info is presented for both enabled and disabled rules.
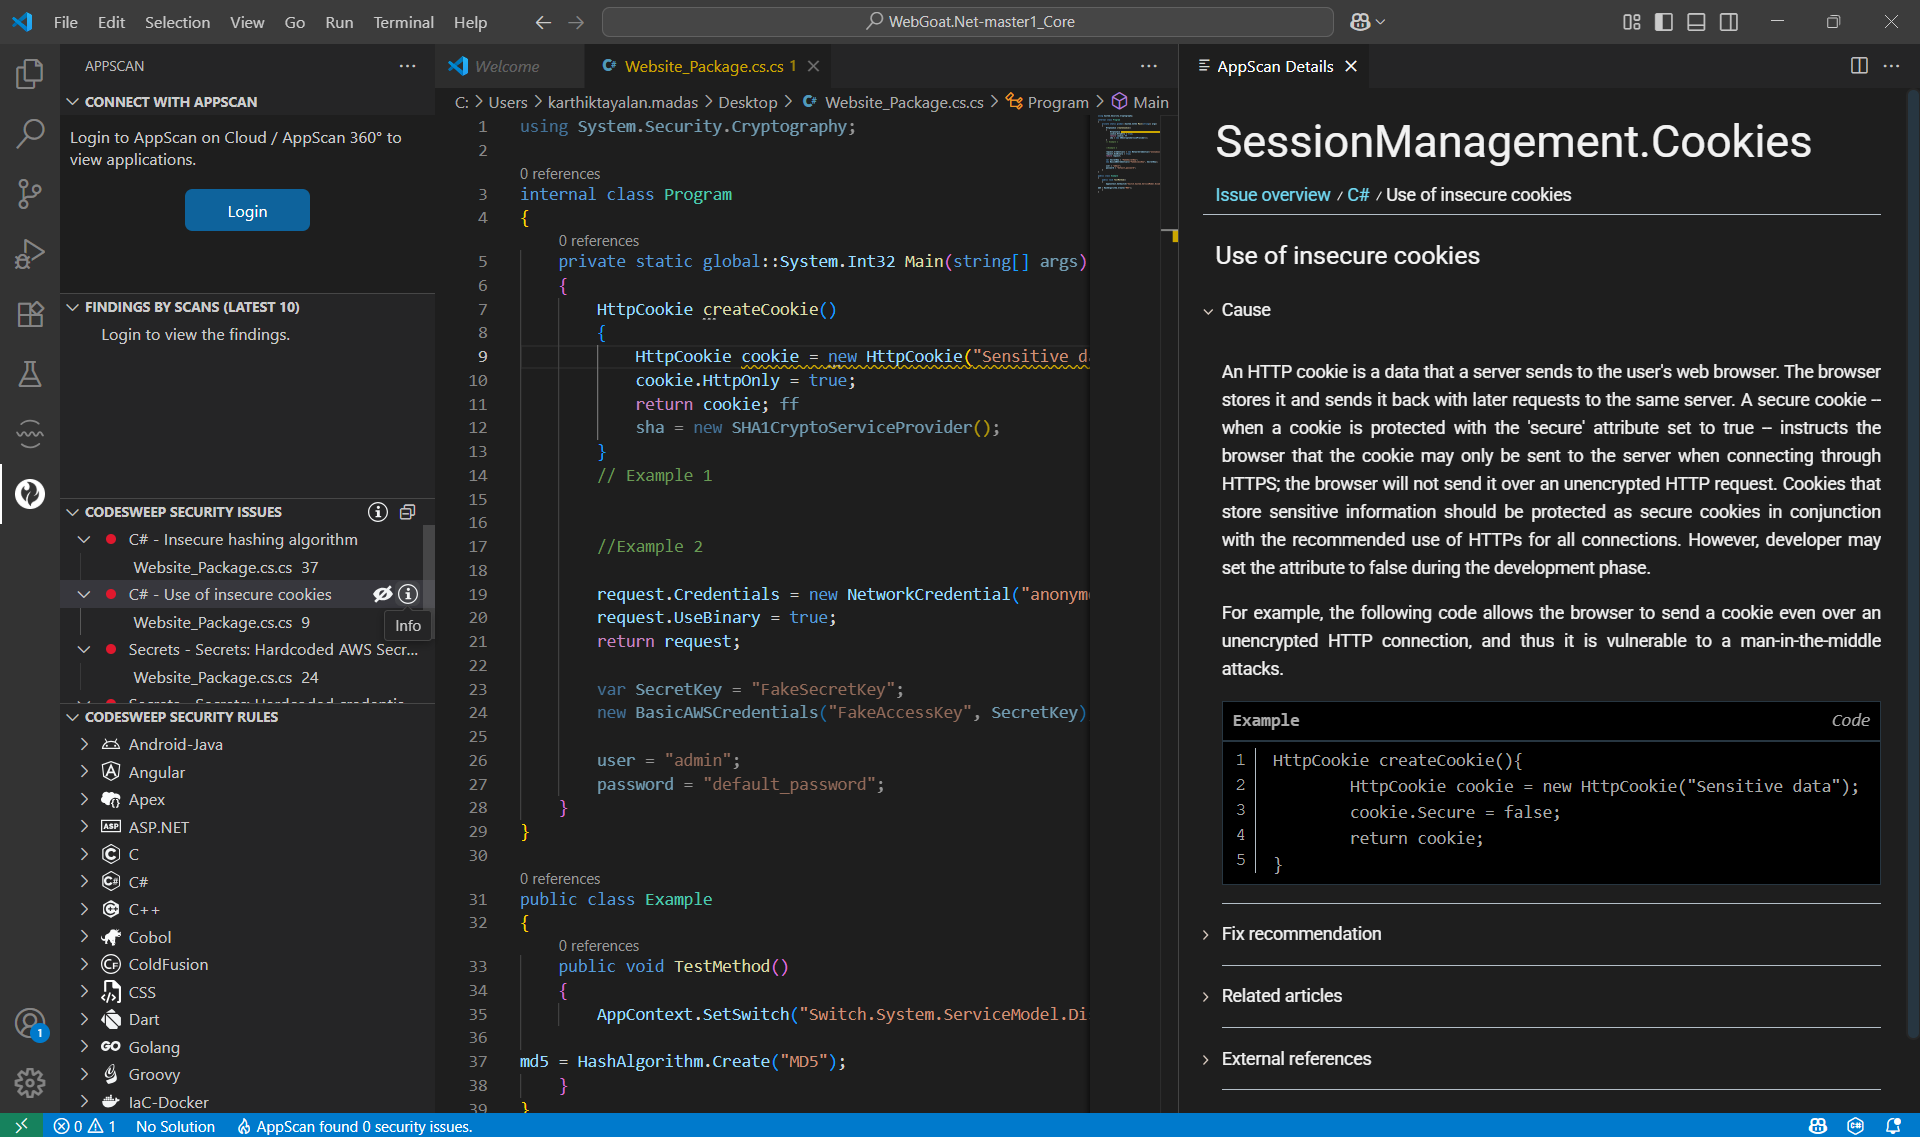
To view Security Issues usage info within the editor hover over Security Issues title bar and click on the info icon.
CodeSweep Security Rules View
The Security Rules view displays applicable rules grouped by supported programming languages. Within every group, the rules are ordered based on severity.
From the Security Rules View you can perform the following actions on listed rules:
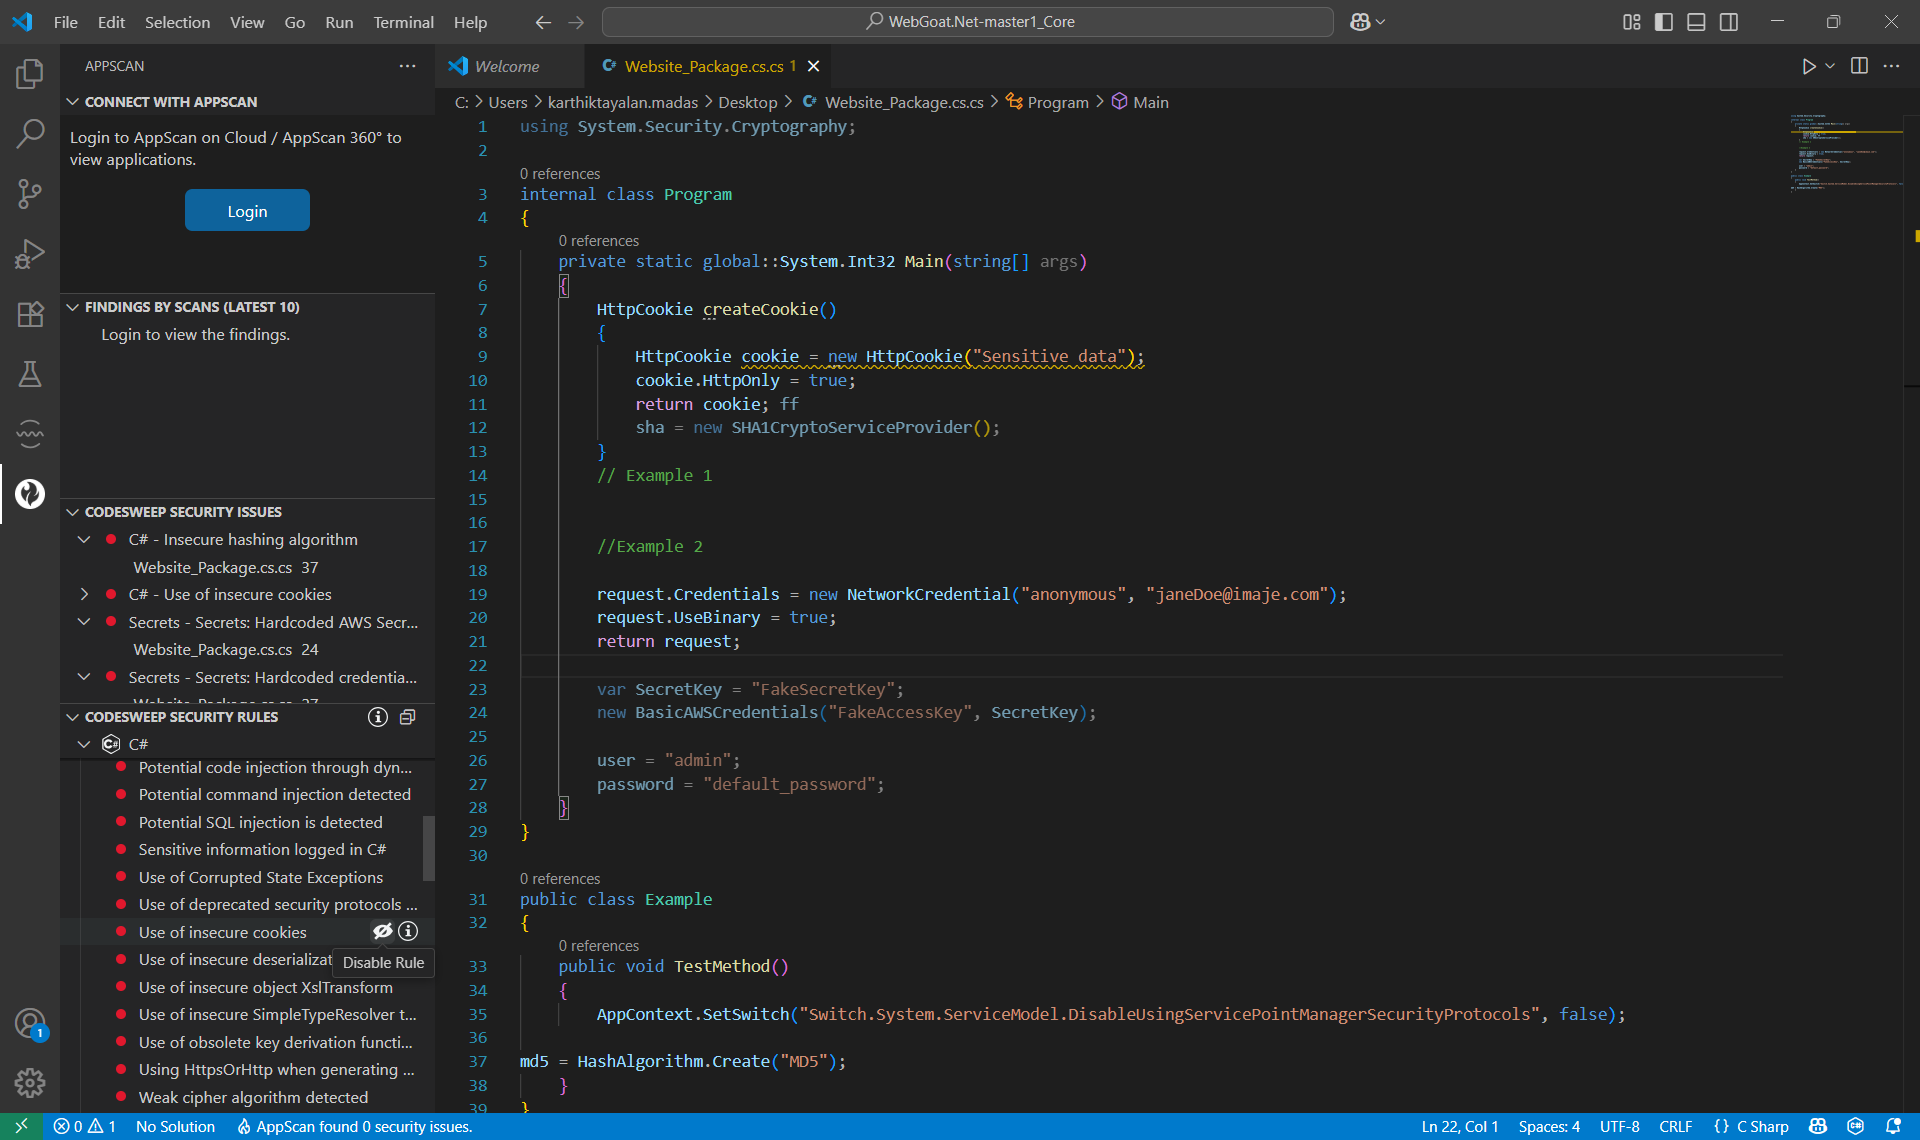
Disable Rule
Disabling a rule means it will not be considered for future scans.
To disable a rule, hover over the rule name and click on the eye cross icon. Once disabled:
- Rule name is annotated with “Rule Disabled” label.
- Severity icon of the rule changes to denote the disabled status.
- Language name label starts displaying the number of rules disabled along with the total count of rules. If a disabled rule is listed in Security Issues view, it will be disabled there as well.
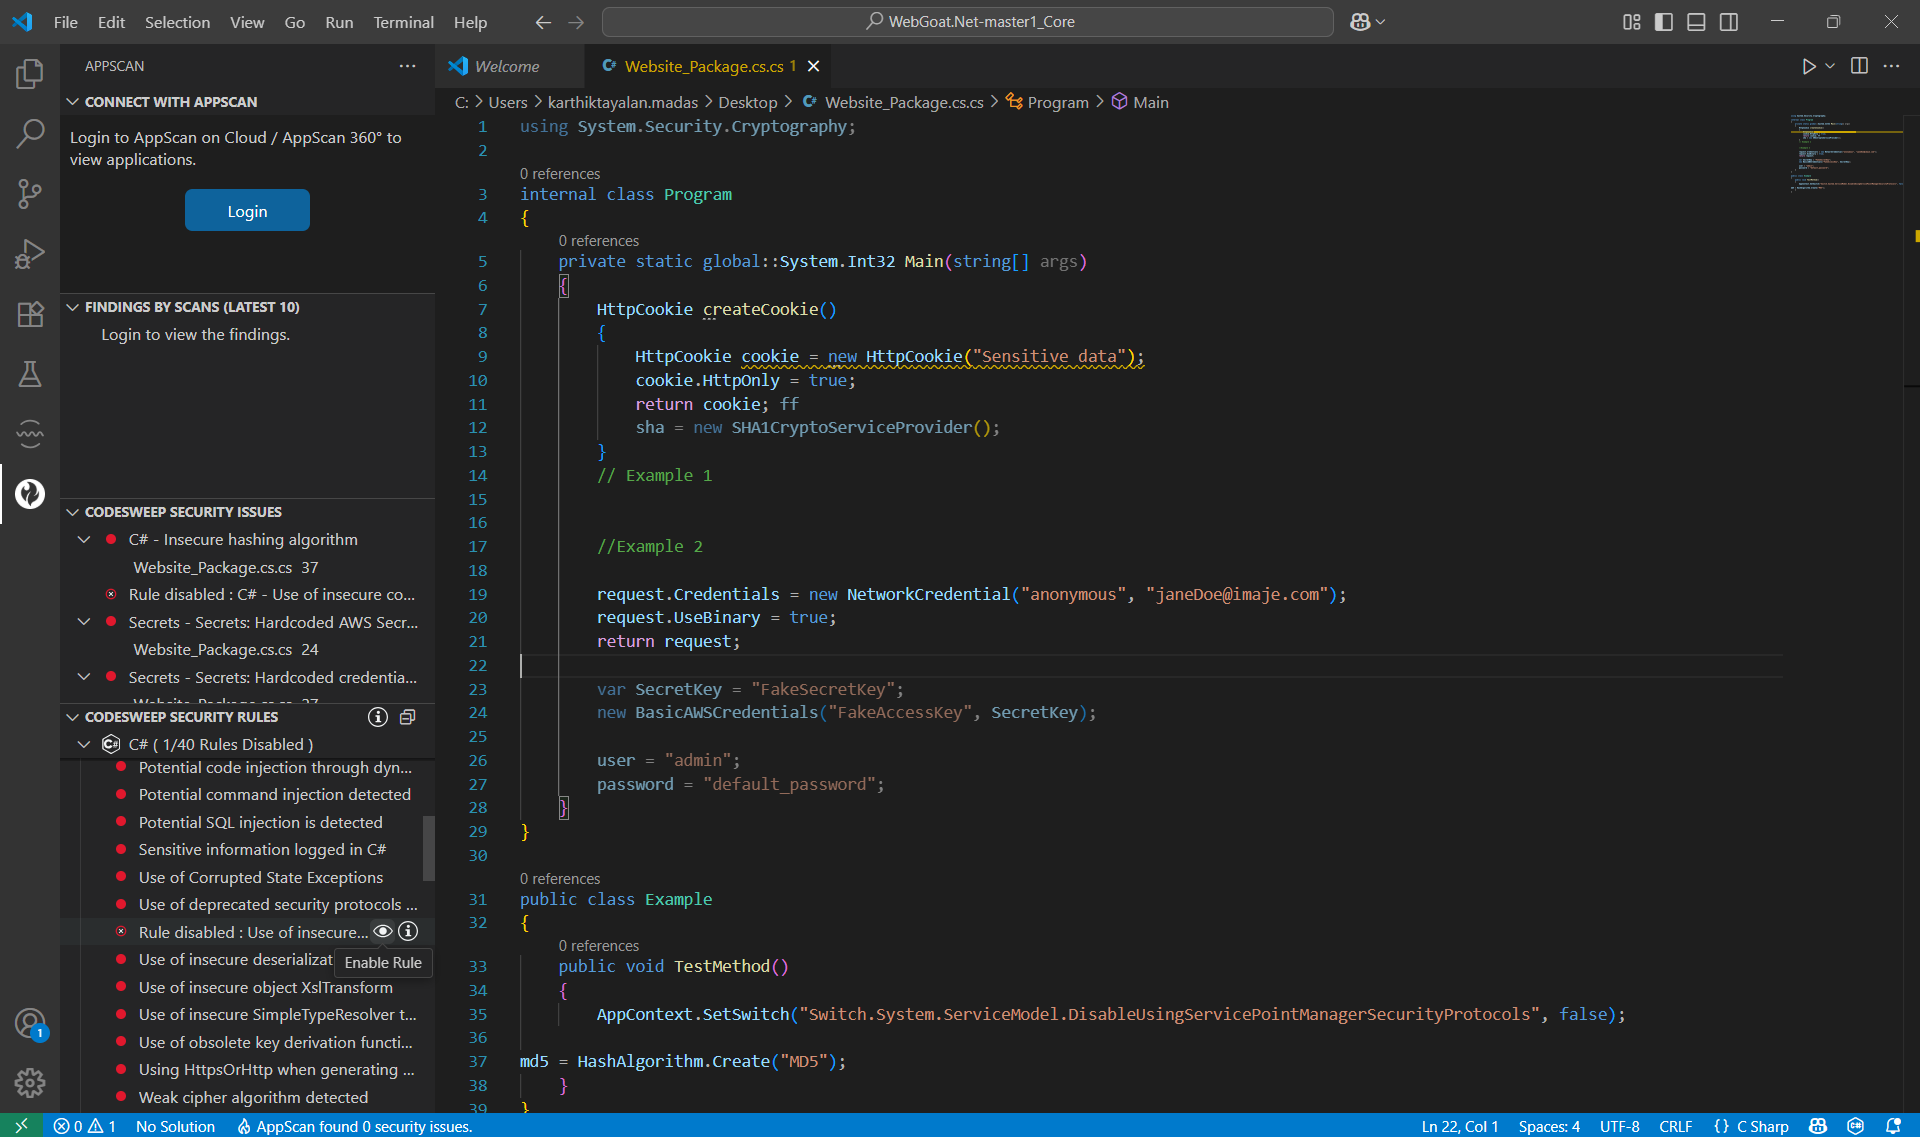
Enable Rule
Enabling a rule means that it will be considered for future scans. If a rule being enabled was earlier displayed in Security Issues View as disabled, it will start showing as enabled there as well.
To enable a rule, hover over a disabled rule name and click on eye icon.
Rule Info
To view the advisory and remediation information of a rule, hover over the rule name and click on info icon. This opens an AppScan Rule Info pane in the VS Code editor with relevant information. Rule info is presented for both enabled and disabled rules.
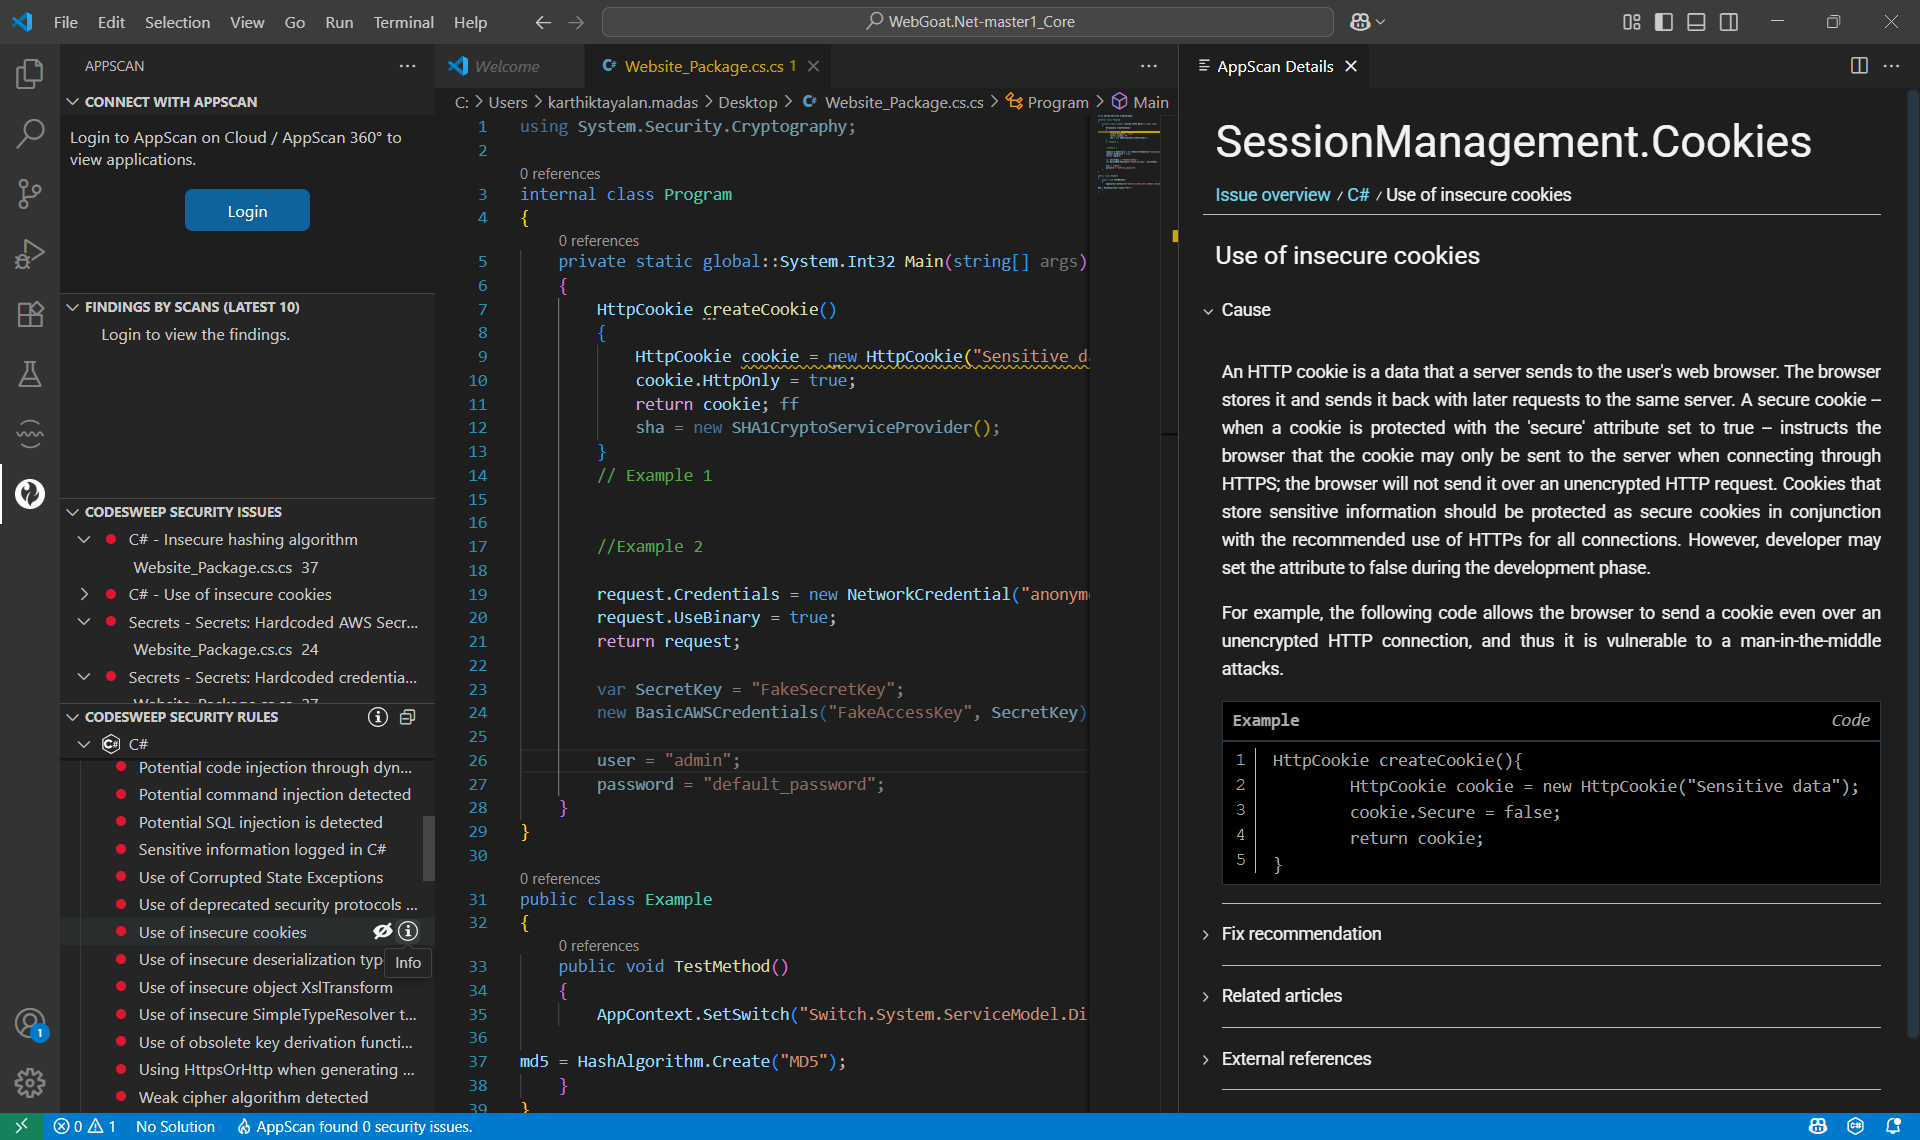
To view Security Rules usage info within the editor hover over Security Rules title bar and click on the info icon.
Connect with AppScan
Connect with AppScan view allows users to login to HCL AppScan on Cloud or HCL AppScan 360° and loads applications to select from.
Connect with AppScan
Select an Application
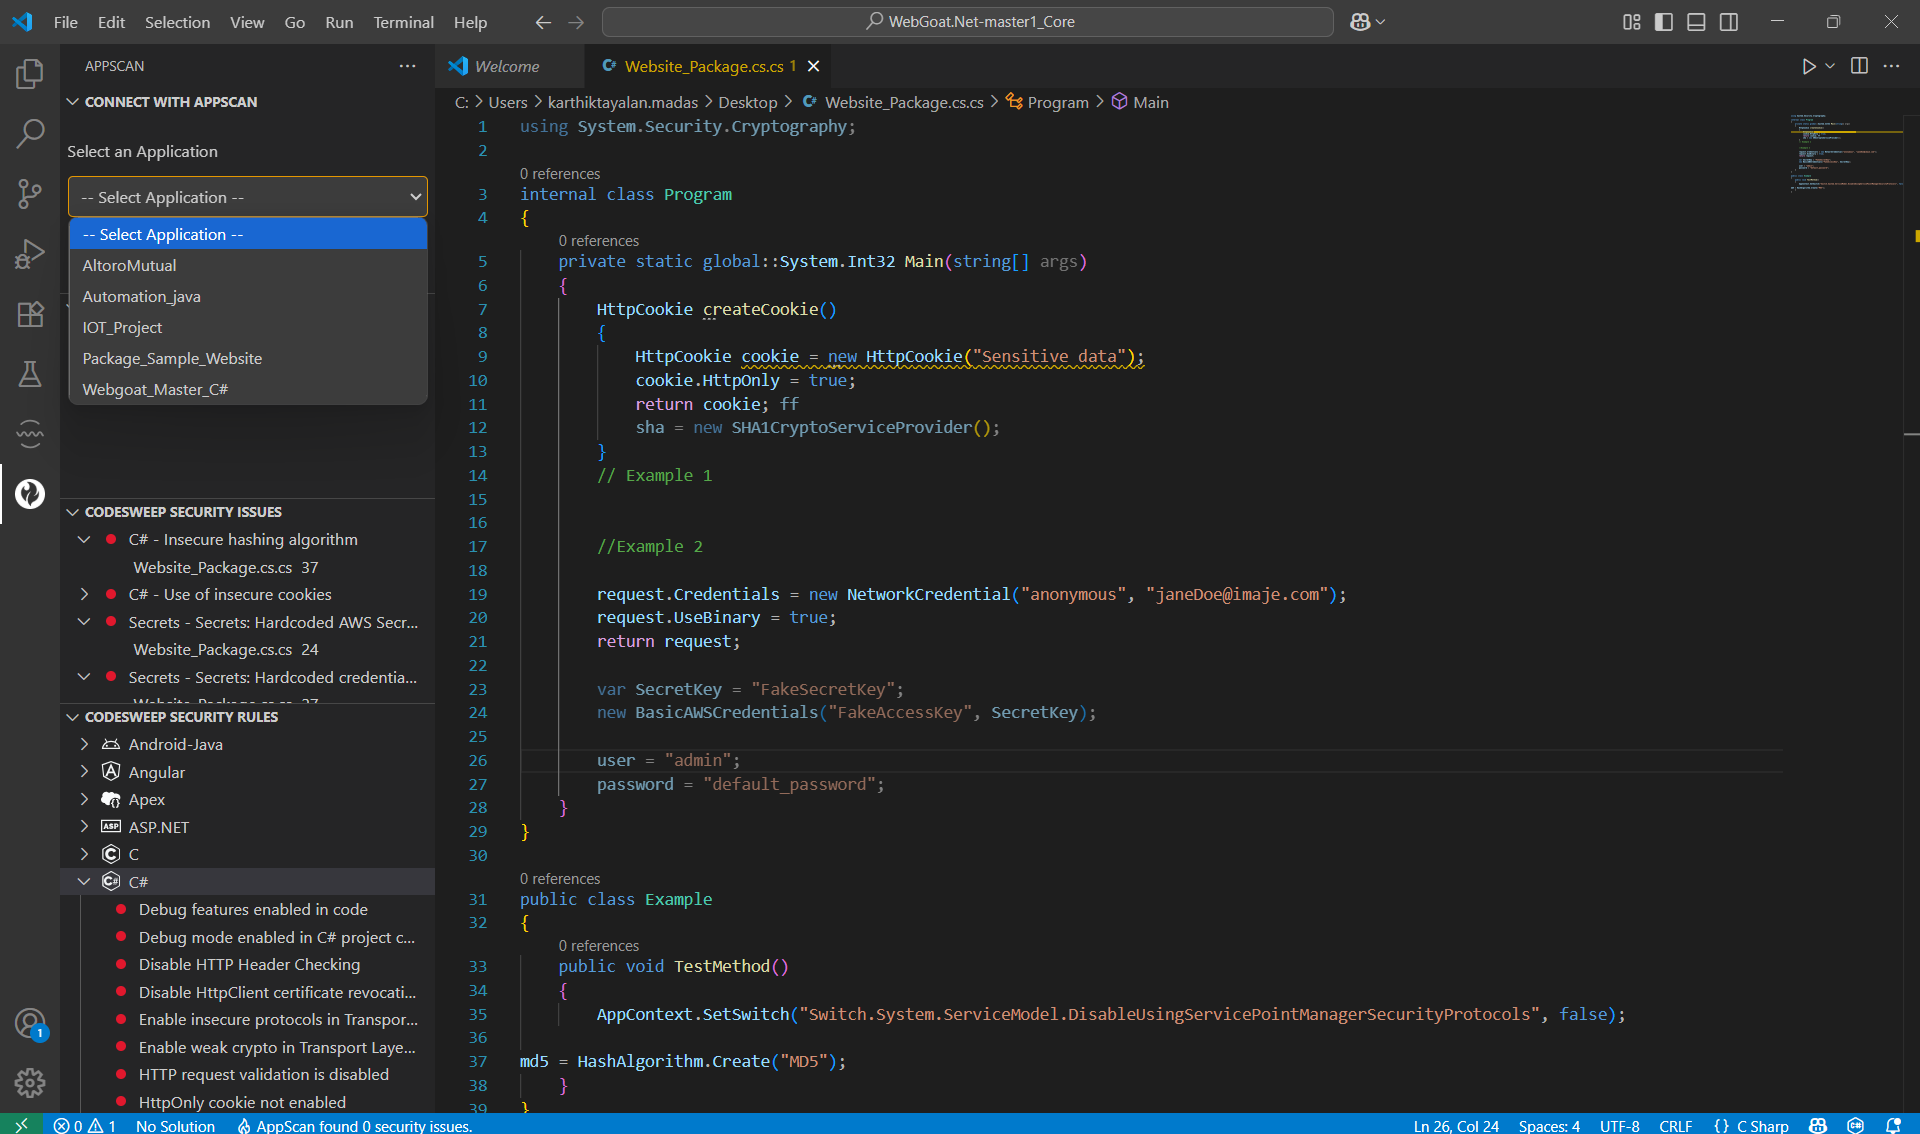
Findings by Scans
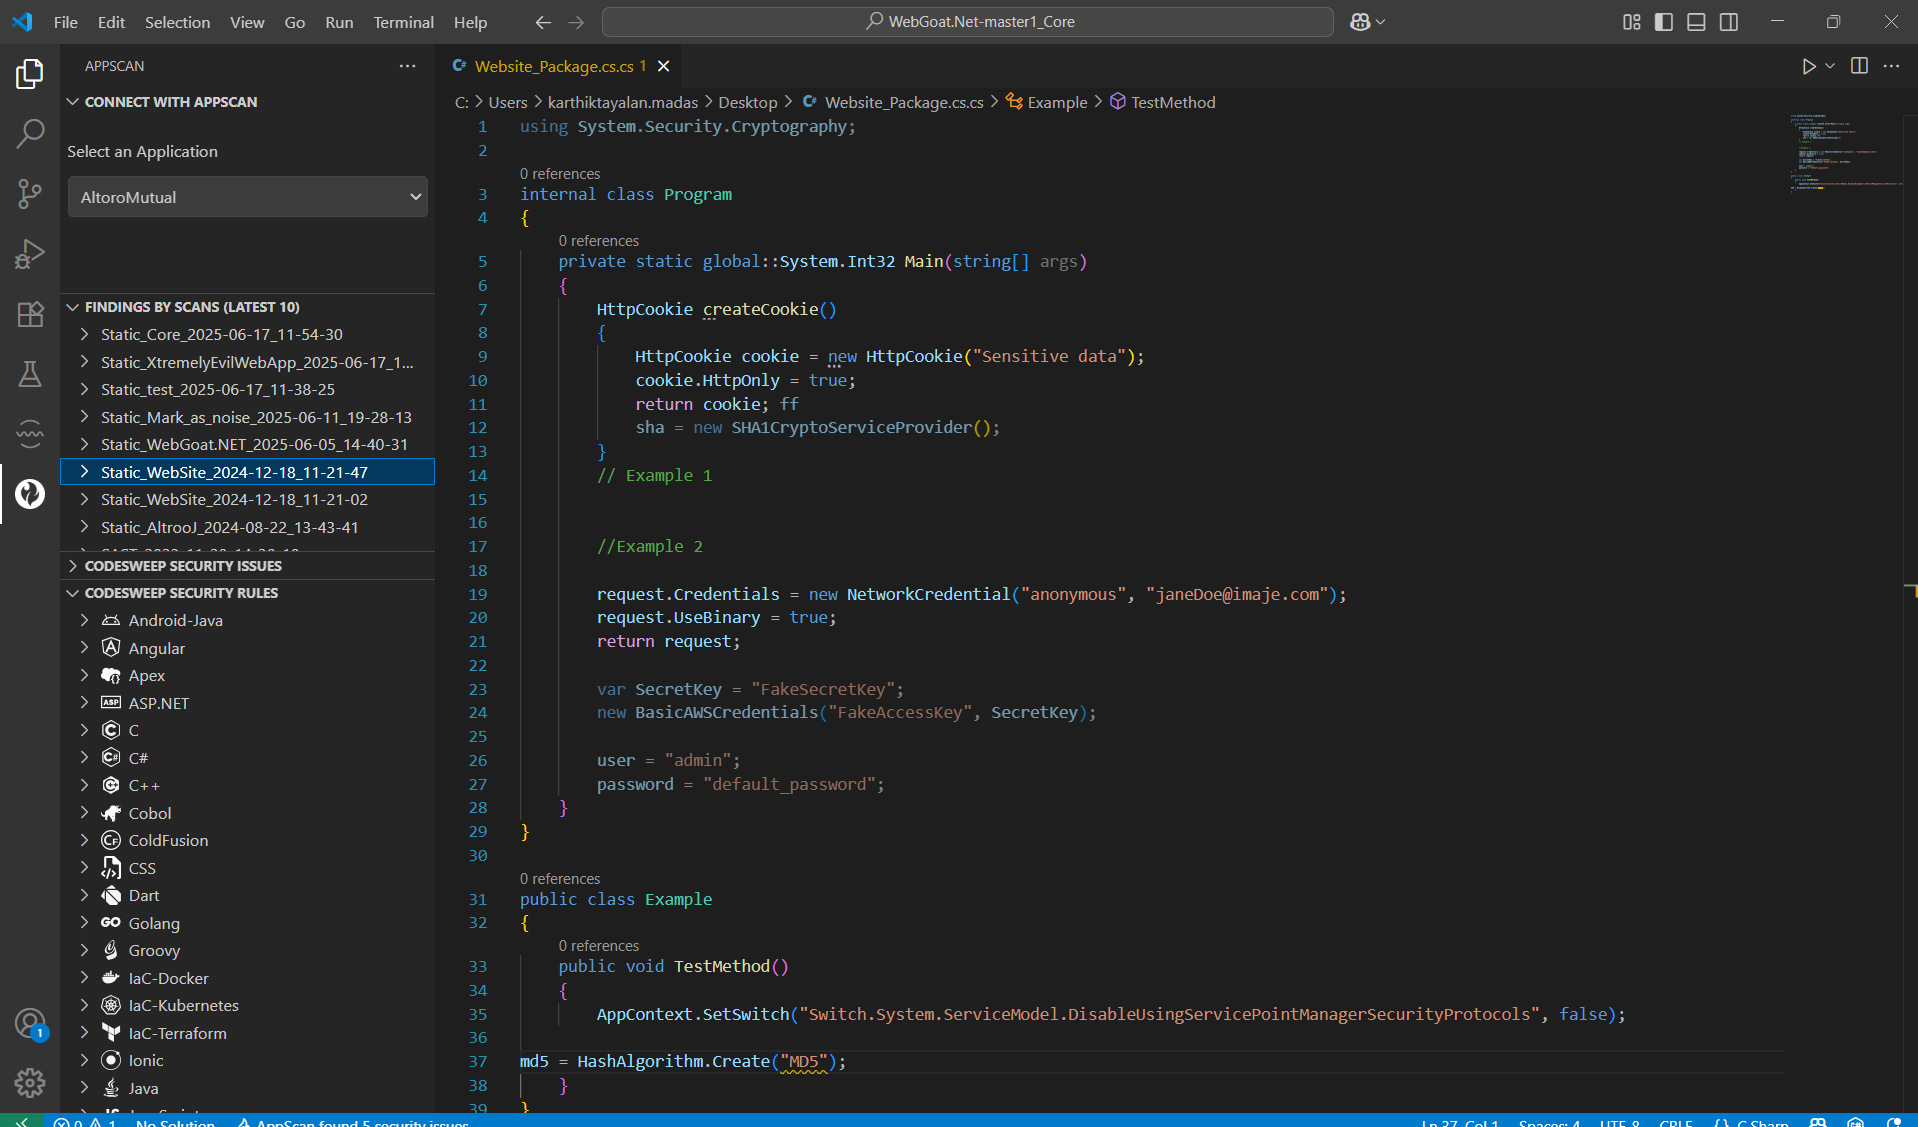
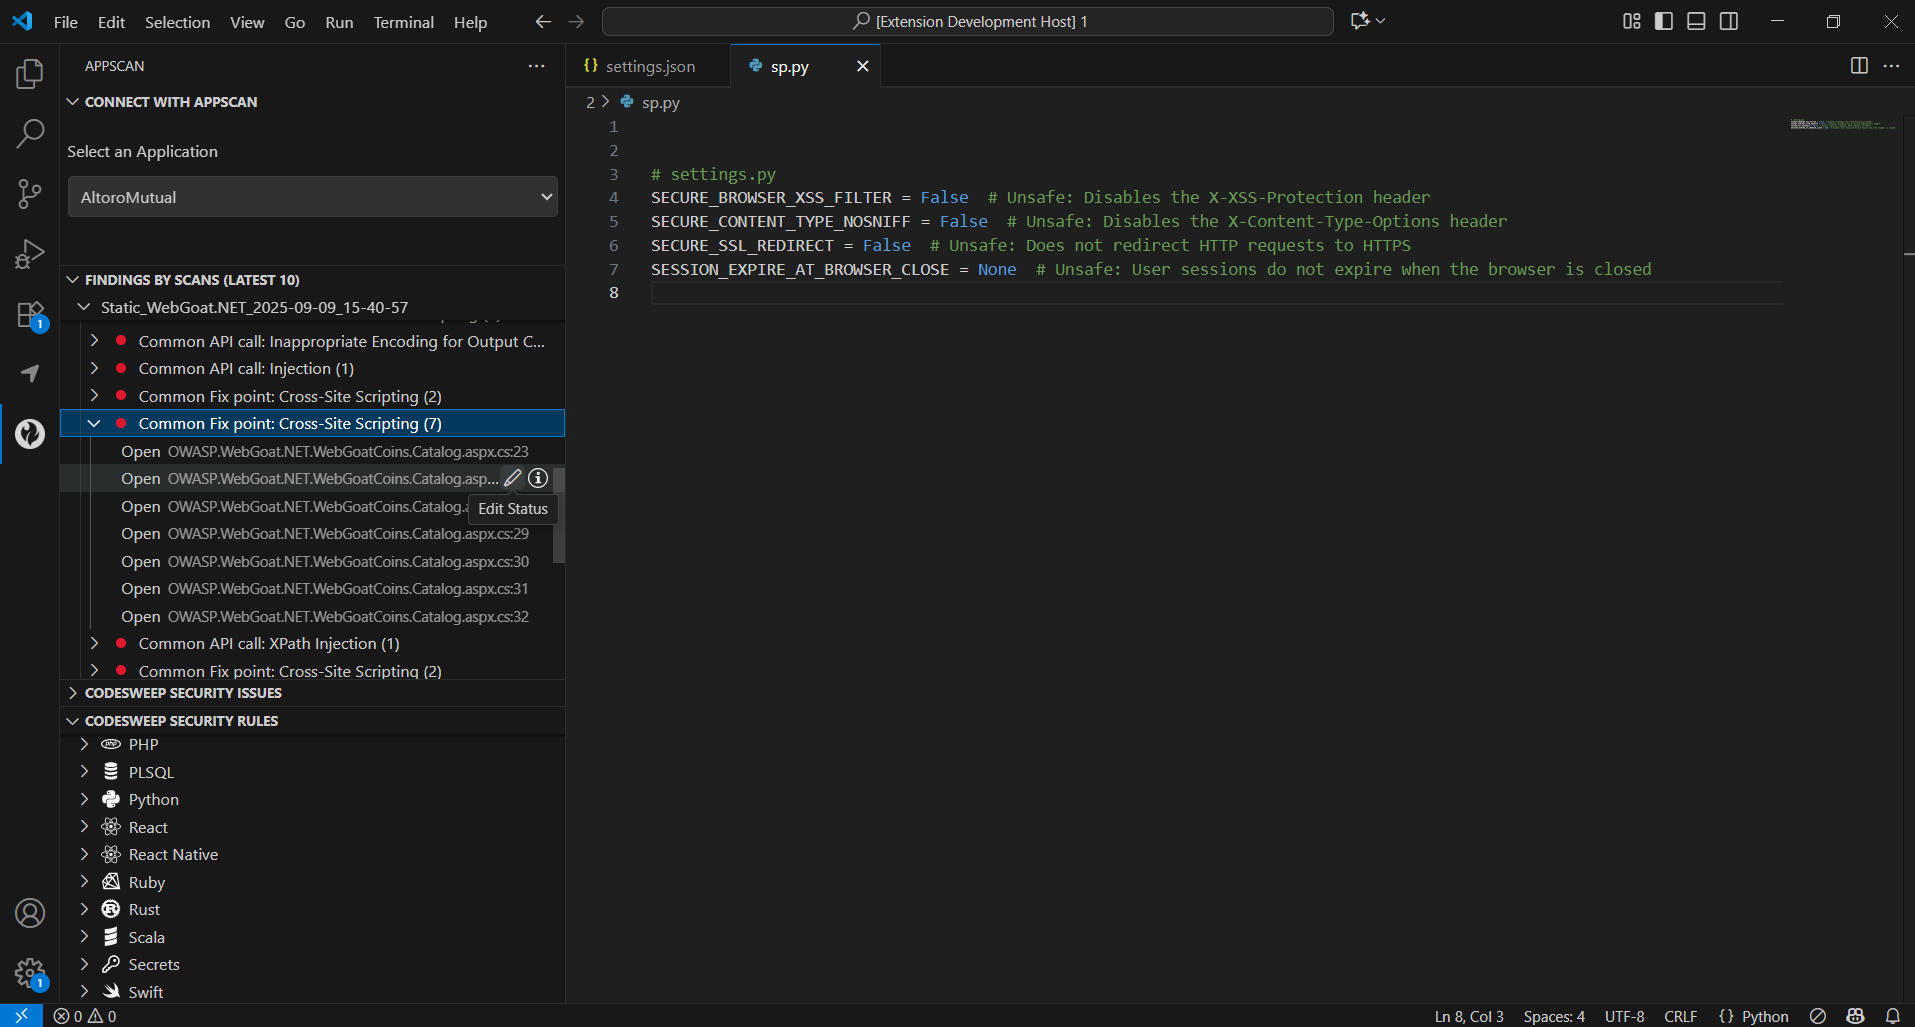
Findings by Scans view displays latest 10 scans for the selected application. While viewing findings by scans, the following links are available:
Scan Name : It displays the scan name. On click, it expands to display the associated fix groups.
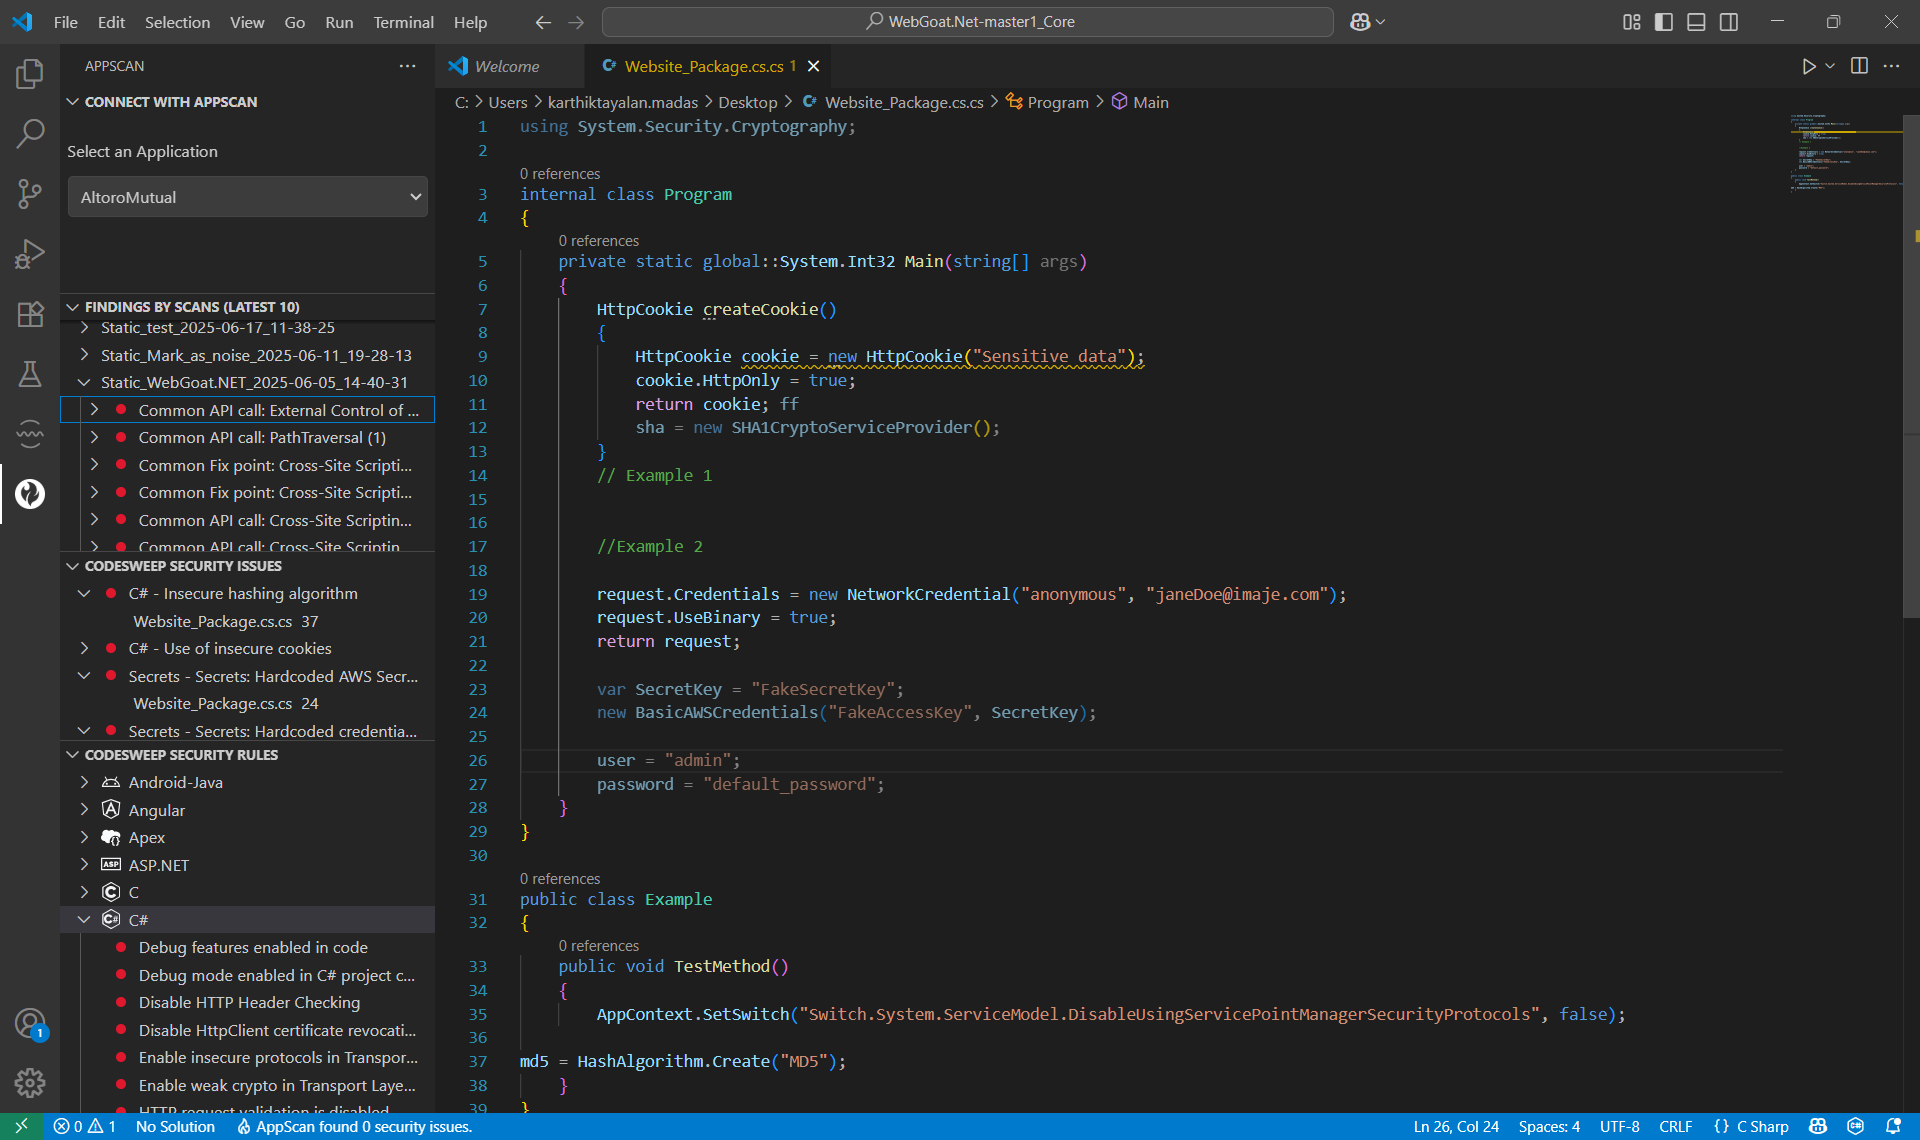
Fix Group : It displays fix group name along with total issue count. On click, it expands to display all issues under that fix group.
Issues : It displays issue type along with source file and location information. On click of issue, it navigates to that open file location, else prompt user to select the file.
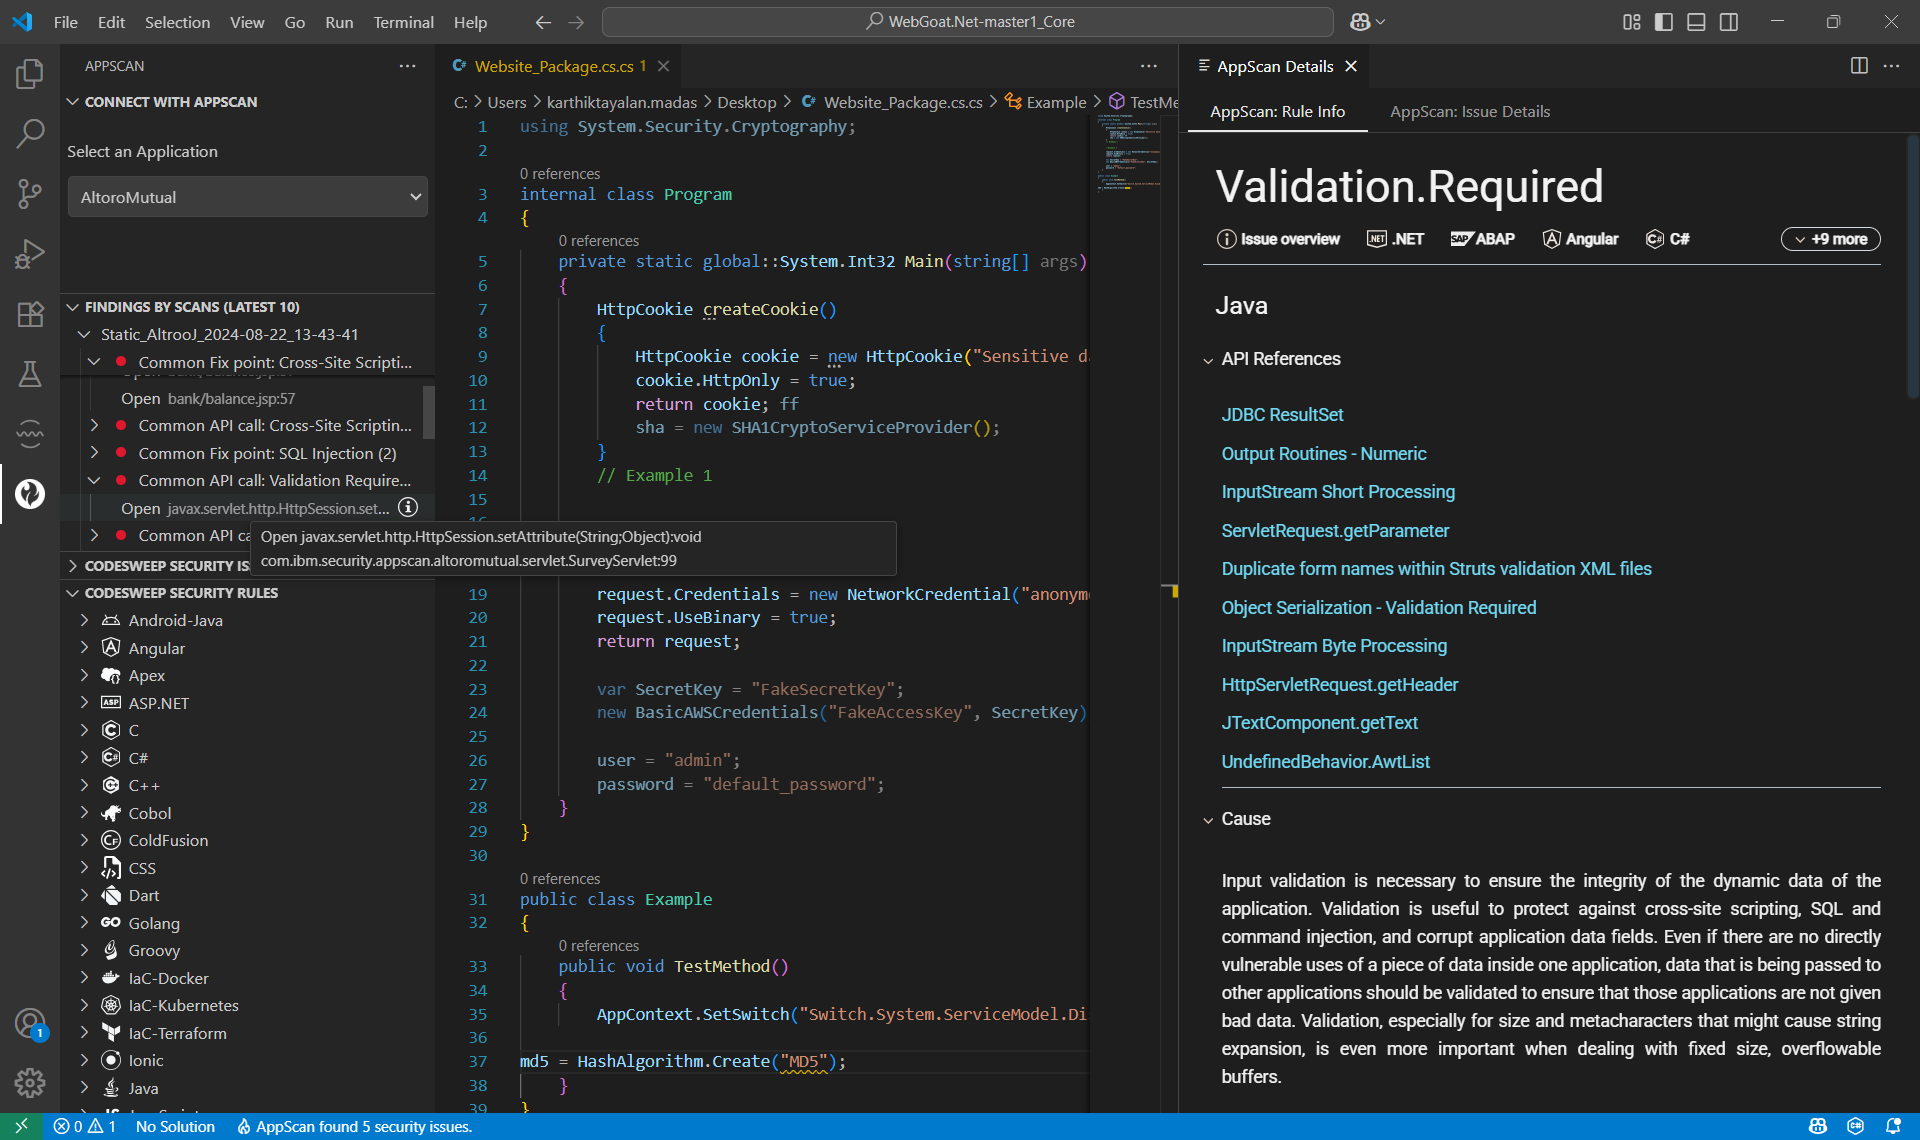
- Info icon will display AppScan Details with Rule Info and Issue Details.
- Edit Status icon is used to update the issue’s status and optionally add a comment. Status changes and comments are immediately reflected in AppScan on Cloud/AppScan 360°.
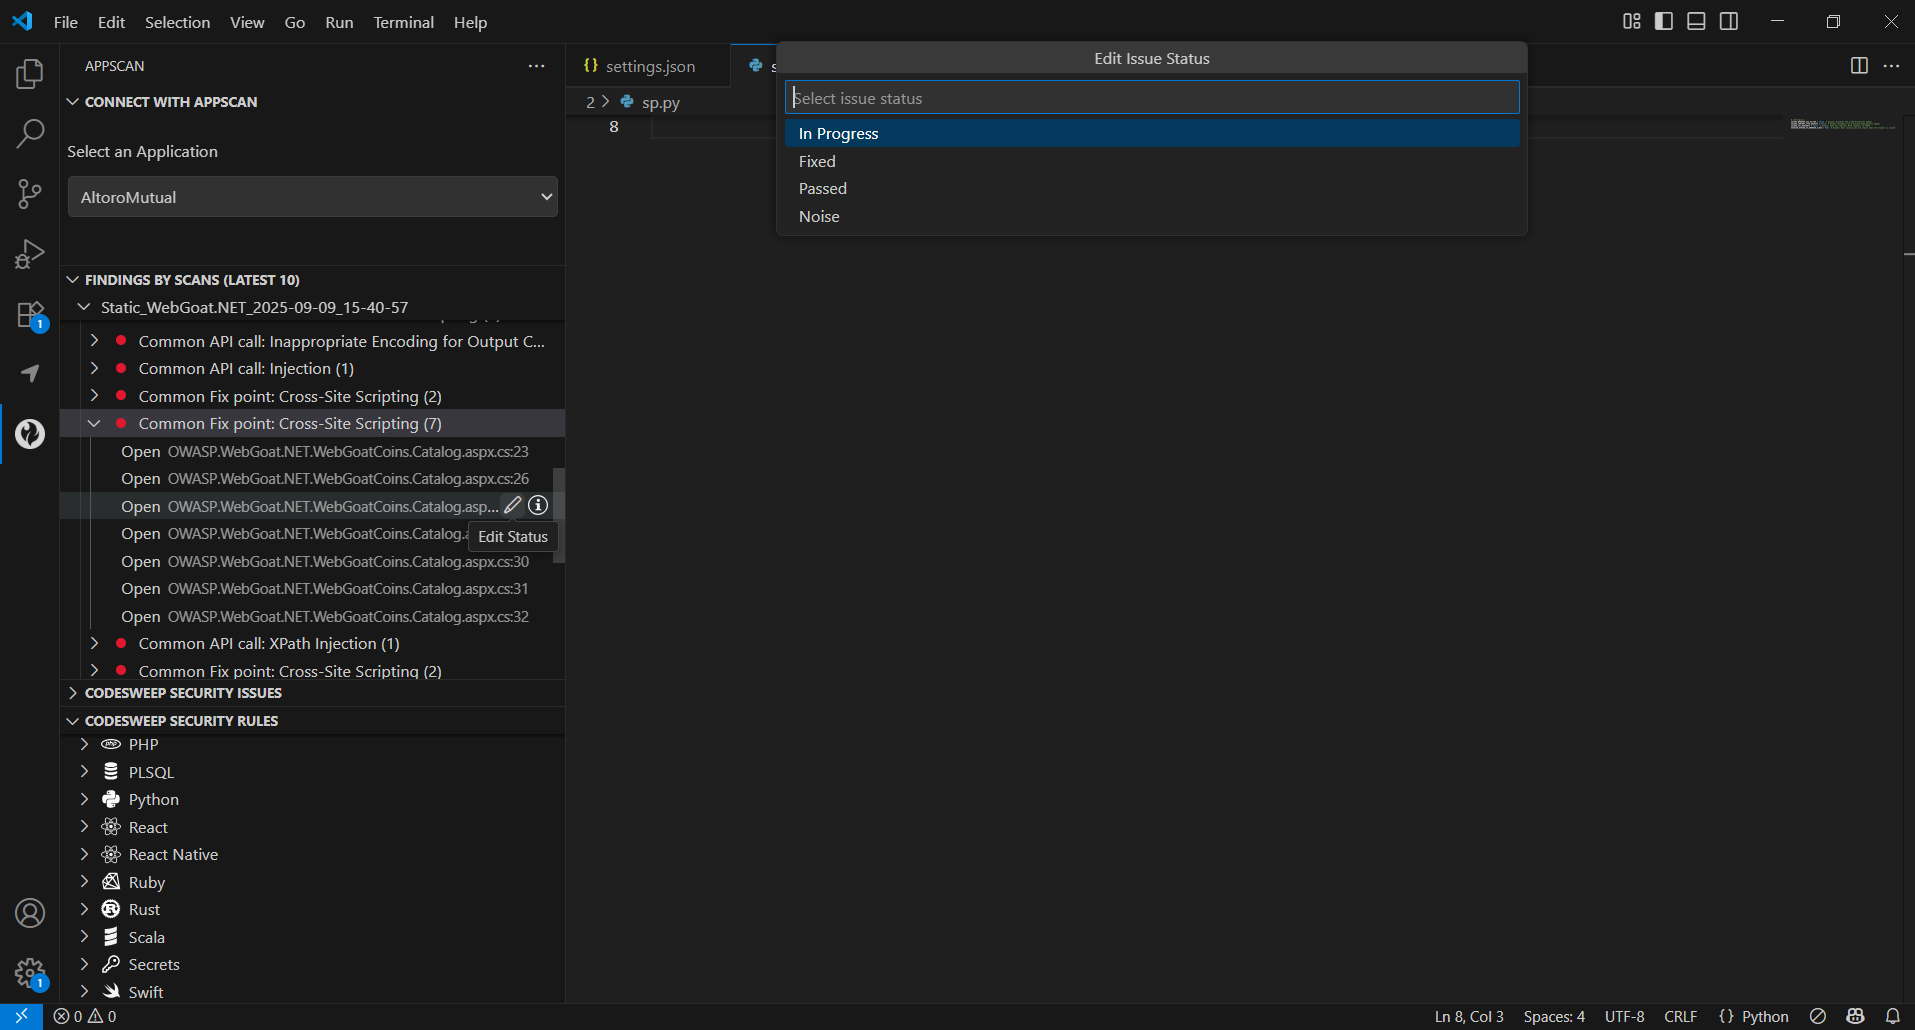
While editing issue status, the following options are available:
Status: Select the status to be updated. The available options are: Open, In Progress, Noise, Passed, and Fixed.
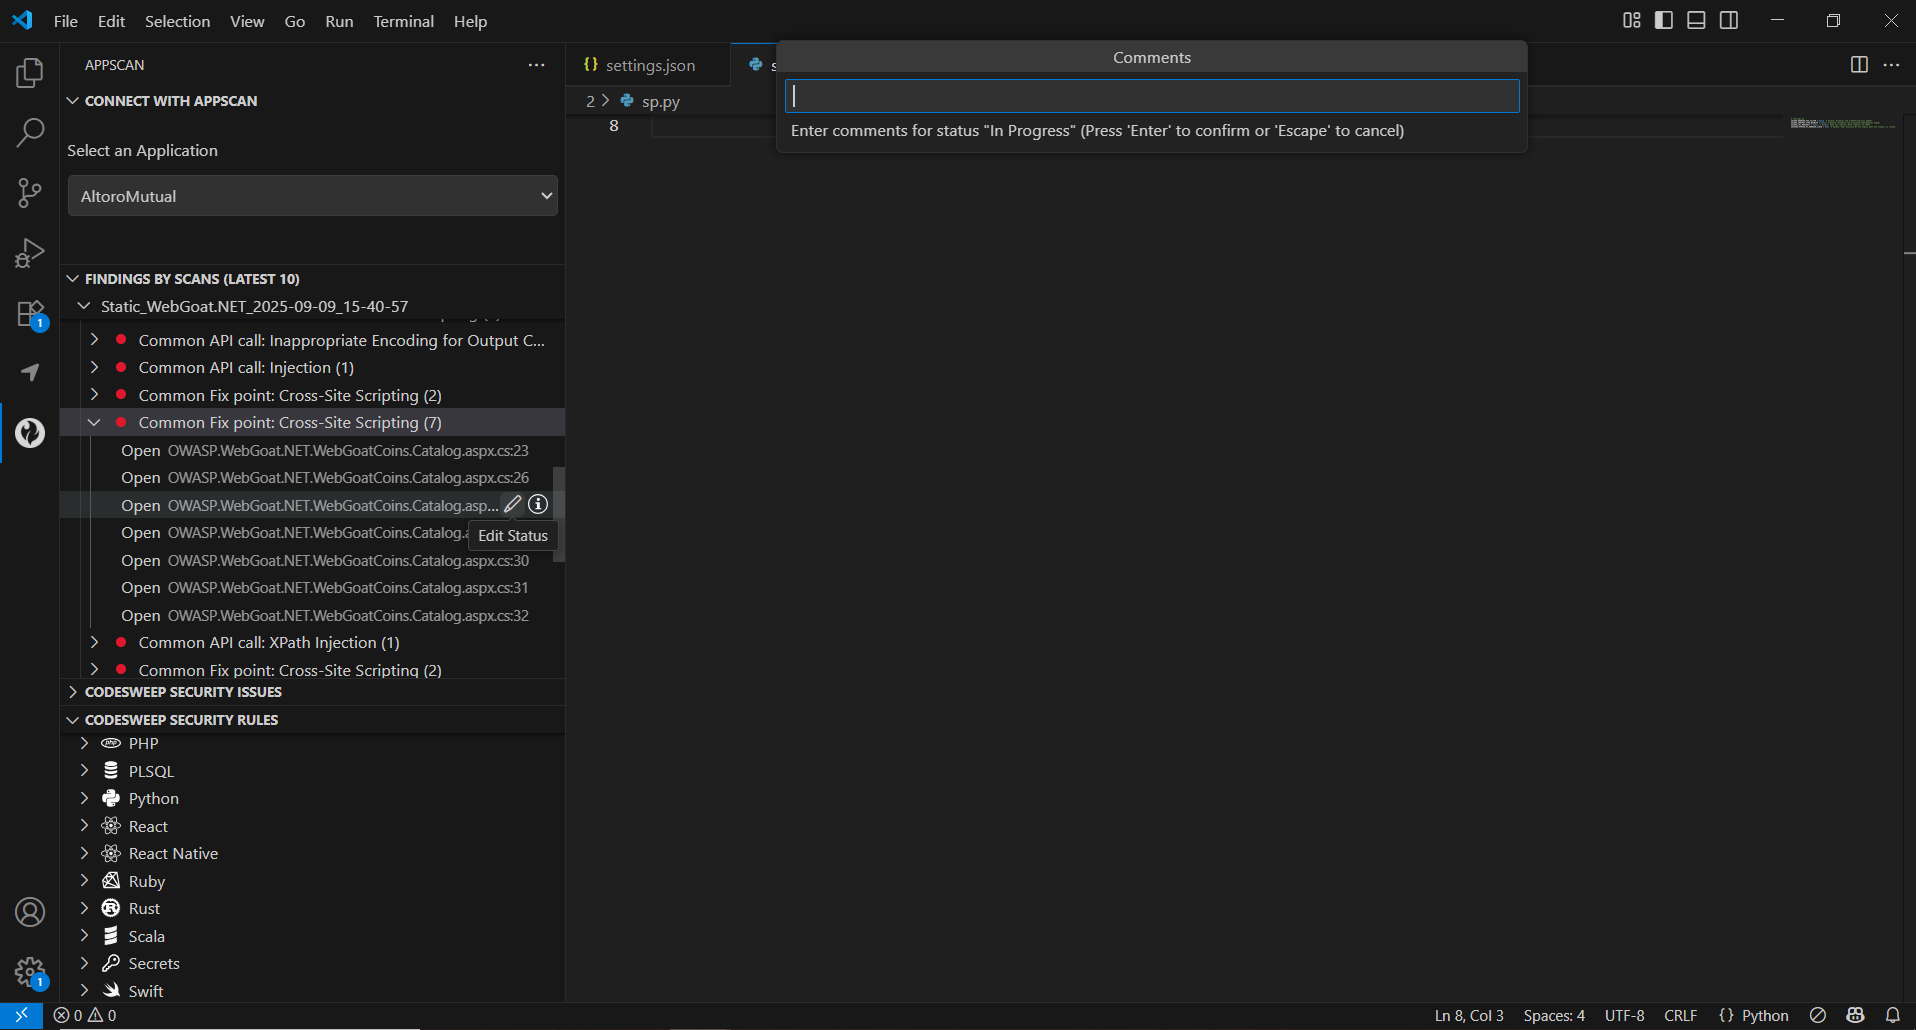
Comments: Add your comments for the status change. Comments are mandatory to add when issue status is selected to Noise.
Telemetry
We are collecting telemetry data [rules ignored, rules info viewed, file types scanned,] to give you a better user experience with our future releases. No information about specific issues is captured or stored. In case you want to opt out, please disable setting “Enable Telemetry” from Visual Studio Code Preferences.
Useful Resources
Known Issues
- Enable/disable operation on rules might not be synced across multiple active instances of Visual Studio Code. As a work-around, you can restart Visual Studio Code to see the latest rule states.
- After upgrading to CodeSweep version 1.2.1 or later from version 1.2.0 or earlier, Visual Studio Code needs to be restarted for the changes to take effect. This is not an issue when upgradring from version 1.2.1 onwards.
- Disable HCL AppScan CodeSweep extension to render Markdown previews.
- A rule enabled from the issues view may not reflect in the rules view. Restarting Visual Studio Code will show the latest rule states.
FAQs
Can I use the Codesweep plugin to scan an entire project without having to save files individually?
The Codesweep plugin scans code as you save the file. You cannot use it to scan an entire project at once.
Why am I not seeing security issues after importing a file into the workspace?
You must save the file after importing for the tool to scan it and list security issues.
Report feedback
- Use the CodeSweep slack channel to report any feedback or ask general questions about the extension.


