Introduction
Use the Cisco Edge Intelligence extension for Microsoft Visual Studio Code (VS Code) to develop and debug custom data logic used by Cisco IoT Data Policies to transform your data.
Data logic based policies allow you to add data intelligence to the Edge using the JavaScript language. Once created, the Data Logic scripts can be selected as a source in Data Policies.
The EI extension also allows you to log in to your Cisco IoT account from VS Code so your scripts can be accessed when creating Data Policies.
The following illustration summarizes the data development process.

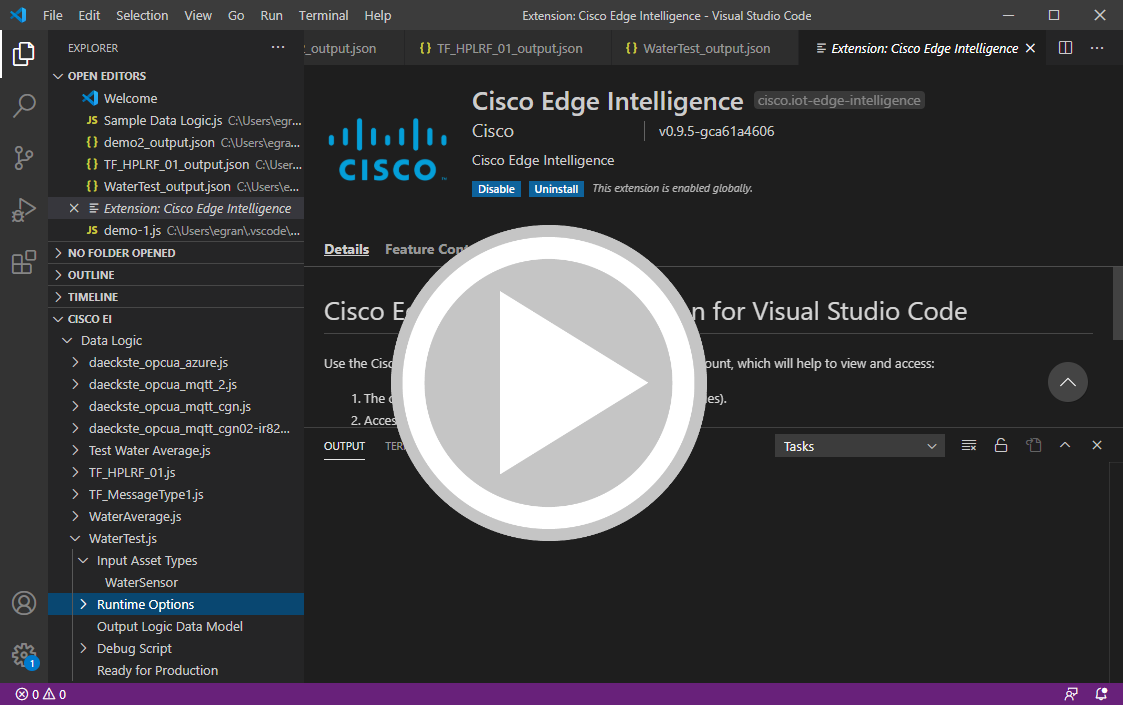
Watch this short video for an introduction to creating Data Logic for use in Data Policies:
Prerequisites
Before you begin, download the required software:
| Prerequisite |
Description |
| Microsoft Visual Studio Code (VS Code) |
VS Code is the supported code editor for data development in EI.
Download VS Code from here. |
| Cisco Edge Intelligence extension |
The VSCode extension is available in the Visual Studio marketplace. |
| "Asset Management" permissions in EI |
See Add users. |
Install VS Code and the EI extension
Option 1
- Search for the "Cisco Edge Intelligence" extension Visual Studio marketplace.
- Follow the prompts to install the extension.
- Once installed, "CISCO EI" appears in the explorer bar.
Option 2
Download the .vsix extension file to your computer.
Install the extension file in VS Code.
Install and open VS Code on your computer.
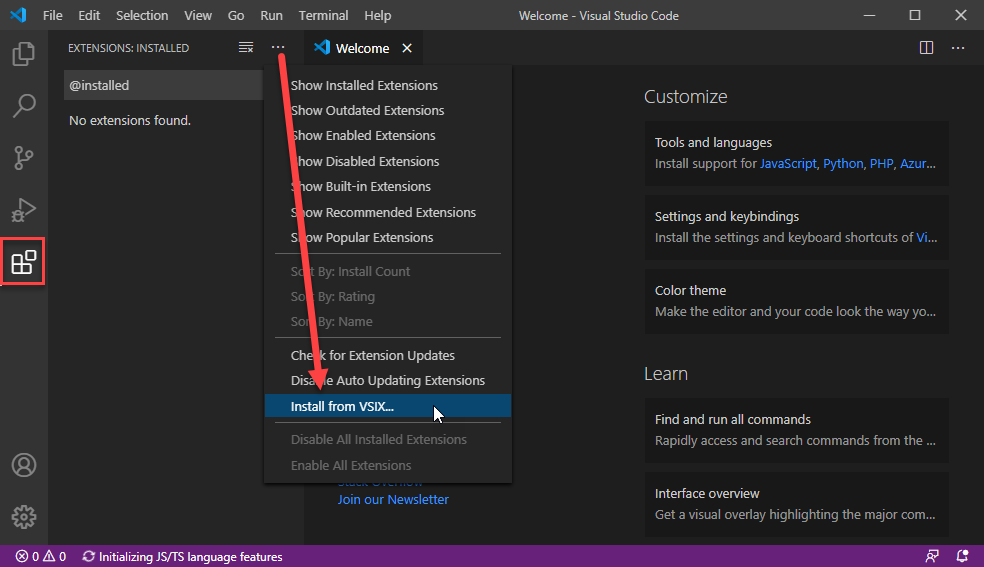
In the left-side pane, click the Extensions icon  .
.
Select More  > Install from VSIX…
Select the .vsix extension file from your computer.
Click Install.
Once installed, "CISCO EI" appears in the explorer bar.
Tip: Do not double-click the .vsix extension file if Microsoft Visual Studio is installed, or an error message appears. Install the file in VS Code instead, as described above.
Update the EI extension
To install a newer version of EI, uninstall the existing version and install the
new version.
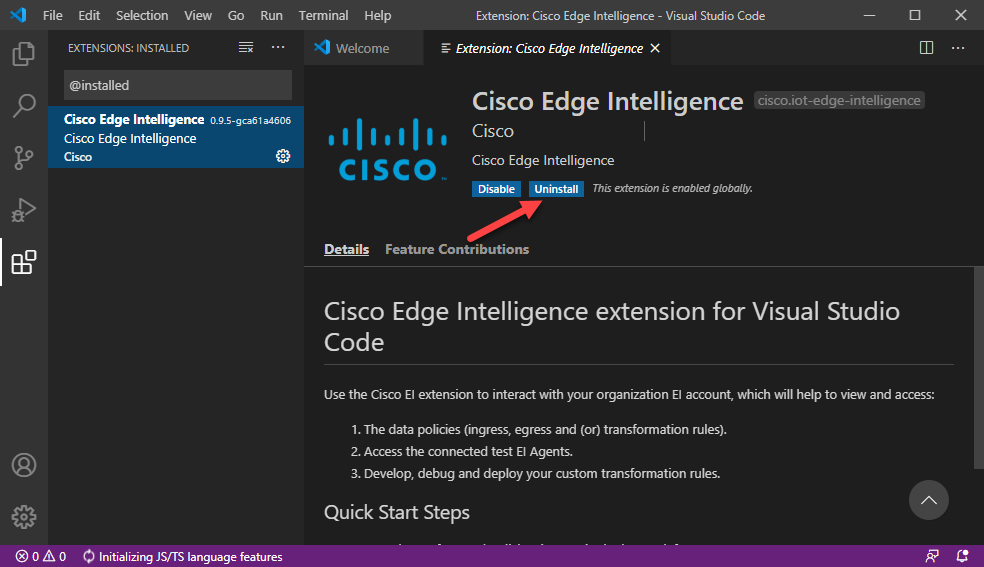
In the left-side pane, click the Extensions icon  .
.
Right-click Cisco Edge Intelligence and select Uninstall.
Reload the Visual Studio Code, if prompted.
Install the new version.
Get Started
To create Data Logic scripts, log in to your Cisco IoT account from the VS Code Edge Intelligence extension. This gives you access to IoT Asset Types and Runtime Options, and allows you to add your Data Logic to Cisco IoT. Once added to IoT, the Data Logic can be used in IoT Data Policies.
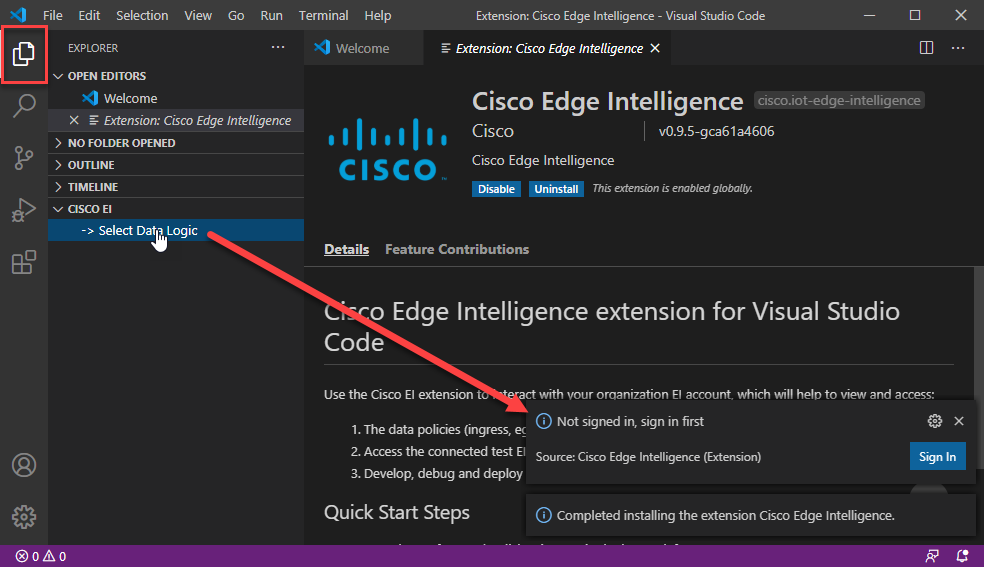
Click the Explorer icon  in the top left.
Under Explorer, click Cisco EI.
This option appears only if the Cisco Edge Intelligence extension was installed.
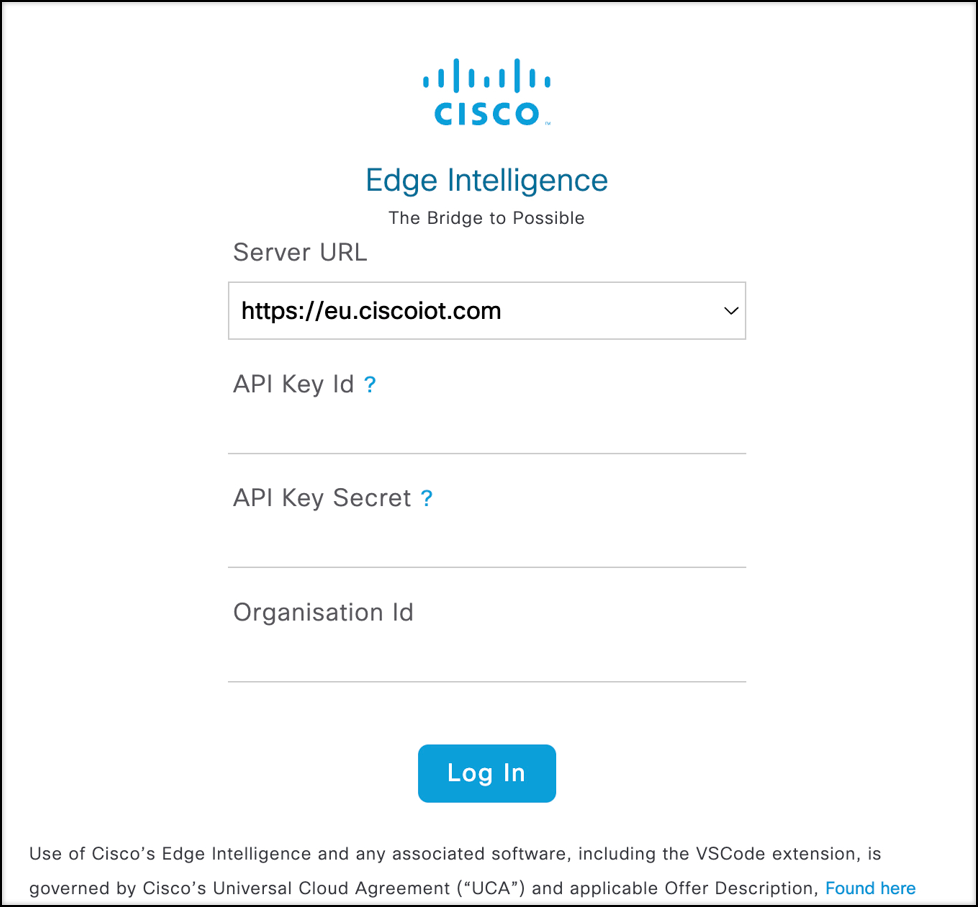
If you are not signed in to Edge Intelligence, click Select Data Logic and then Sign-In (in the bottom right). Then enter your Cisco IoT credentials.
- Server URL: Select the URL for your Cisco IoT Operations Center account.
- Api Key Id: Enter Api Key Id.
- Api Key Secret: Enter Api Key Secret.
- Organisation Id: Enter Organisation Id.
Create or modify your data logic scripts.
After you log in to Cisco IoT, click Data Logic to select and revise an existing script.
Right-click Data Logic and select Create New to create a new script. Enter a name and press Enter.
Revise and test your scripts as described below.
Click Update Data Logic to update the scripts available in Cisco IoT. Click Ready for Production to add a new script.
To use the Data Logic in Cisco IoT:
Log in to Cisco IoT
Click Data Policies > Data Logics.
Select "configure" on any of the Data Logic created in Scripting Engine. If the script does not appear, make sure you clicked Update Data Logic or Ready for Production’ in the VS Code entry.
Click Add Destination.
Complete the Data Destination fields and click Save.
Create Data Logic
Scripting Engine Tutorial
This section explains how to implement scripts for Cisco Edge Intelligence. This feature is based on duktape 2.5.0 and supports the same subset as duktape does, i.e. conforms to ES5.0/ES5.1 with semantics updated from ES2015 or later where appropriate.
For additional information, refer to the following links:
High Level Flow
A data policy can be configured to use data logic (JavaScript code) to transform data. Each data logic script will be called for every change to fields in the input data model, or periodically based on the "runtime" option selected. The user code may decide to publish a value so that it can be consumed by an egress link or not.
User code may create global objects that are persistent over different invocations, allowing it to implement stateful transformations such as: A sliding average, sliding median, histograms and so on. Further a script can be configured to allow customization and reuse in different data policies. For example, the same script could be used to aggregate the last 30 values in one policy and 100 in another, the count of values to aggregate being the configuration parameter.
Required Implementation
Each script is required to provide an on_update() function that is called whenever there is new data value from the input data model. Similarly, an on_time_trigger() function will need to be defined when the script needs to be invoked at a certain interval. The functions are not expected to return anything. Desired outputs are to be set on the global output object, but they will only be published once output.publish() is called.
Built-in global objects
Output
The global object output shall be used to set the desired output values. The names match the output model as specified in the VSCode plugin. (Refer to Output Data Model). For example, if the output model specifies a foo field, it has to be set with output.foo = ....
Setting the output fields is not sufficient, however, to give the script implementer strict control over when and if he wants to publish the changed output model he needs to call output.publish() to explicitly publish the transformed value.
The global object input is the representation of the input model. Each field of the input model is a field on input.
The input data model is the same data model as defined in Adding Device Models.
When on_update() is called, input will contain all last known values of the input model. They can simply be accessed with var x = input.foo.
Trigger
The global object trigger identifies the field name of the input model that has been changed. Be aware the simultaneous changes to multiple values of the input model are not possible and each change has to be handled on its own. This can be used to access the last changed value: var x = input[trigger.field_name].
Output Data Model
As part of the output function, a data model needs to be defined for the desired output data.
The data model has a JSON array.
- “key” – output data label
- "type” – output datatype
- "category” – “TELEMETRY” or “ATTRIBUTE” (Determines if the data point is nested or not)
- "TELEMETRY” – Nests the data point under machine_data label
- "ATTRIBUTE” – Publishes the data point without nesting
Output Data Model Example:
[{"key": "avg_analog_input_1", "type": "DOUBLE", "category": "TELEMETRY"},
{"key": "avg_analog_input_2", "type": "DOUBLE", "category": "TELEMETRY"},
{"key": "count_digital_input_1", "type": "INT", "category": "TELEMETRY"},
{"key": "count_updates", "type": "INT", "category": "TELEMETRY"},
{"key": "location", "type": "STRING", "category": "ATTRIBUTE"},
{"key": "manufacturer", "type": "STRING", "category": "ATTRIBUTE"}
]
{
  "location": “Lab”,
  "manufacturer ": "ACME Corp",
  "machine_data": {
    "avg_analog_input_1": 2,
    "avg_analog_input_2": 1,
    "count_digital_input_1": 10,
    "count_updates ": 20
    }
}
Optional initialization
It is optional to provide an init() function. If present, this function will be called exactly once when the policy is instantiated, i.e. when the policy is first created and after each restart.
Putting it all together
The following section contains two examples – the first example is a simple Degree Celsius to Degree Fahrenheit conversion, and the second is a more detailed sliding average example.
- Example 1: Temperature Conversion
- Example 2: Sliding average on two fields
Temperature conversion from Celsius to Fahrenheit
{
  "apiVersion": 1.0,
  "connectionType": "OPC_UA",
  "metrics": {
    "temperature": {
        "label": "Temp in Degree Celsius",
        "nodeId": {
            "type": "numeric",
            "namespaceUri": "http://cisco.com/ns/test",
            "identifier": "4711"
        },
        "samplingInterval": 500.0,
        "datatype": "Float"
    }
  }
}
The Datalogic Script:
function on_update() {
    var temp_celsius = input.temperature;
    var temp_fahrenheit = temp_celsius * (9/5) + 32;
    output.temperature = temp_fahrenheit;
    output.publish();
}
The Output Model:
[{"key":"temperature", "type":"DOUBLE", “category”: “TELEMETRY”}]
Sliding average on two fields
The code assumes an input model with two fields: temp and vibration, both fields are also expected to be present in the output model. The expected output is the sliding average over the input variables over a configurable window size.
Note: To know if the script is working as expected, you can deploy the current version using a policy and monitor the health status in the health monitoring page.
{
  "apiVersion": 1.0,
  "connectionType": "OPC_UA",
  "metrics": {
    "temp": {
        "label": "Current Temperature",
        "nodeId": {
            "type": "numeric",
            "namespaceUri": "http://cisco.com/ns/test",
            "identifier": "4711"
        },
        "samplingInterval": 500.0,
        "datatype": "Float"
    },
    "vibration": {
        "label": "Current Vibration Amplitude",
        "nodeId": {
            "type": "numeric",
            "namespaceUri": "http://cisco.com/ns/test",
            "identifier": "4715"
        },
        "samplingInterval": 500.0,
        "datatype": "Float"
    }
  }
}
The Datalogic Script
function FastSlidingAvg(window_size) {
    this.size = window_size;
    this.values = [];
    this.sum = 0;
    this.update = function(value) {
       if(this.values.length == this.size) {
      this.sum -= this.values[0];
      this.values.shift();
    }
    this.sum += value;
    this.values.push(value);
  }
  this.avg = function() {
    return this.sum / this.values.length;
  }
}

var acc = {};

function init() {
  acc["temp"] = new FastSlidingAvg(100);
  acc["vibration"] = new FastSlidingAvg(100);

  output.temp = 0;
  output.vibration = 0;
}

function on_update() {
  var field_name = trigger.field_name;
  var value = input[field_name];
  acc[field_name].update(value);

  output[field_name] = acc[field_name].avg();
  output.publish();
}
The Output Model
[
{"key":"temp", "type":"DOUBLE", “category”: “TELEMETRY”},
{"key":"vibration", "type":"DOUBLE", “category”: “TELEMETRY”}
]
Remote Debugging
Use the Debug Script to deploy your script on a specific EI Agent and test the output locally so you can verify the results and revise the script, if necessary.
Create Data Logic:
Right-click Data Logic and select New.
Enter a name and press Enter. (For example: " LogicExample")
Under Cisco EI → Data Logic , select the new created script name. (" LogicExample.js")
Click Input Asset Types and select the Asset Types that provide the source data.
Click Runtime Options and select when the script will be run, such as when data changes or periodically.
Click Output Logic Data Model and enter the format of the telemetry message the script will output.
Click the script name and create your logic within the script.
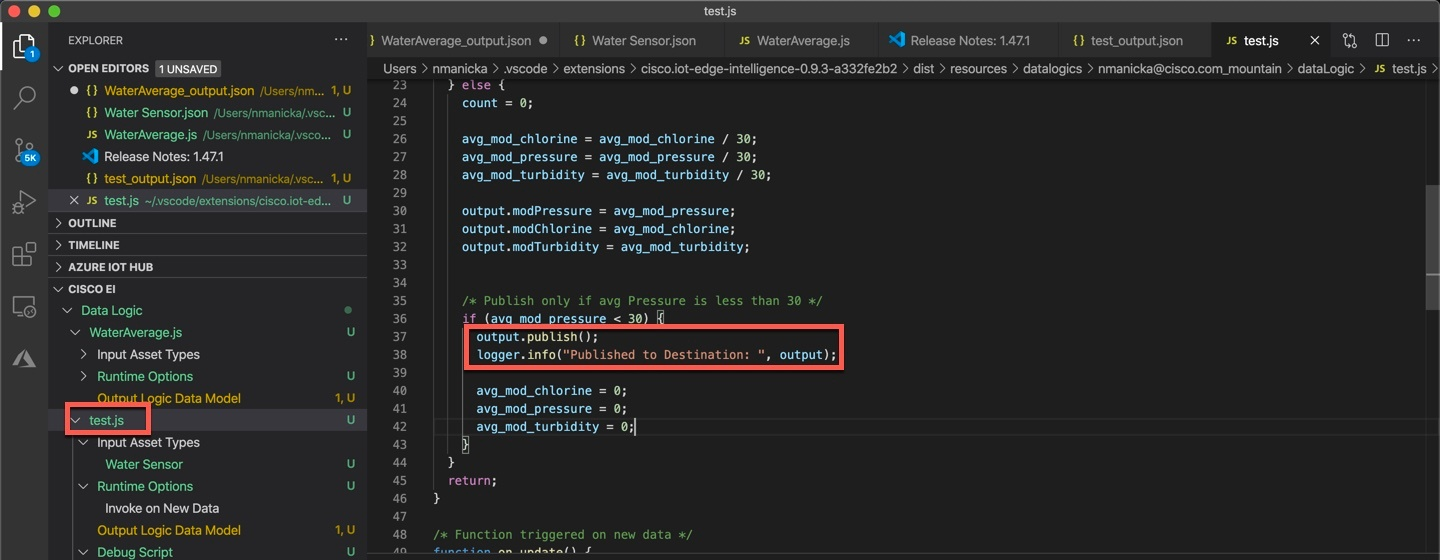
Be sure to include any required console print statements to test the data logic, using the built-in function "logger.info()"
You can print anything, such as transformed variables, data coming in, etc.
In the following example, the log output will be printed in the output drop-down panel of VSCode:
`output.value = input.value`<br>
`logger.info("debug.statement")`
Debug your script.
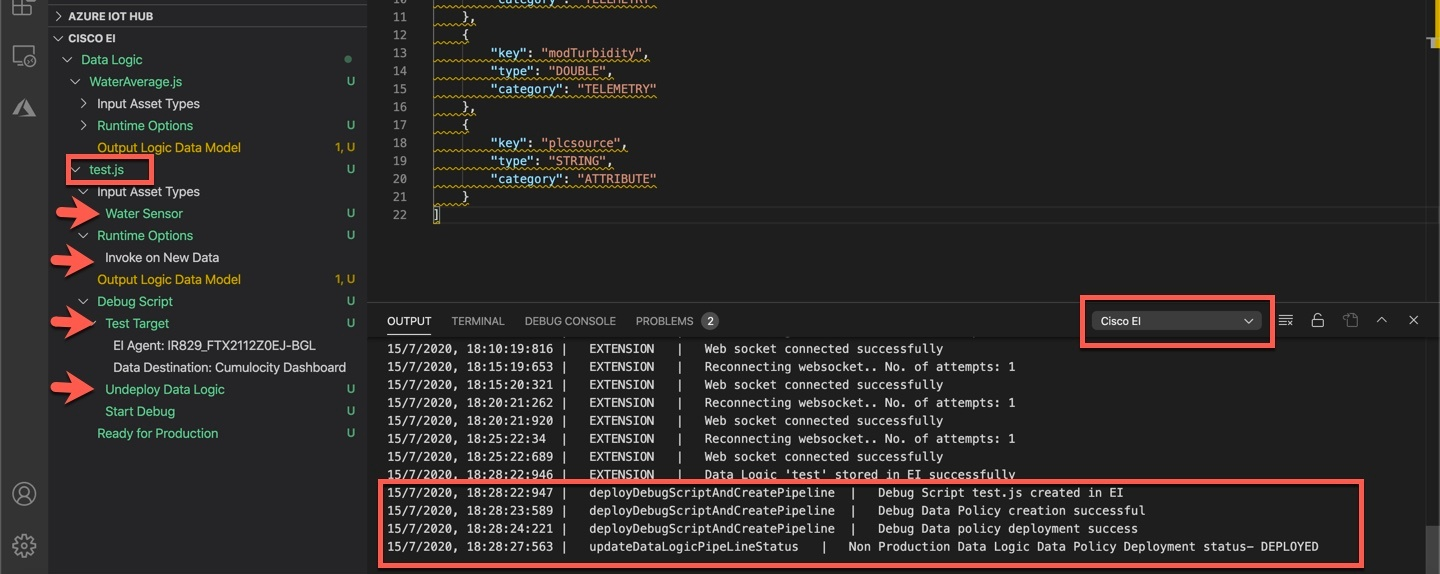
Under Debug Script, select Test Target and then select an EI agent to deploy this script on.
Select the Data Destination, Azure or MQTT. Then select the data destination previously configured in EI.
Click Debug Script.
Click Deploy Data Logic and then Yes to confirm.
This deploys the data logic for debugging.
(NOTE: Ensure in the EI portal, that there is an Asset instance that is mapped to the selected Test Target EI Agent which matches the Input Asset Type , else the deployment will report a failure.)
Click Start Debug , which appears after you deploy the script.
Click View > Debug Console to display the console along the bottom.
Click the Output tab.
The drop-down menu will have 2 options related to Cisco Edge Intelligence
- Select Cisco EI from the drop-down menu , to view output related to the EI VSCode extension
- Select LogicExample (or the appropriate Data logic name), to view the console output of the newly created script
The script returns data from the router, which appears locally in the Debug Console. This allows you to see the effect of your script.
Revise your script as needed, and debug again, if required.
Click Stop Debug and then Undeploy Data Logic to stop debugging.
When you are finished, click Ready For Production to publish your script to EI so it can be used in data policies.
