🧙♂️ Velaris Branch Creator
"One does not simply name a branch without consulting the JIRA overlords."
— Boromir, probably
A VS Code extension that creates Git branches from JIRA ticket IDs, following the naming conventions used in Velaris.

🐒 How to use
Follow these steps to create a branch from a JIRA ticket:
- Open your project in VS Code
- Press
Ctrl+Shift+P (Windows/Linux) or Cmd+Shift+P (macOS) to open the Command Palette
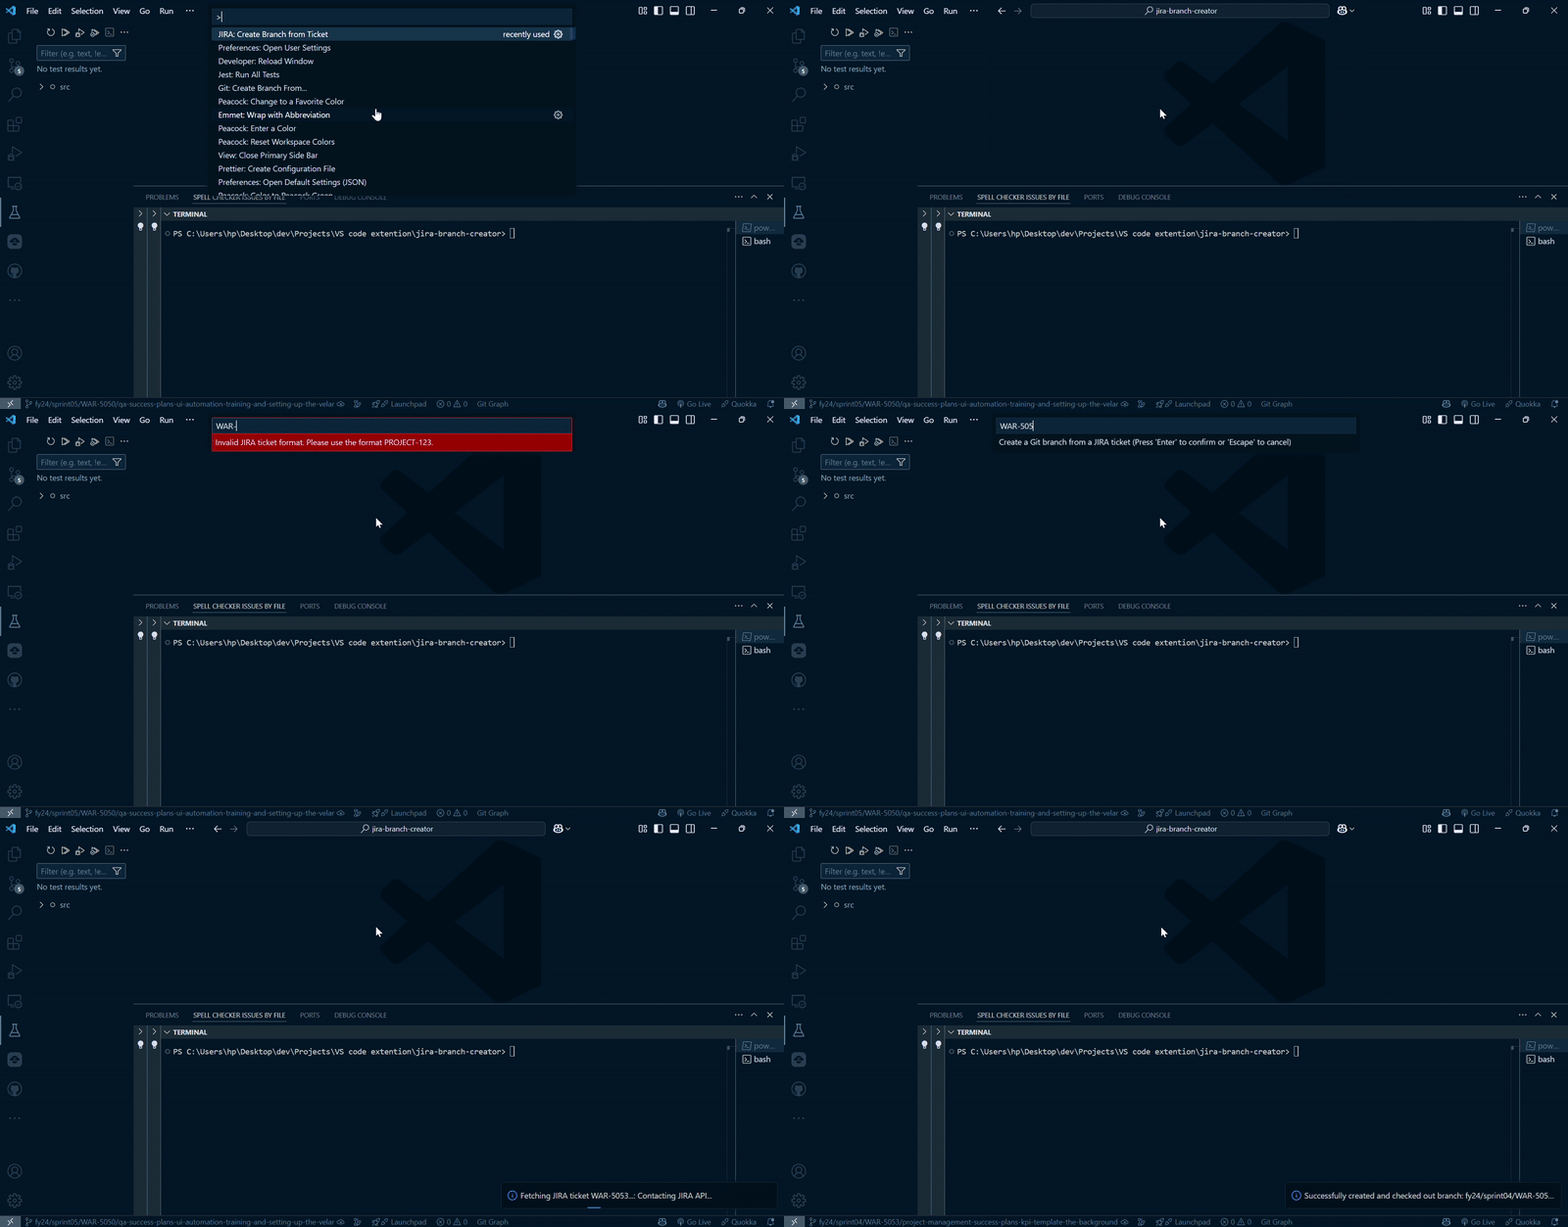
- Type "JIRA" and select "JIRA: Create Branch from Ticket" from the dropdown
- Enter your JIRA ticket ID (e.g., WAR-1234) in the input box that appears
- The extension will connect to JIRA and fetch the ticket details
- A new Git branch will be created and checked out automatically
- You'll see a confirmation message with the new branch name
You can also test your JIRA API connection by selecting "JIRA: Test API Response" from the Command Palette.
✨ Branch Naming Convention
The extension automatically creates branch names with the following format:
{fiscal_year}/sprint{sprint_number}/{ticket_id}/{summary-slug}
For example, if your JIRA ticket:
- Has ID: WAR-7080
- Has Summary: "Fix task name bug"
- Is in Sprint: "WAR 2025 - Q2 Sprint 7"
🔮 The resulting branch name will be:
fy25/sprint07/WAR-7080/fix-task-name-bug
🧍♂️ Installation
You can install this extension through:
- The VS Code Marketplace
- Search for "Velaris Branch Creator"
- Open VS Code Settings (
File > Preferences > Settings or Ctrl+,)
- Search for "JIRA Branch Creator"
- Fill in your JIRA base URL, email, and API token
- Optionally change the branch prefix
Example settings.json configuration:
{
  "jira-branching.baseUrl": "https://yourcompany.atlassian.net",
  "jira-branching.email": "your.email@company.com",
  "jira-branching.apiToken": "your-api-token-here",
  "jira-branching.branchPrefix": "fy25/great-merge"
}
😑 How to Get a JIRA API Token
- Log in to your Atlassian account at id.atlassian.com
- Click "Create API token"
- Enter a label for your token (e.g., "vscode")
- Copy the generated token
🚒 Troubleshooting
Error: "Failed to fetch JIRA issue"
- Verify your JIRA base URL, email, and API token are correct
- Ensure your JIRA instance is accessible from your network
🛠️ Contributing
Contributions to this extension are welcome!
🧪 Development Setup
- Clone the repository
- Run
npm install
- Open the project in VS Code
- Press F5 to start debugging

Made with bugs🐞 Enjoy!


