Lucid Reader
A reading view for Markdown in VS Code. Not a preview.
The built-in preview exists to show you what your Markdown compiles to. Lucid
exists to let you read it: one column at a comfortable measure, typography you
can tune to your eyes, and a set of aids for holding your place in a long
document.
Zero runtime dependencies. The Markdown parser, the renderer, and the reading
aids are all in this repo, roughly 2,000 lines total.
Install
Search for Lucid Reader in the Extensions view (Ctrl+Shift+X), or run:
ext install appforgelabs.lucid-reader
The extension is free and MIT licensed. If it earns a place in your day, there
is a pay-what-you-want download at
shop.appforgelabs.com
with a suggested $5.
Opening a document
| How |
What happens |
Ctrl+K R (Cmd+K R) |
Opens the active Markdown file in the reader |
Ctrl+K Shift+R |
Opens it in a split beside the editor |
| Book icon in the editor title bar |
Same as Ctrl+K R |
Right-click a .md file in the explorer |
"Open in Lucid Reader" |
| Right-click a tab, "Reopen Editor With" |
Switch an open file into the reader |
The reader is a real editor tab, so tab groups, Ctrl+P, and split panes all
behave normally. Edits made in a text editor show up live, including unsaved
ones.
To make the reader the default for every .md file, add this to your settings:
"workbench.editorAssociations": {
  "*.md": "lucid.reader"
}
Keyboard
Everything below works while a reader tab has focus. Press ? in the reader for
the same list.
Move
| Key |
Action |
j / k |
Next / previous block |
Space / Shift+Space |
Page down / up |
d / u |
Half page down / up |
n / p |
Next / previous heading |
g / G |
Top / bottom |
a |
Toggle auto scroll (teleprompter) |
< / > |
Auto scroll slower / faster |
Type
| Key |
Action |
+ / - |
Font size |
0 |
Reset font size |
[ / ] |
Narrower / wider line length |
{ / } |
Tighter / looser line height |
y |
Cycle font preset |
t |
Cycle theme |
T |
Open the theme picker |
Read
| Key |
Action |
f |
Cycle focus mode (off, paragraph, sentence, line) |
b |
Toggle bionic reading |
r |
Cycle reading ruler (off, band, underline, spotlight) |
w |
Cycle code block display (expanded, collapsed, hidden) |
s |
Toggle the outline |
Do
| Key |
Action |
/ |
Find in document |
e |
Open the source file at your current reading position |
, |
Open all Lucid settings |
? |
Help |
Esc |
Close the current overlay |
Every key has a matching command in the palette under "Lucid", so you can rebind
any of it through the normal VS Code keybindings UI.
The settings that matter most
There are about sixty settings under lucid.*, grouped into Typography, Theme,
Layout, Reading Aids, and Behaviour. These five are the ones worth setting
first.
lucid.typography.measure (default 68)
Line length in characters. This is the single biggest lever on reading comfort.
Long lines make your eye lose the return sweep; short ones break rhythm. Between
55 and 75 suits most people. Note that it is measured in ch units, so it
tracks your font size automatically.
lucid.typography.fontPreset (default serif)
No font files are bundled, so each preset is a stack that falls back to whatever
you have installed. hyperlegible and dyslexic will only look different if you
have Atkinson Hyperlegible or OpenDyslexic on your system. Use custom plus
lucid.typography.customFontFamily for anything else.
lucid.theme.name (default auto)
auto follows your VS Code theme. The other eighteen are independent of it,
which is the point: a dark IDE and a sepia reading pane is a perfectly
reasonable setup.
Light: paper (warm off-white), sepia, parchment (duller and greyer than
sepia, olive accent), dawn (rose-tinted, violet text), sage (green-tinted,
the calmest), mist (cool blue-grey daylight), newsprint (near-black ink on
warm grey, red accent), gray, contrast (maximum contrast, thicker rules).
Dark: dim (the gentlest for long sessions), dark, midnight (deep navy),
ocean (dark teal), forest (deep green, low blue content), ember (warm
brown, amber accent, the least blue of the dark set), plum (deep purple),
black (for OLED panels), contrast-dark (the dark mirror of contrast:
pure white on pure black, full-strength rules).
Press T in the reader for a grid of all of them. Arrow keys preview each one
on the document behind the picker, Enter keeps the one you are looking at, and
Esc puts back the one you started with. t still cycles the list one step at
a time, and the list runs light to dark so a cycle walks a family before it
jumps.
lucid.reading.focusMode (default off)
Dims everything except what you are reading. paragraph is the usual choice.
sentence is aggressive and good for close reading or editing. Pair it with
lucid.reading.focusFollows: center tracks your scroll position, mouse
tracks your pointer, manual only moves with j and k.
lucid.layout.codeBlocks (default expanded)
Set to collapsed when you want to read the prose of a technical document
without code interrupting every paragraph. Collapsed blocks expand on click.
Everything else, briefly
Typography: font size, weight, line height, letter spacing, word spacing,
paragraph spacing, first-line indent (book style), left or justified alignment,
hyphenation, a heading scale multiplier, heading balancing, widow prevention,
hanging punctuation, smart quotes, smart dashes, numeral style (lining,
oldstyle, or tabular), and drop caps.
Theme: nineteen schemes, a customColors object that overrides any subset of
them (background, surface, text, heading, muted, accent, rule,
codeBackground, highlight), a text contrast softener, four link styles including one that removes link
styling entirely, heading colour source, and three code block treatments.
Layout: column alignment, top padding, trailing padding (so the last
paragraph can scroll up to eye level), outline visibility and side and depth,
progress bar, corner readout, sticky heading, front matter card, code block
display, code wrapping, image height cap, three table styles, smooth scrolling,
and where jump targets land in the window.
The Wrap button next to Copy in each code block caption toggles
lucid.layout.wrapCode. It is one document-wide switch, not a per-block one:
pressing it wraps every code block, in every open reader, in every window, and
the choice is written to your settings so it survives a restart.
Reading aids: focus mode and what drives it, dim amount, optional blur,
bionic reading with adjustable strength and contrast, four reading ruler styles,
ruler height and strength, auto scroll speed, your words-per-minute for the time
estimate, scroll position memory, idle cursor hiding, and hover highlighting.
Behaviour: where in-reader adjustments get saved (user settings, workspace
settings, or memory only), whether Markdown links open in the reader or the
editor, the raw HTML allowlist, and automatic Zen Mode.
Lucid: Reset All Reader Settings in the command palette clears the lot.
Markdown support
CommonMark plus the GitHub extensions people actually use: tables, task lists,
strikethrough, autolinks, footnotes, and > [!NOTE] callouts. Also YAML front
matter (rendered as a metadata card), ==highlight==, and [[wiki links]].
Images resolve relative to the document. Links to other Markdown files open in
the reader; links to other file types open in an editor; external links open in
your browser.
On raw HTML
Lucid escapes all HTML, then restores a small allowlist of inert tags: br,
kbd, sub, sup, mark, ins, del, abbr, small, u, s, details,
summary, dl, dt, dd, wbr. Attributes are always stripped.
This means <div align="center"> renders as literal text. That is deliberate.
The alternative is running a sanitiser over arbitrary embedded HTML inside a
webview that has script access, and the failure mode there is worse than an
ugly <div>. Turn the allowlist off entirely with
lucid.behavior.allowRawHtmlTags: false.
On bionic reading
It is included because some people find it helps and it costs nothing to offer.
The published evidence for it is thin and contested. Treat it as a preference,
not a proven gain.
Building from source
bun install
bun run build          # tsc, output in out/
bun install-local      # build, package, install the vsix
bun run package compiles first and always writes lucid-reader.vsix. The
filename is deliberately version-free: install-local used to name the vsix it
installed, which broke silently on every version bump. The tsc step is in the
package script rather than a vscode:prepublish hook because vsce packages
whatever sits in out/ without building, so a forgotten compile ships stale
JavaScript that looks like a working build.
Installing does not affect the running window. Reload it (Developer: Reload Window) or the old copy stays live, which reads exactly like a change that had
no effect.
Dev dependencies are TypeScript and the VS Code type definitions. There is no
bundler: the extension host code compiles to CommonJS, and the webview runtime
in media/ is plain JavaScript loaded directly.
Layout
src/markdown.ts    Markdown to HTML. Emits data-line on every block.
src/config.ts      Reads and clamps settings. Writes them back.
src/webview.ts     Webview shell, CSP, asset URL rewriting.
src/extension.ts   Custom editor, commands, message routing.
media/reader.css   All presentation. Driven by CSS custom properties.
media/reader.js    Reading aids, navigation, find, keyboard.
The settings contract lives in exactly one place, contributes.configuration in
package.json. config.ts reads it back with clamping so a hand-edited
settings.json degrades instead of breaking the layout.
Screenshots
Seventeen reading palettes, ordered light to dark. midnight below, and the
kitchen sink document in sepia.
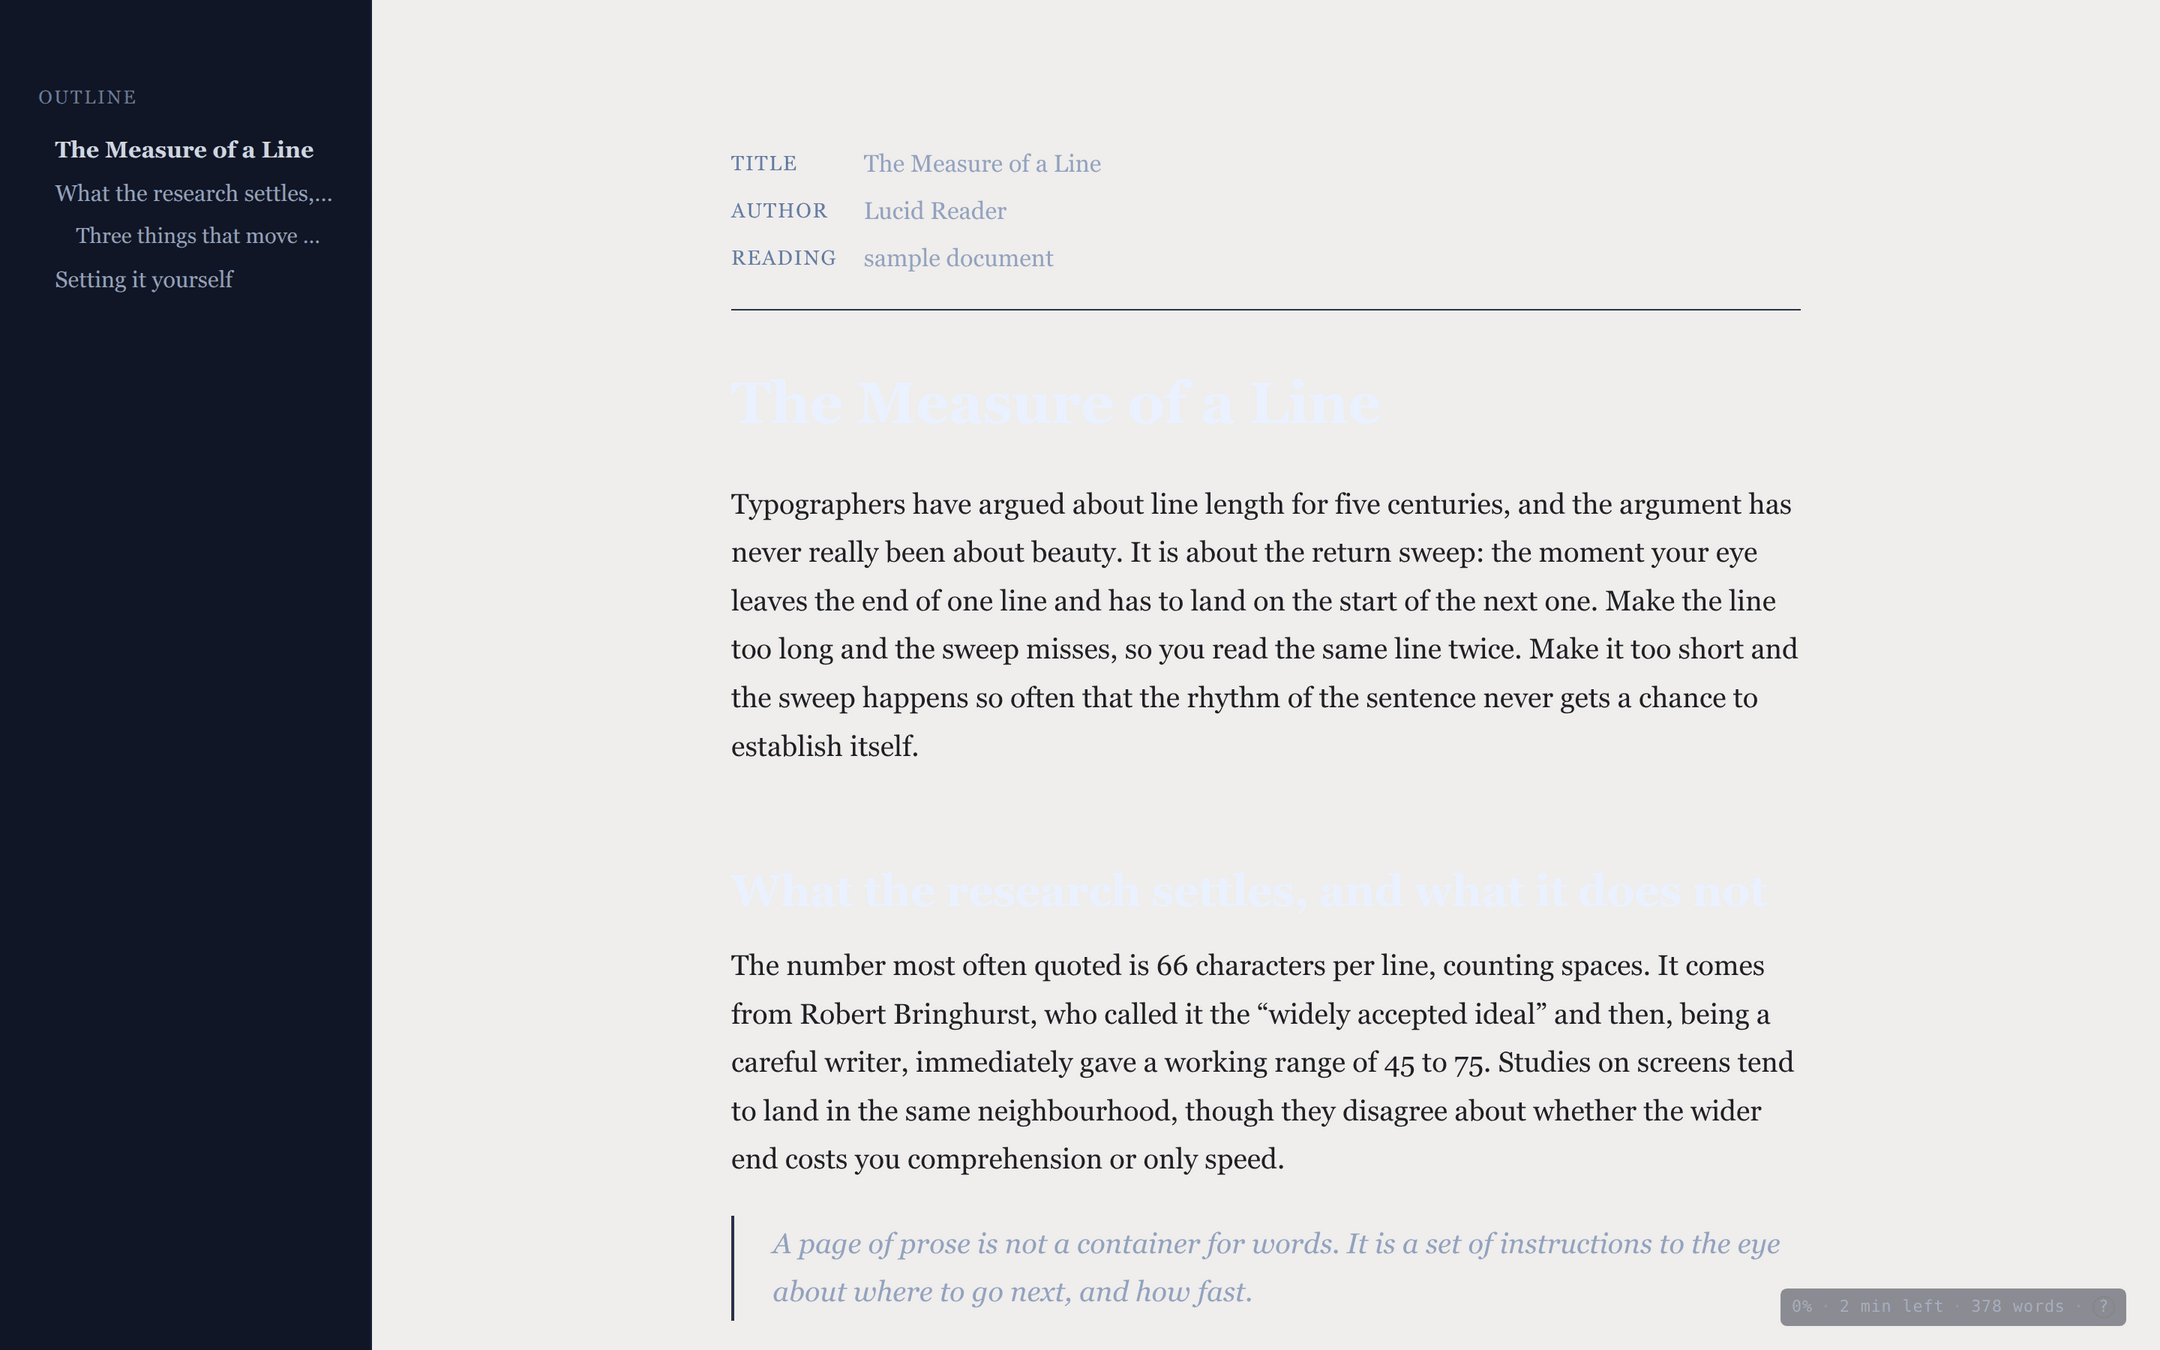
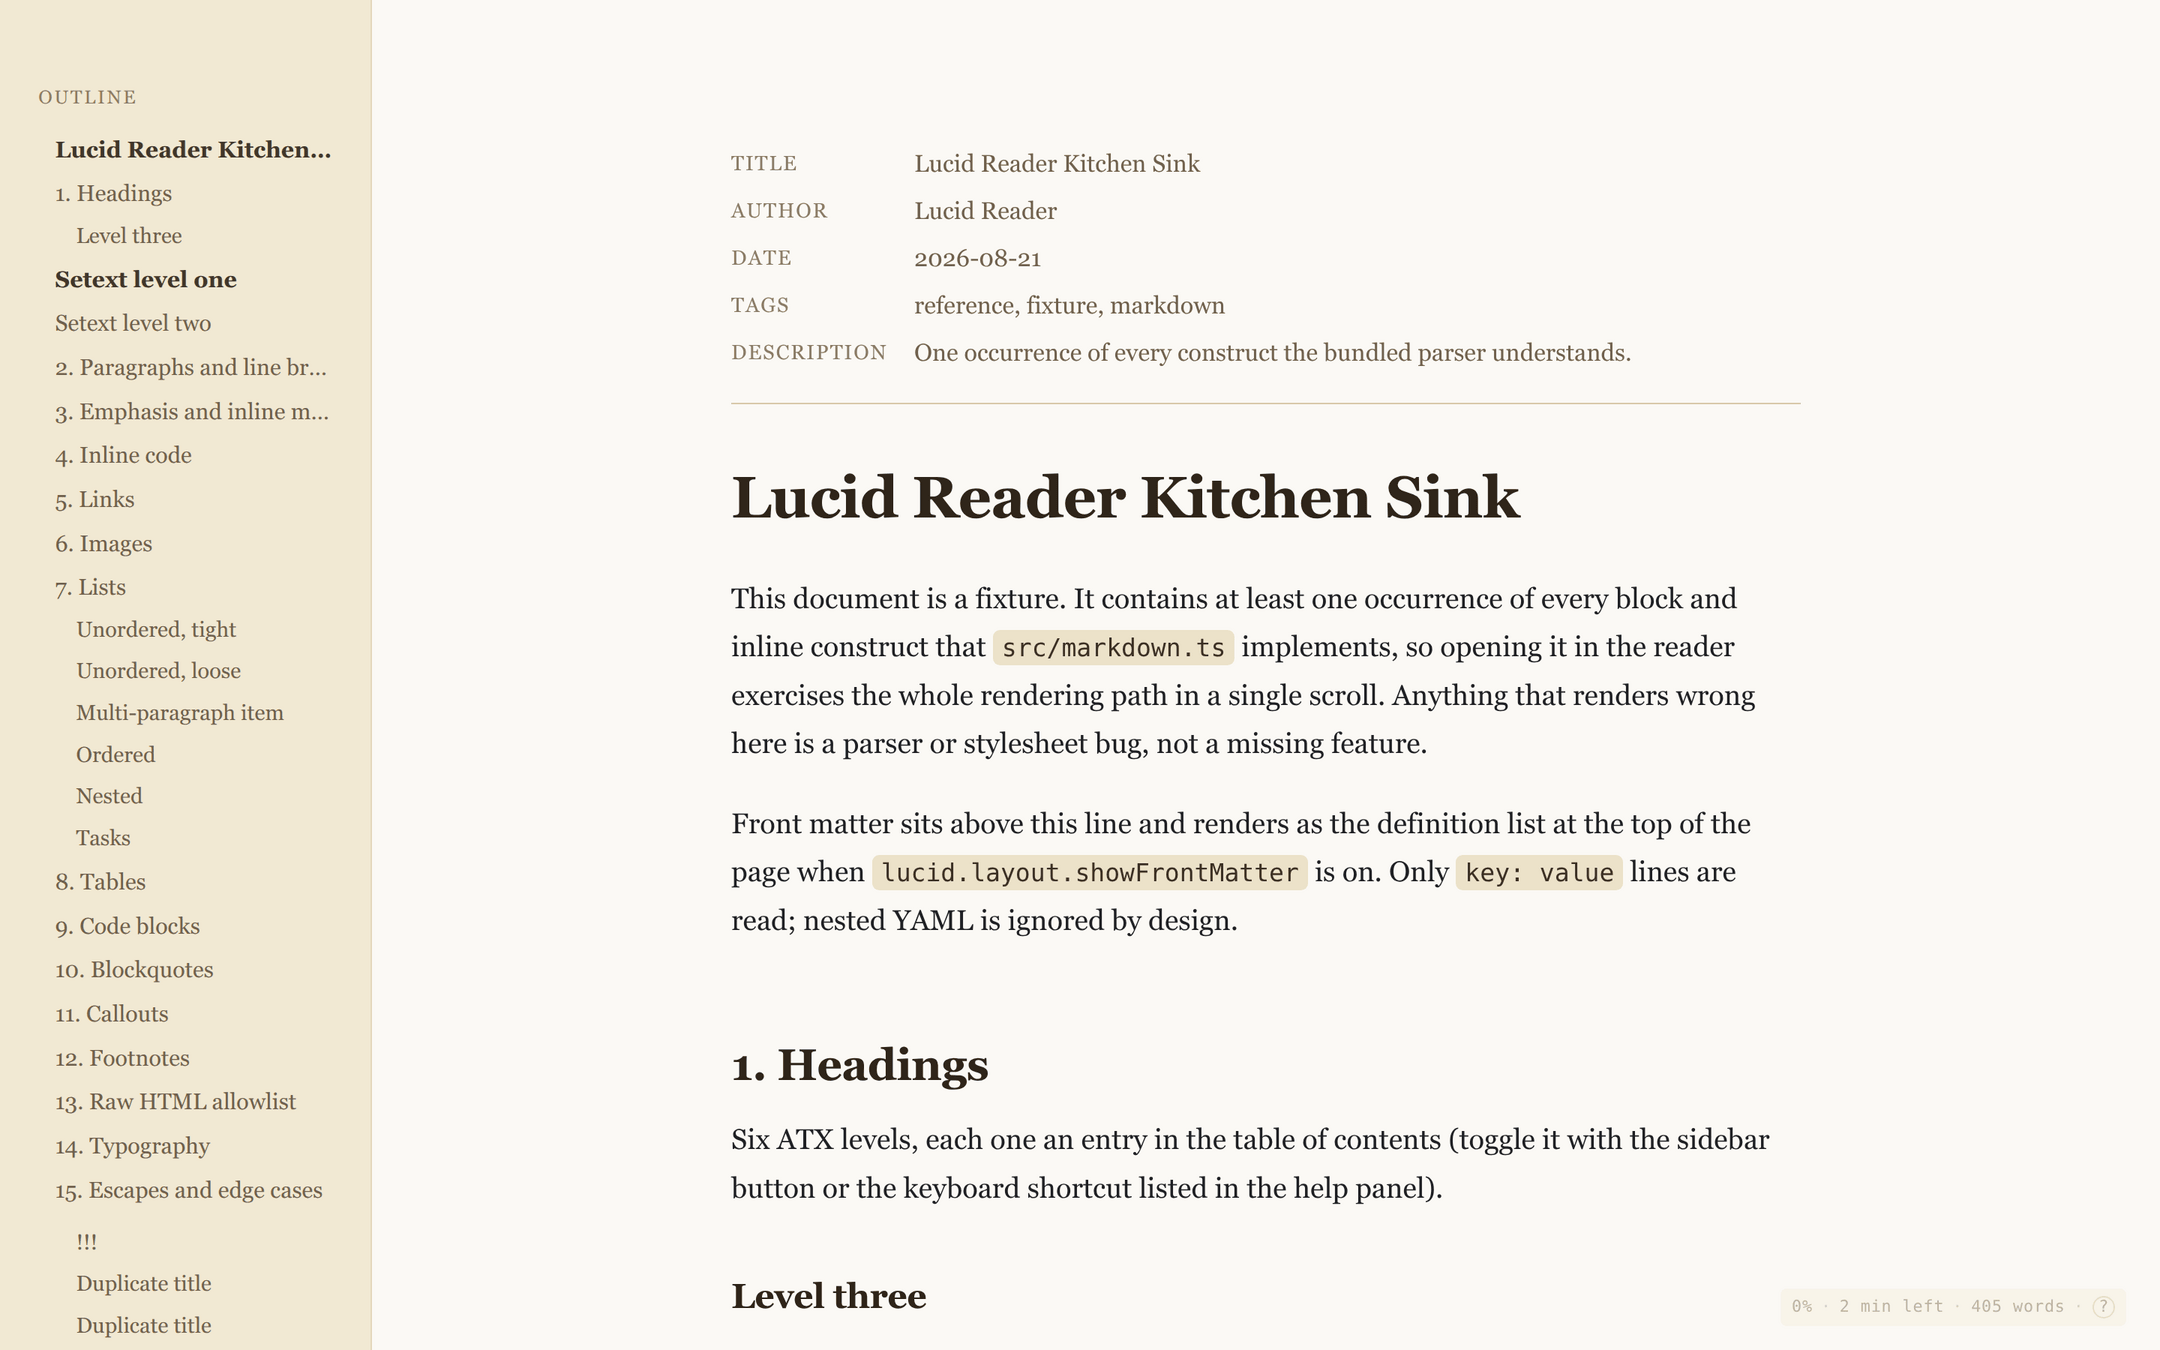
Regenerate them with bun run shots, which renders docs/screenshot-prose.md
through the real parser and the real webview runtime in headless Chrome. No
screenshot is taken by hand, so the pictures cannot drift from the code.
Licence
MIT.

