
QuestaSim Compiler & SimulatorCompile and simulate Verilog/SystemVerilog projects with QuestaSim or ModelSim. Installation Launch VS Code Quick Open ( Ctrl+P), paste the following command, and press enter.Copied to clipboard |

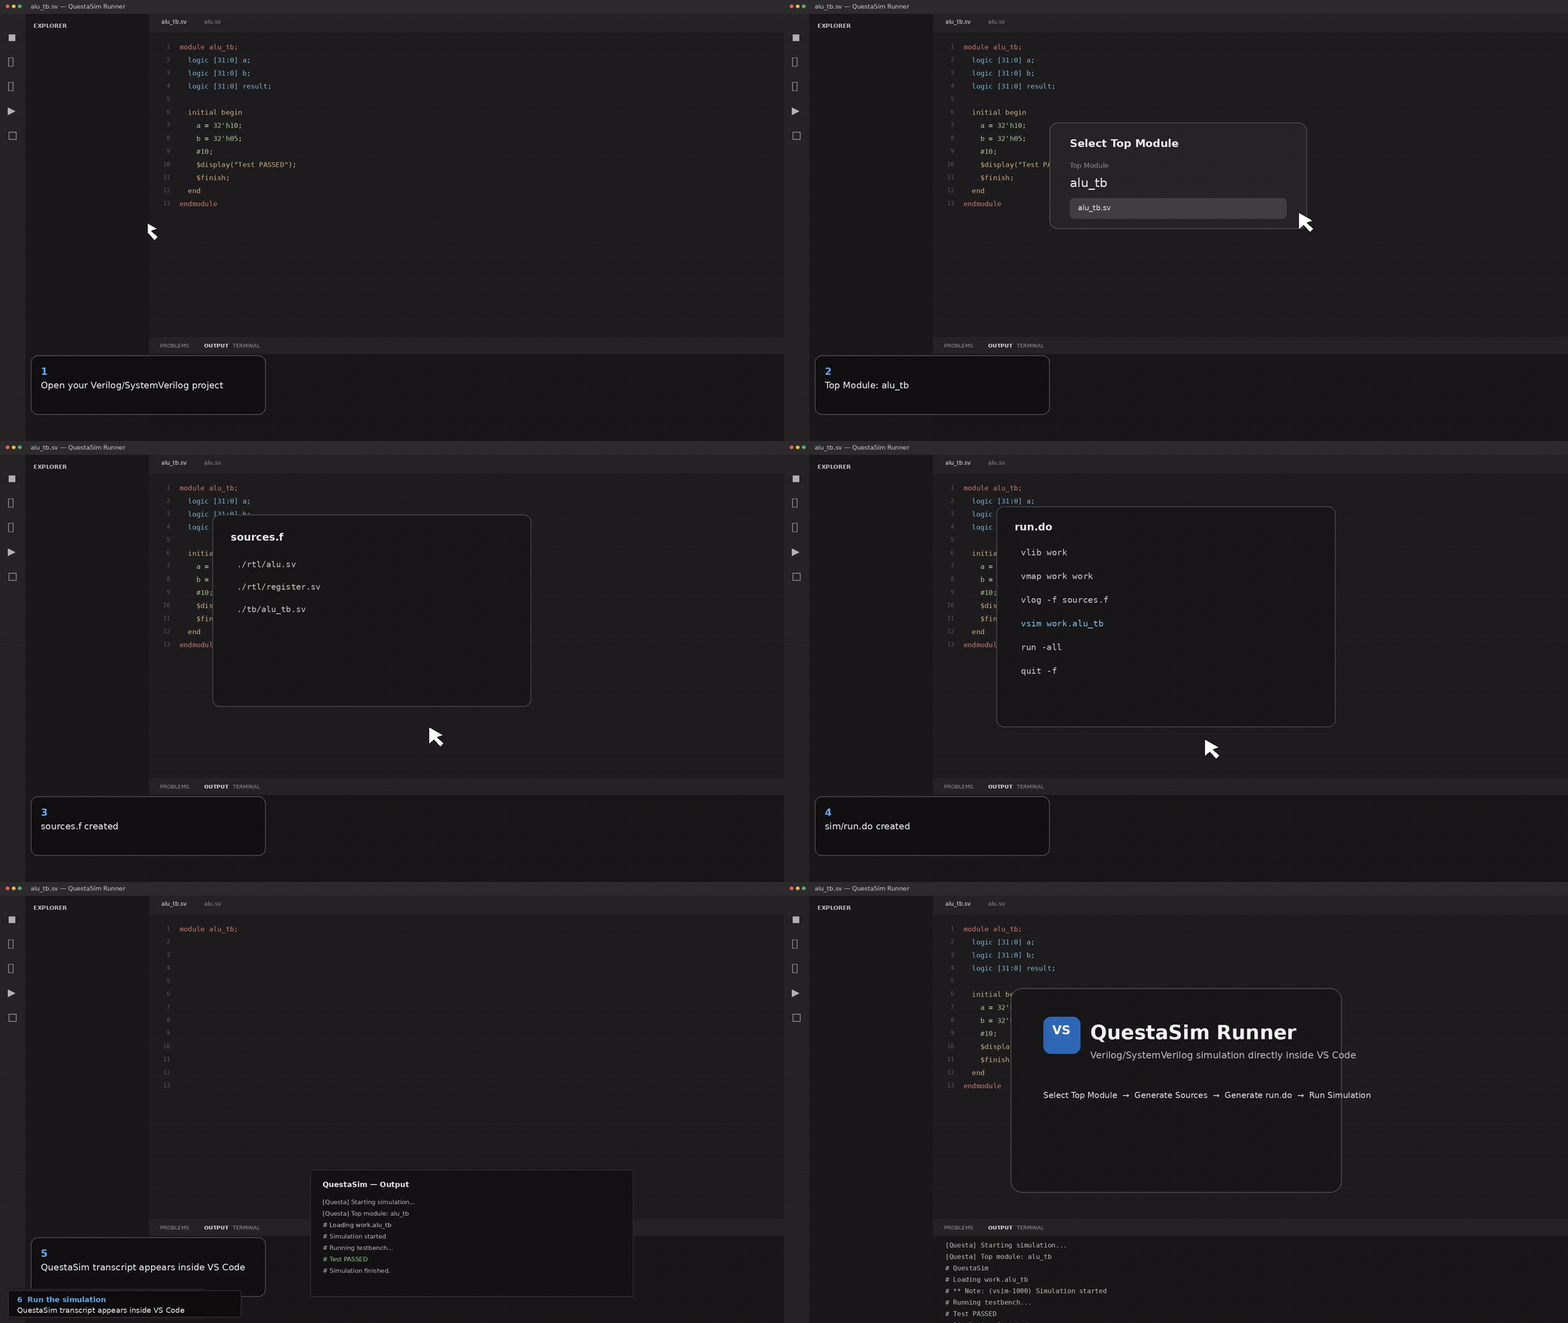
QuestaSim Compiler & SimulatorRun Verilog and SystemVerilog projects with QuestaSim or ModelSim directly from VS Code. Generate a source list, compile your design, run a testbench, and read the complete simulator transcript without switching to an external terminal. 🎥 Video TutorialSee QuestaSim Compiler & Simulator in action and learn how to run Verilog/SystemVerilog simulations directly from VS Code.
What you needBefore using this extension, make sure that:
First-time setup1. Install the extensionInstall QuestaSim Compiler & Simulator from the VS Code Marketplace, then reload VS Code if it asks you to. 2. Open your Verilog projectUse File → Open Folder... and open the folder containing your RTL and testbench files. For example: 3. Choose the testbench top moduleOpen the Command Palette and run Questa: Select Top Module. You can select a testbench file or type its module name manually. For the example above, enter: The extension saves this as the workspace setting Run your first simulationFollow these steps in order:
The expected generated files look like this: Everyday workflowAfter setup, the usual loop is simple: With Click Simulation modesThe default is console simulation: Use GUI mode to open the QuestaSim graphical window: You can also run Questa: Open Waveform, which launches the generated script in GUI mode. Waveforms are displayed by QuestaSim itself. Configuration referenceAdd these settings to your workspace when needed:
Source-file orderThe extension uses this sensible default order:
For projects that require a strict custom order, set The scanner excludes generated and dependency folders such as Existing
|
| Command | What it does |
|---|---|
| Questa: Generate Source List | Finds HDL files and writes sources.f. |
| Questa: Generate run.do | Safely creates or updates the managed script. |
| Questa: Select Top Module | Chooses or enters the testbench top module. |
| Questa: Compile | Compiles HDL files into the work library. |
| Questa: Run Simulation | Runs the generated script in console or GUI mode. |
| Questa: Run Existing run.do | Runs a selected existing script without overwriting it. |
| Questa: Open Waveform | Launches the generated script in GUI mode. |
| Questa: Refresh Sources | Rescans the workspace and regenerates sources.f. |
| Questa: Show Transcript | Opens the QuestaSim Output channel. |
| Questa: Clear Transcript | Clears the Output-channel transcript. |
Troubleshooting
“QuestaSim executable was not found”
Set questa.vsimPath to the full path of vsim.exe on Windows, or vsim on Linux. Confirm the path points to the QuestaSim installation, not a shortcut.
“No top module configured”
Run Questa: Select Top Module and choose or enter the testbench module name.
Compilation errors or simulation failures
Run Questa: Show Transcript. The Output channel contains the complete vlib, vmap, vlog, and vsim messages, including the original file and line reported by QuestaSim.
My files compile in the wrong order
Configure questa.sourceOrder as shown above. This is common when packages, interfaces, or generated source files have dependencies that cannot be inferred from filenames.
Optional: Configure the QuestaSim installation path
You normally do not need this step. If Questa: Compile already works, VS Code has found QuestaSim through your system PATH.
Only configure these paths if the extension reports that vsim, vlog, vlib, or vmap cannot be found, or if you want this workspace to use a specific QuestaSim installation.
Open the Command Palette (Ctrl+Shift+P), run Preferences: Open Workspace Settings (JSON), and add:
{
  "questa.vsimPath": "C:/questasim/bin/vsim.exe",
  "questa.vlogPath": "C:/questasim/bin/vlog.exe"
}
If vlog.exe is in the same folder as vsim.exe, questa.vlogPath is optional; the extension derives it automatically.
Linux example:
{
  "questa.vsimPath": "/opt/questasim/bin/vsim",
  "questa.vlogPath": "/opt/questasim/bin/vlog"
}
👨💻 Developer
Created by Ahmed Nossier