An increasing number of software applications incorporate machine
learning (ML) solutions for cognitive tasks that statistically mimic
human behaviors. To test such software, tremendous human effort
is needed to design image/text/audio inputs that are relevant to the
software, and to judge whether the software is processing these
inputs as most human beings do. Even when misbehavior is exposed,
it is often unclear whether the culprit is inside the cognitive ML
API or the code using the API.
Keeper is a new testing tool for software that
uses cognitive ML APIs. Keeper designs a pseudo-inverse function
for each ML API that reverses the corresponding cognitive task in
an empirical way (e.g., an image search engine pseudo-reverses the
image-classification API), and incorporates these pseudo-inverse
functions into a symbolic execution engine to automatically generate relevant image/text/audio inputs and judge output correctness.
Once misbehavior is exposed, Keeper attempts to change how ML
APIs are used in software to alleviate the misbehavior
For more information, refer to our paper in 2022 International Conference on Software Engineering.
Quick start
Install dependencies detailed at this file. Installing the CVC4 constraint solver is the most complicated step, and we provided a concise installation to our knowledge. Disregard the Node.js and How to run Keeper sections at the end.
Then, set up environment and application prerequisites. This is the line that gets executed before any of our analysis file runs. Typically, one should include (1) export the google cloud credentials; (2) export the path to CVC4; (3) any other commands needed to activate a virtual environment (e.g. anaconda) for the particular python environment we require, etc. This can be done by going to the Settings in VS Code (details can be found on the VS Code documentations here), search for Mlapi-testing: Set Up Environment And Application Prerequisites, and modify the entry to include these. An example of including (1) and (2) is:
export GOOGLE_APPLICATION_CREDENTIALS='/path/to/your/google/credential.json'; export PYTHONPATH=/usr/local/share/pyshared/;
where for details, refer back to this file. Note that we expect a semicolon after each statement.

Deployment
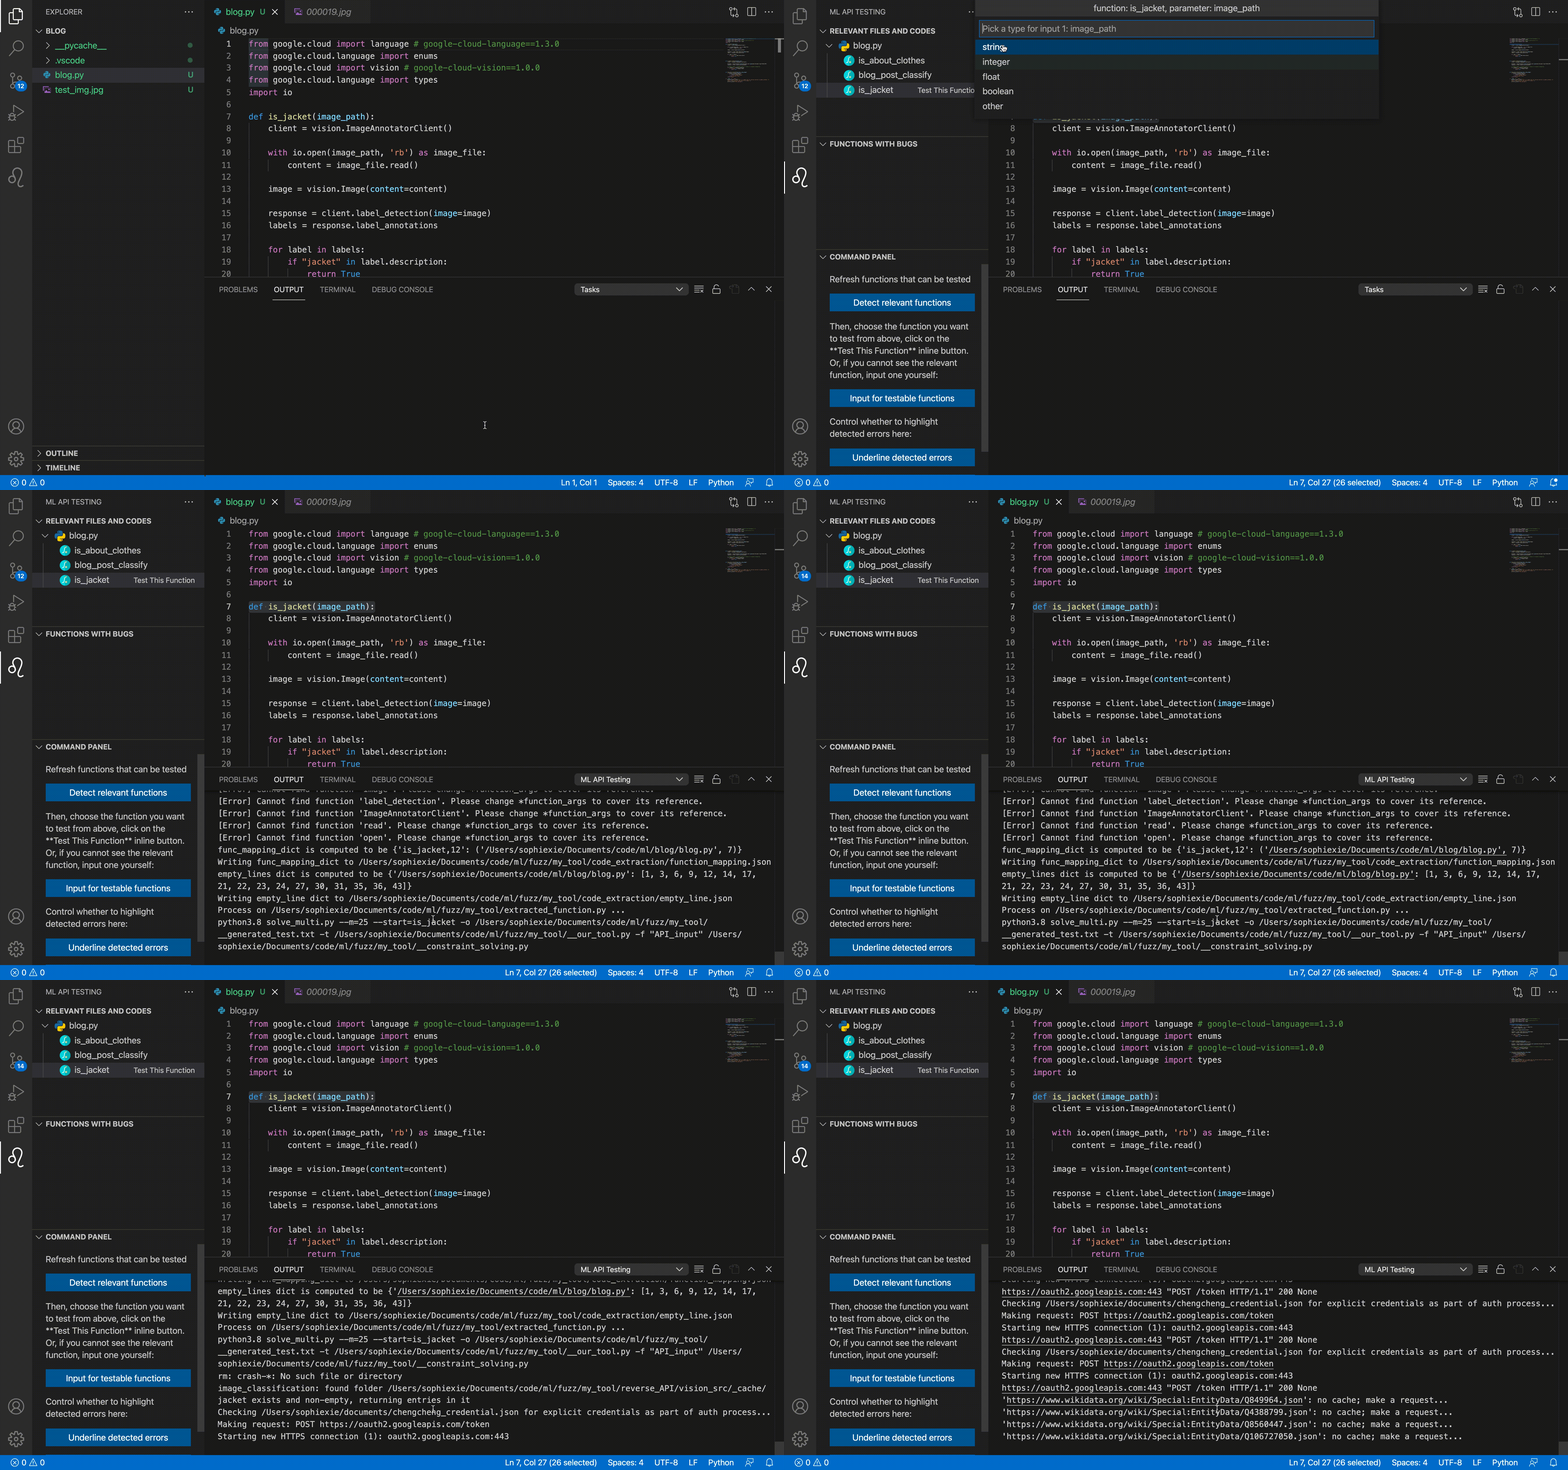
Then, follow the following procedure to complete a typical testing. In the bottom-left corner, there is a "Show logs" button that can help you debug certain environment errors, if needed.
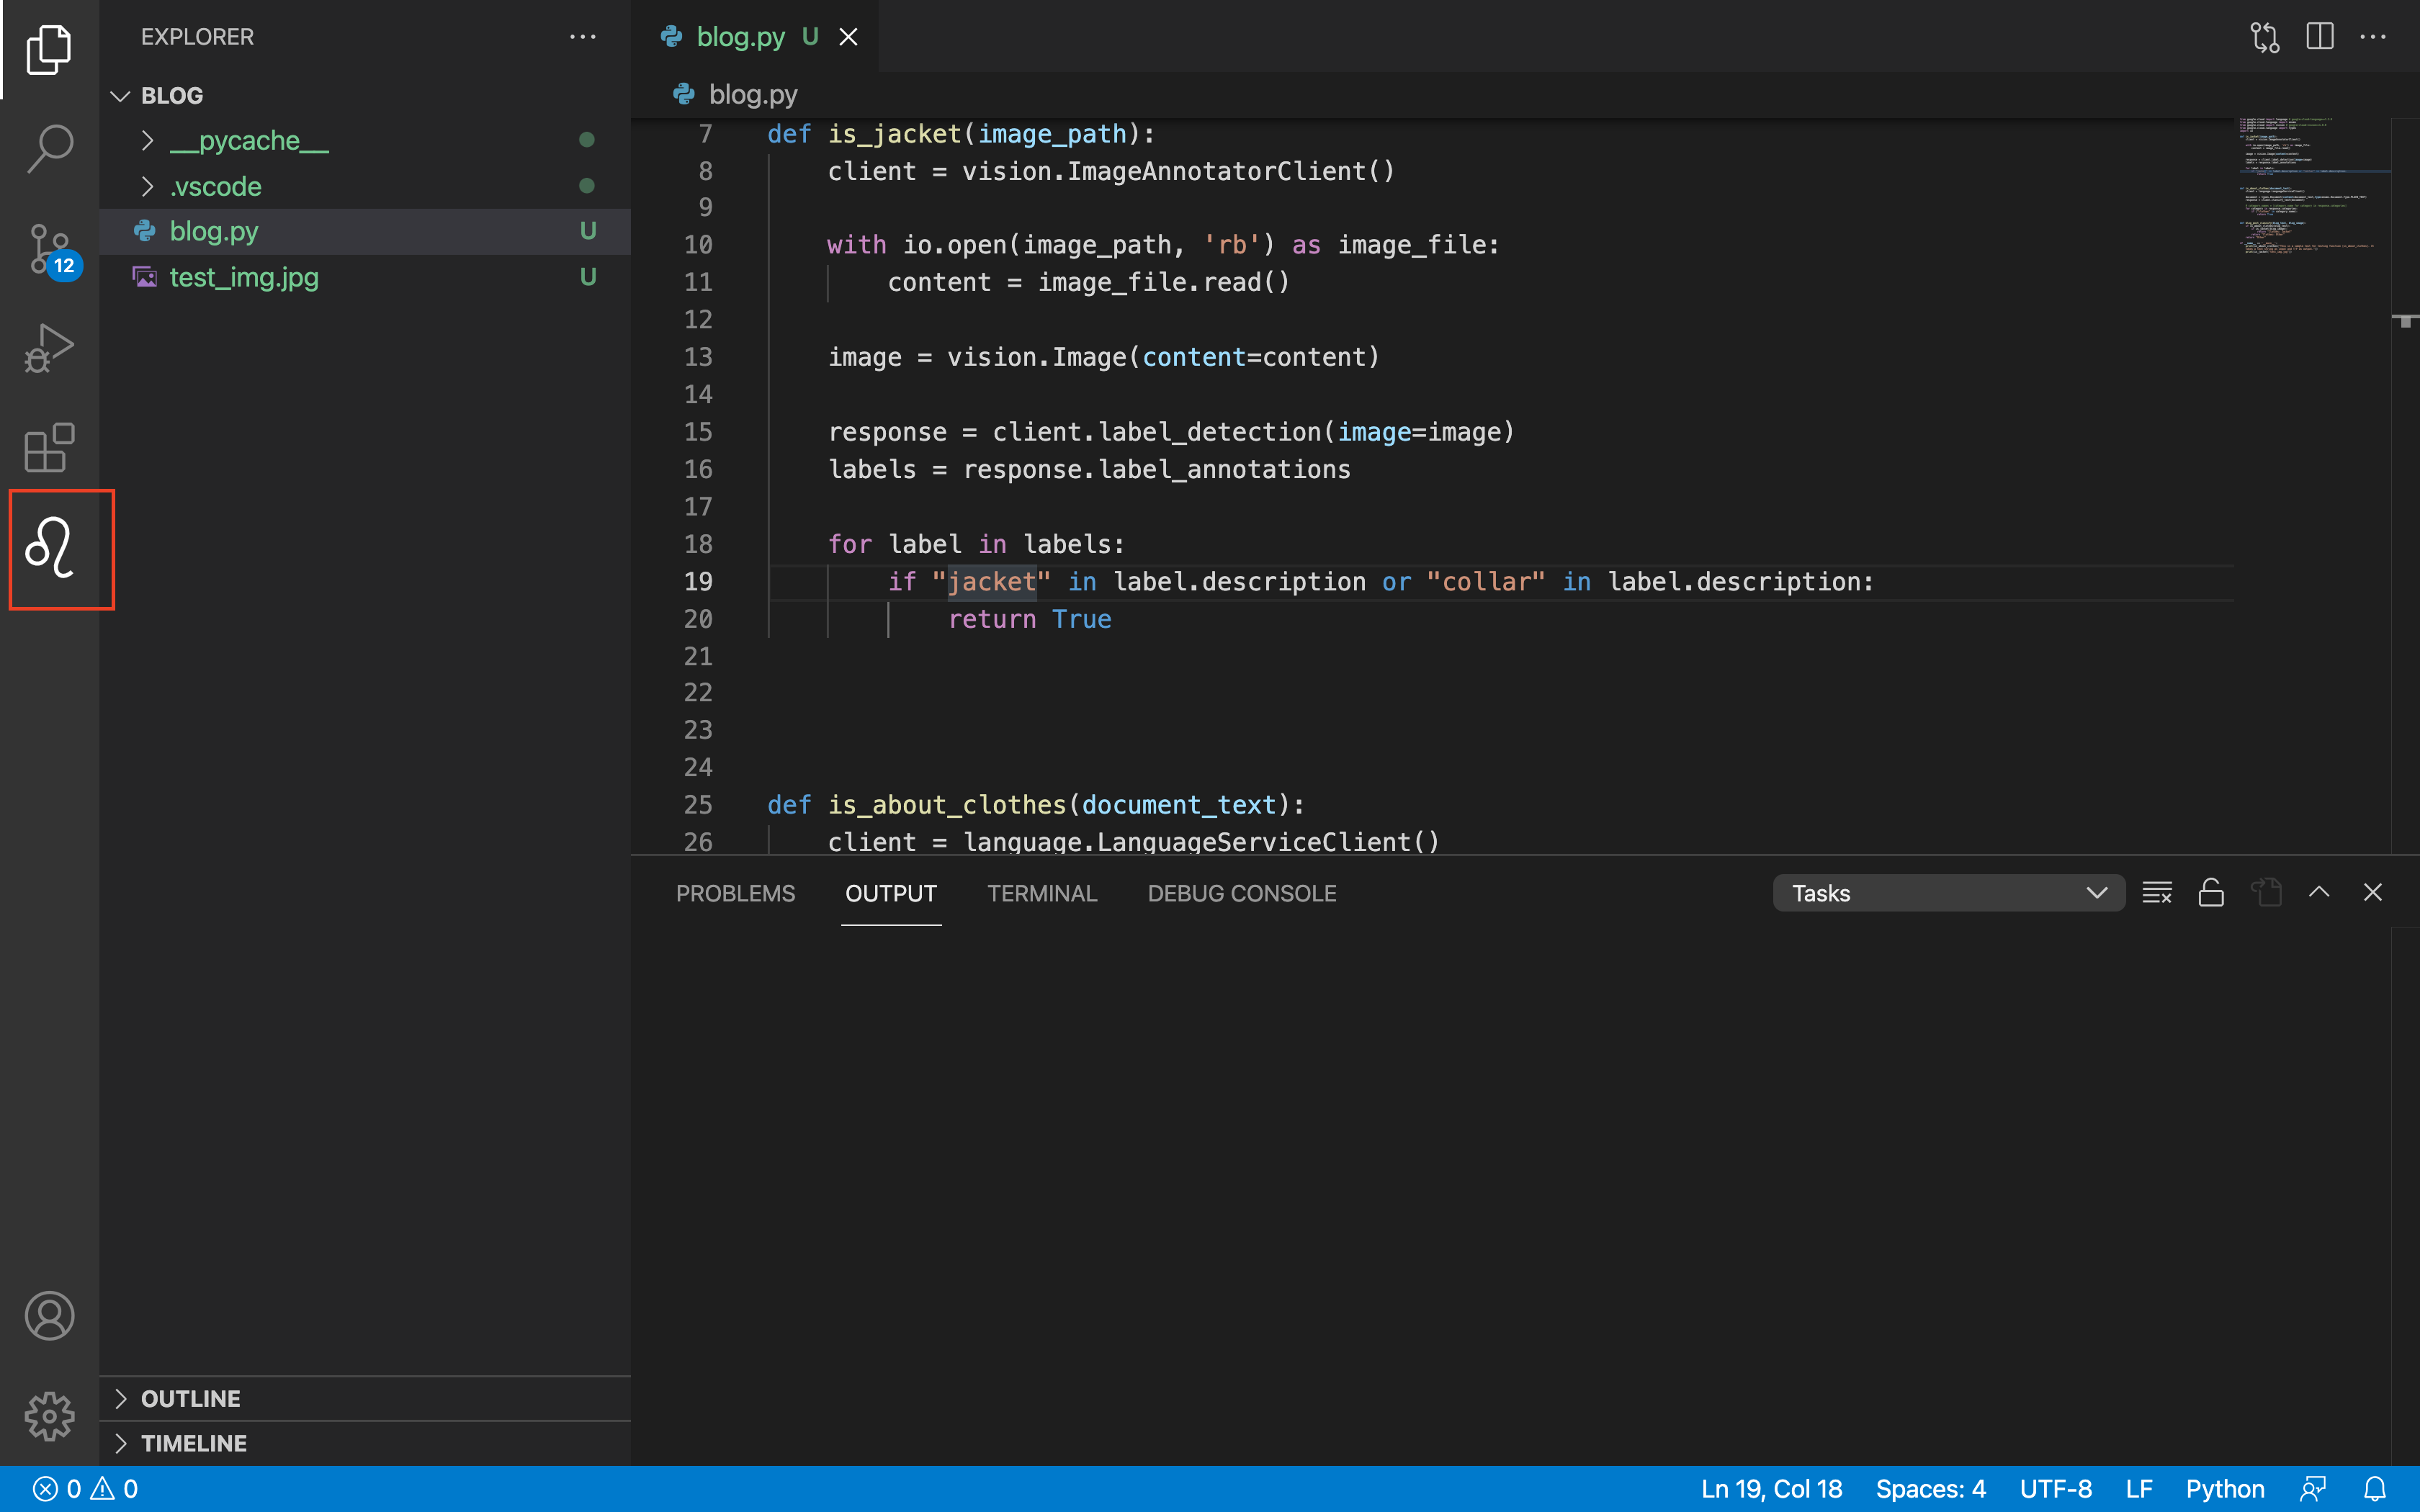
- Click on the plugin icon on the left side of your screen to reveal the plugin window. It may take several seconds.
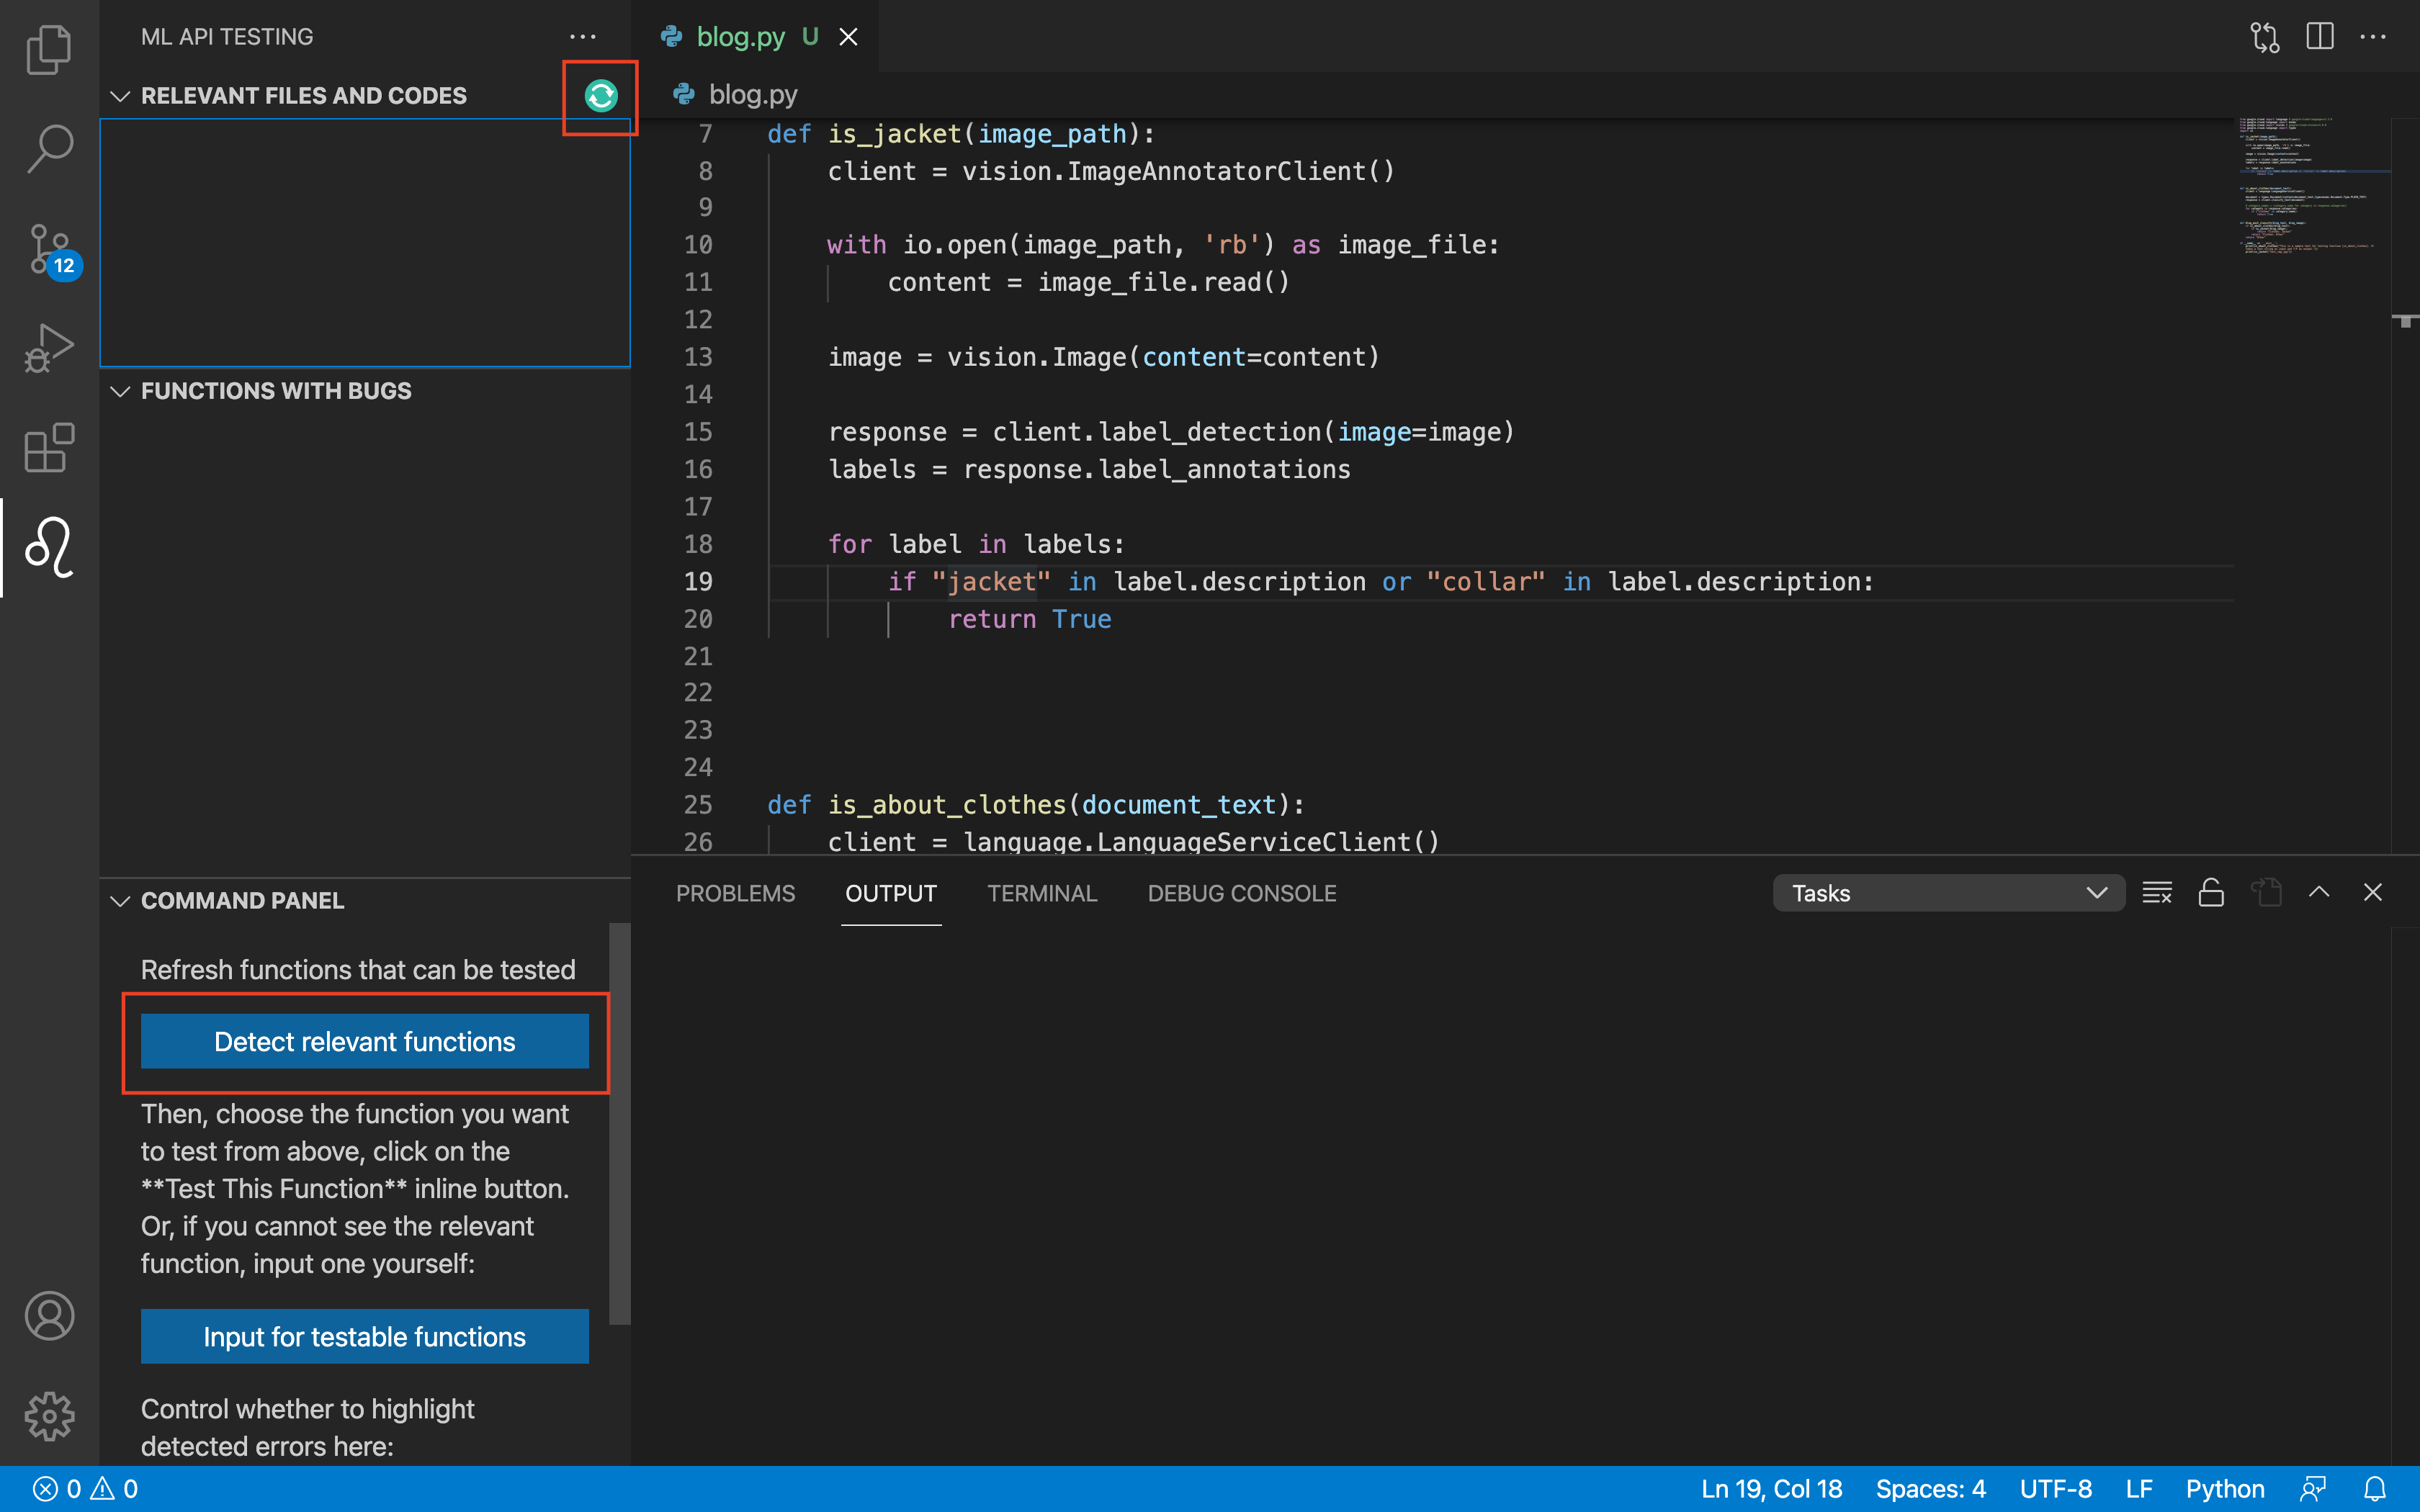
- Next, click on the refresh button in the upper right hand corner of the plugin window, or the "Detect Relevant Functions" button in the bottom third of the plugin window, in order to find functions that can be tested by our plugin.
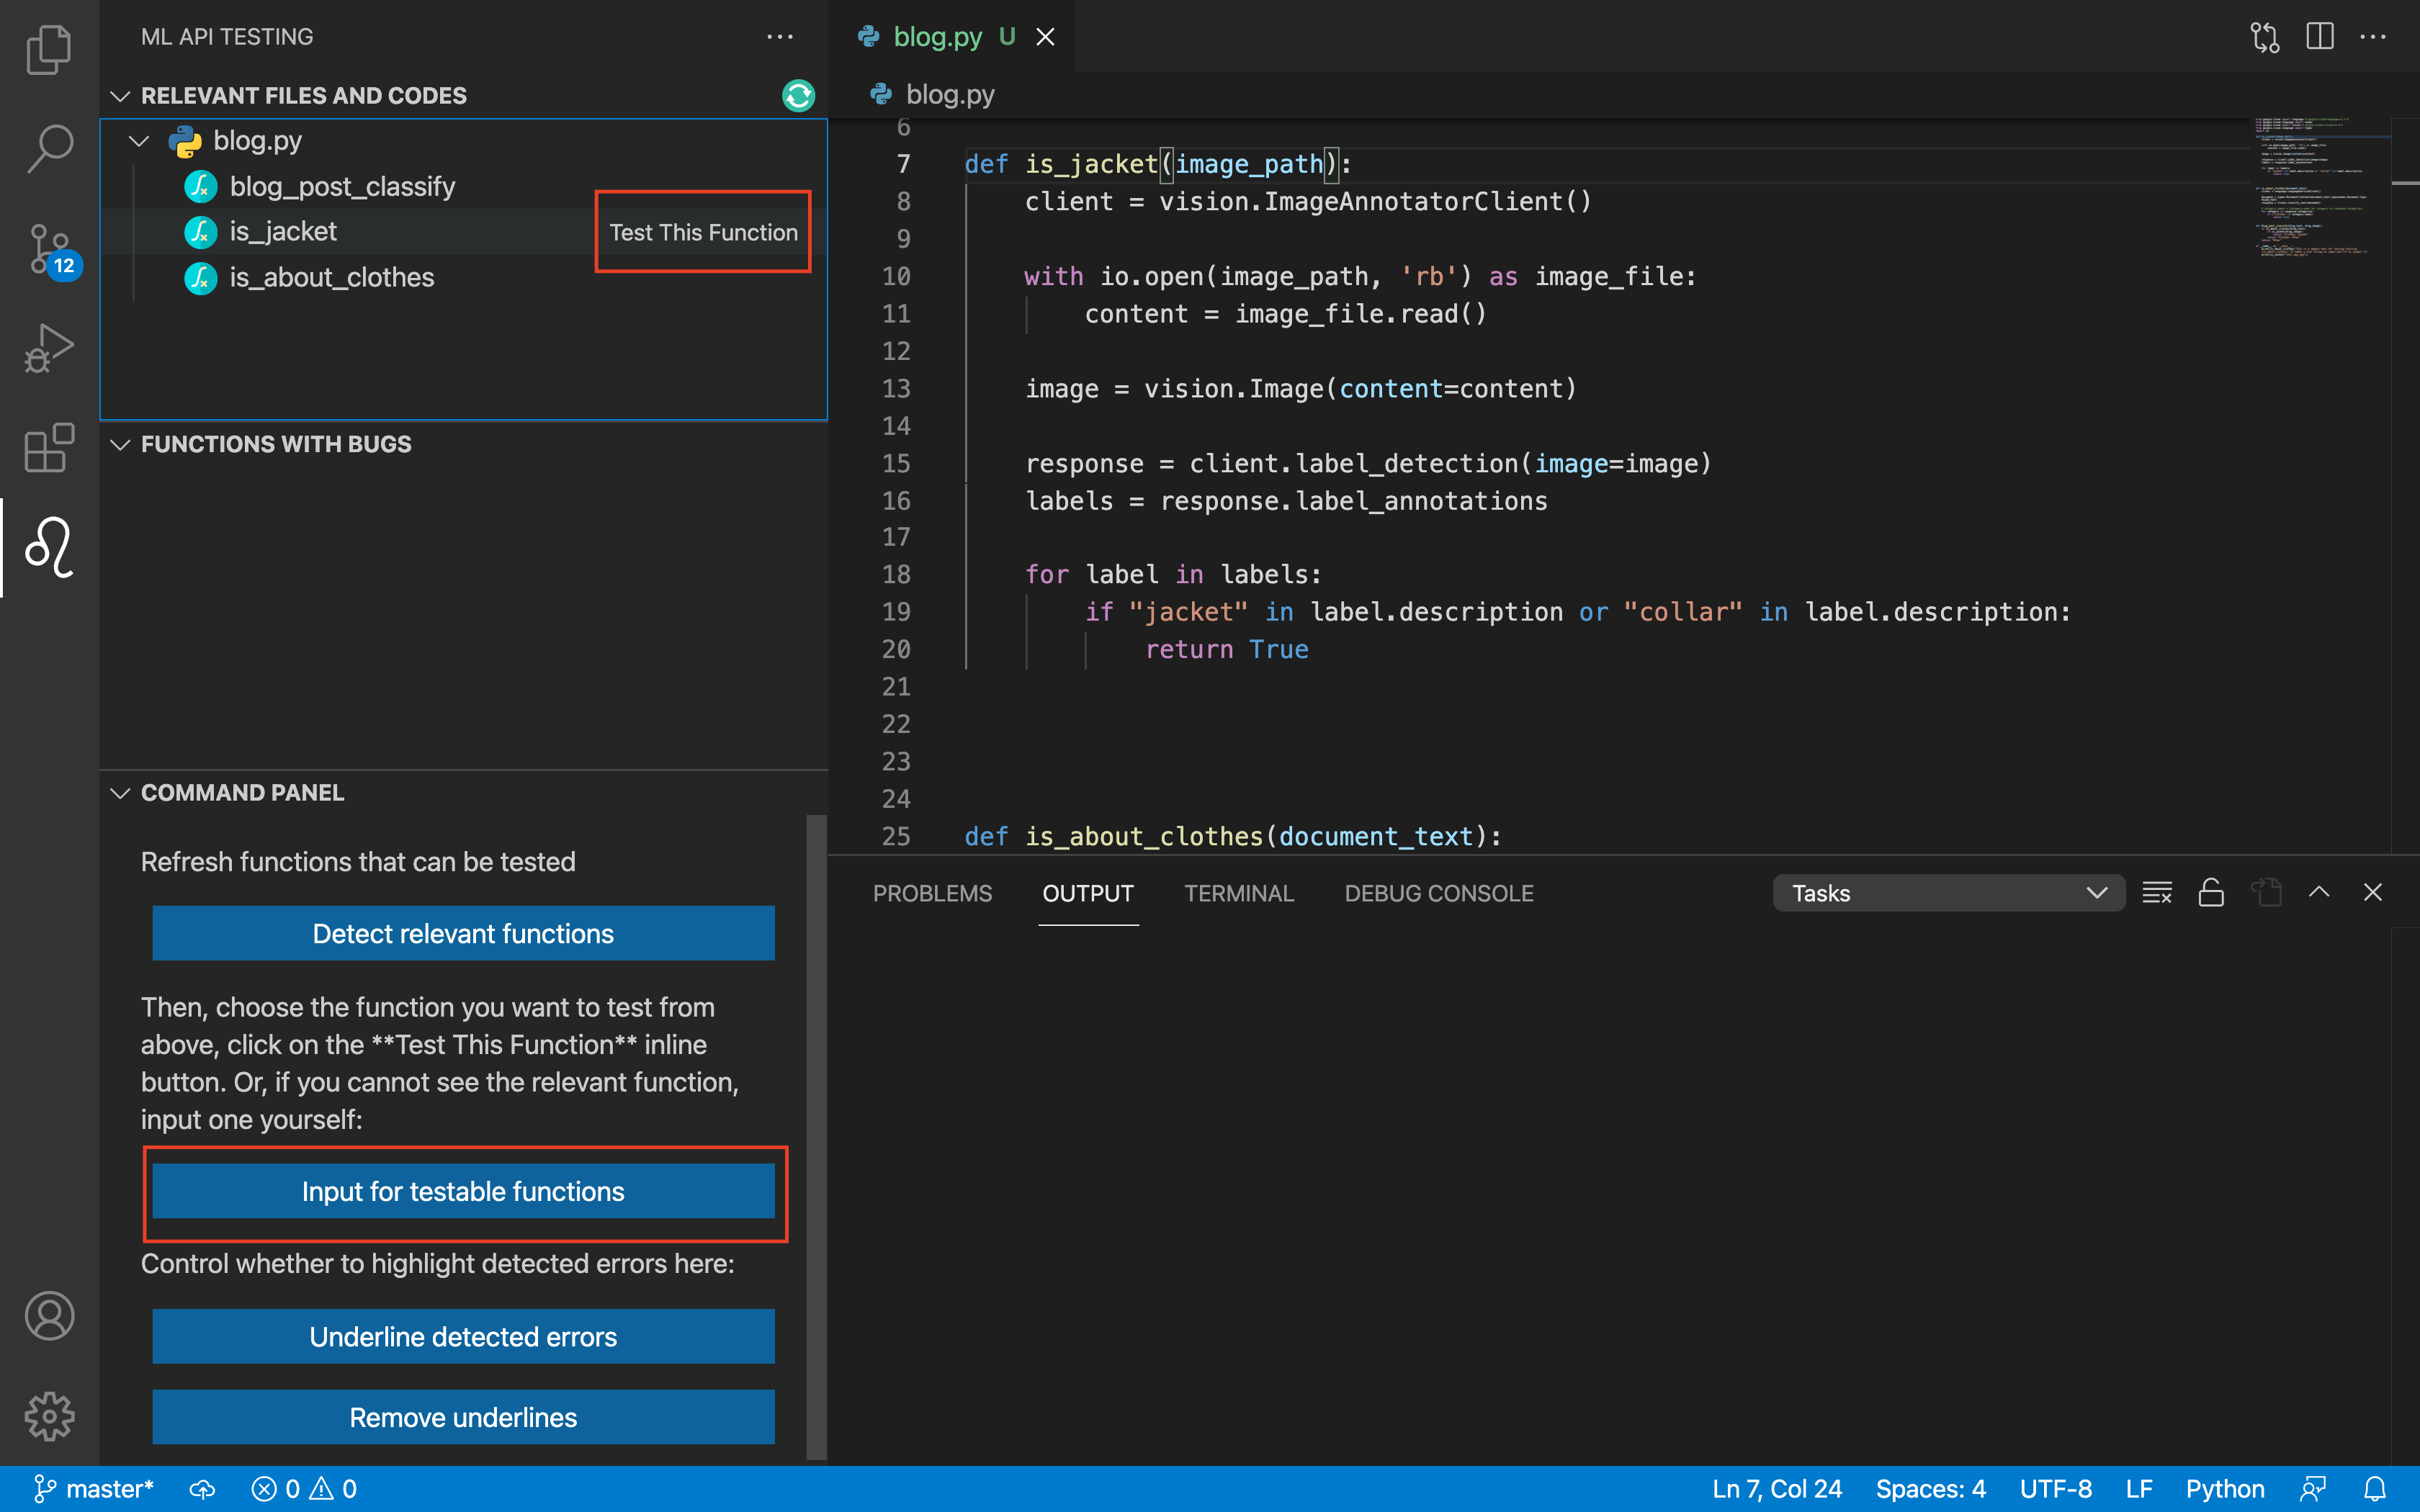
- Next, click on the function you want to test and click on the button "Test This Function" located to the right of the function name. You can also input information for a function not shown in the plugin window by clicking on the "Input for testable functions" button.
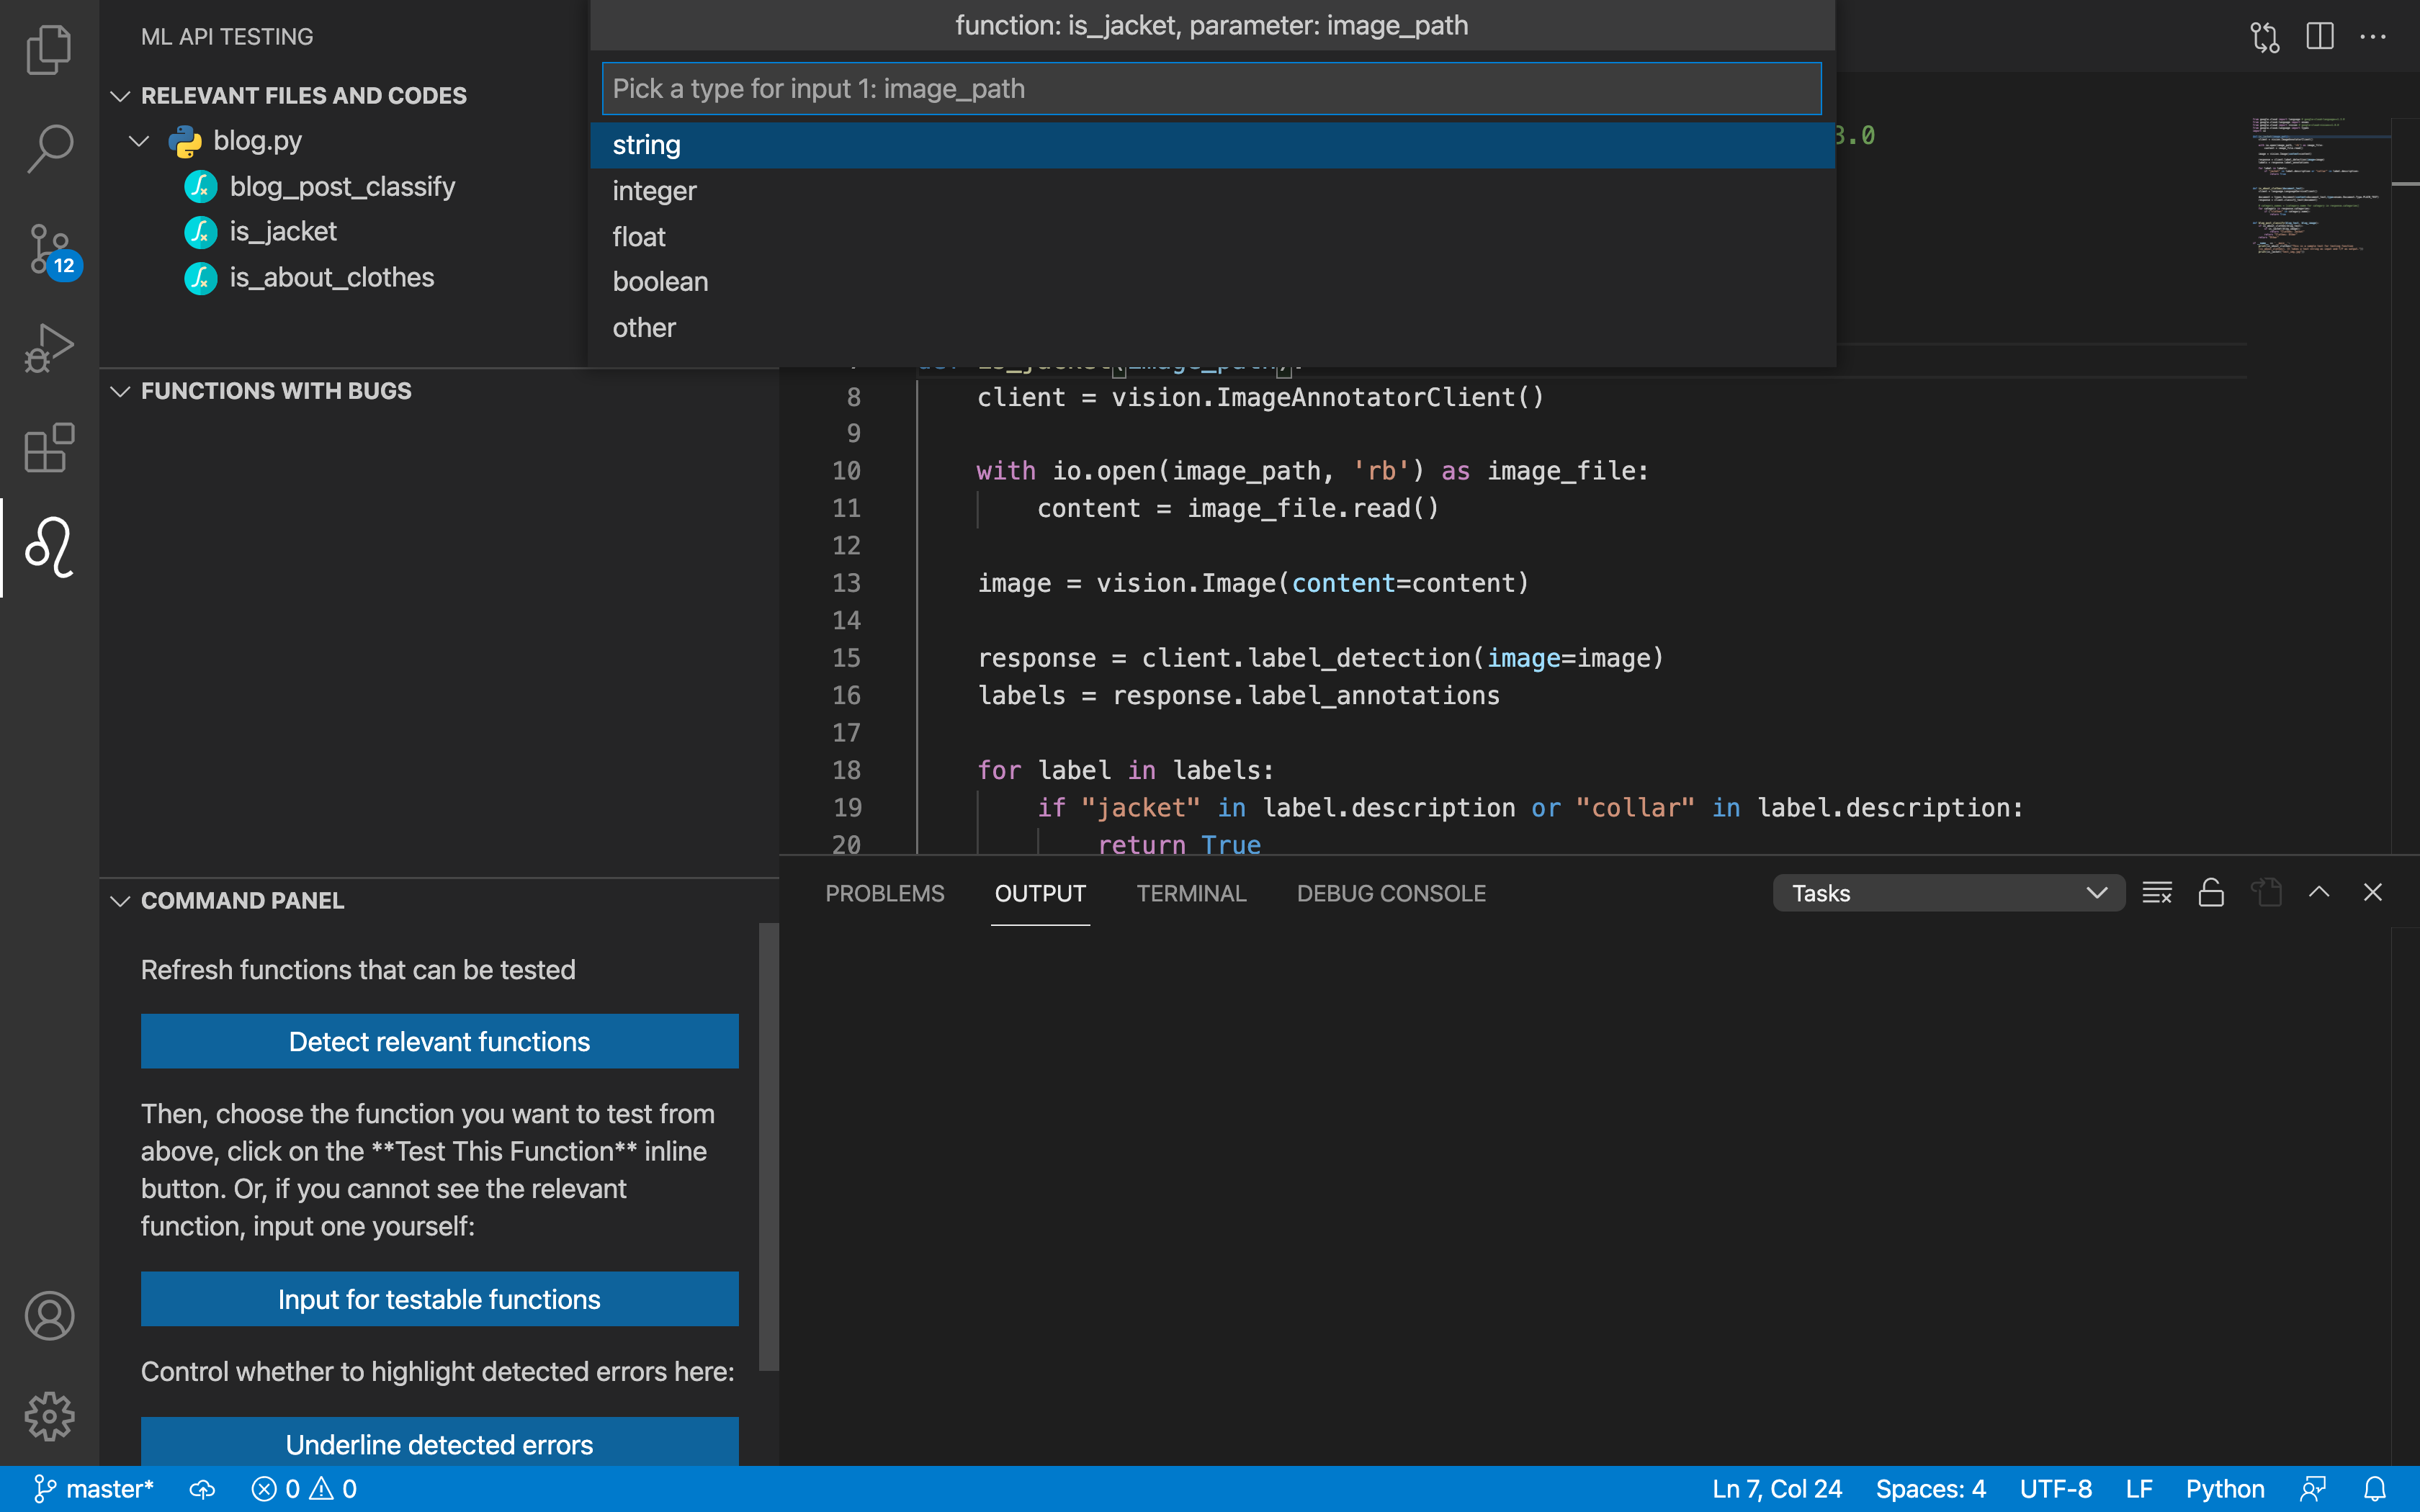
- Next, for each of the selected function's parameters, fill out what type the parameter is and whether it is used in a Machine Learning Cloud API.
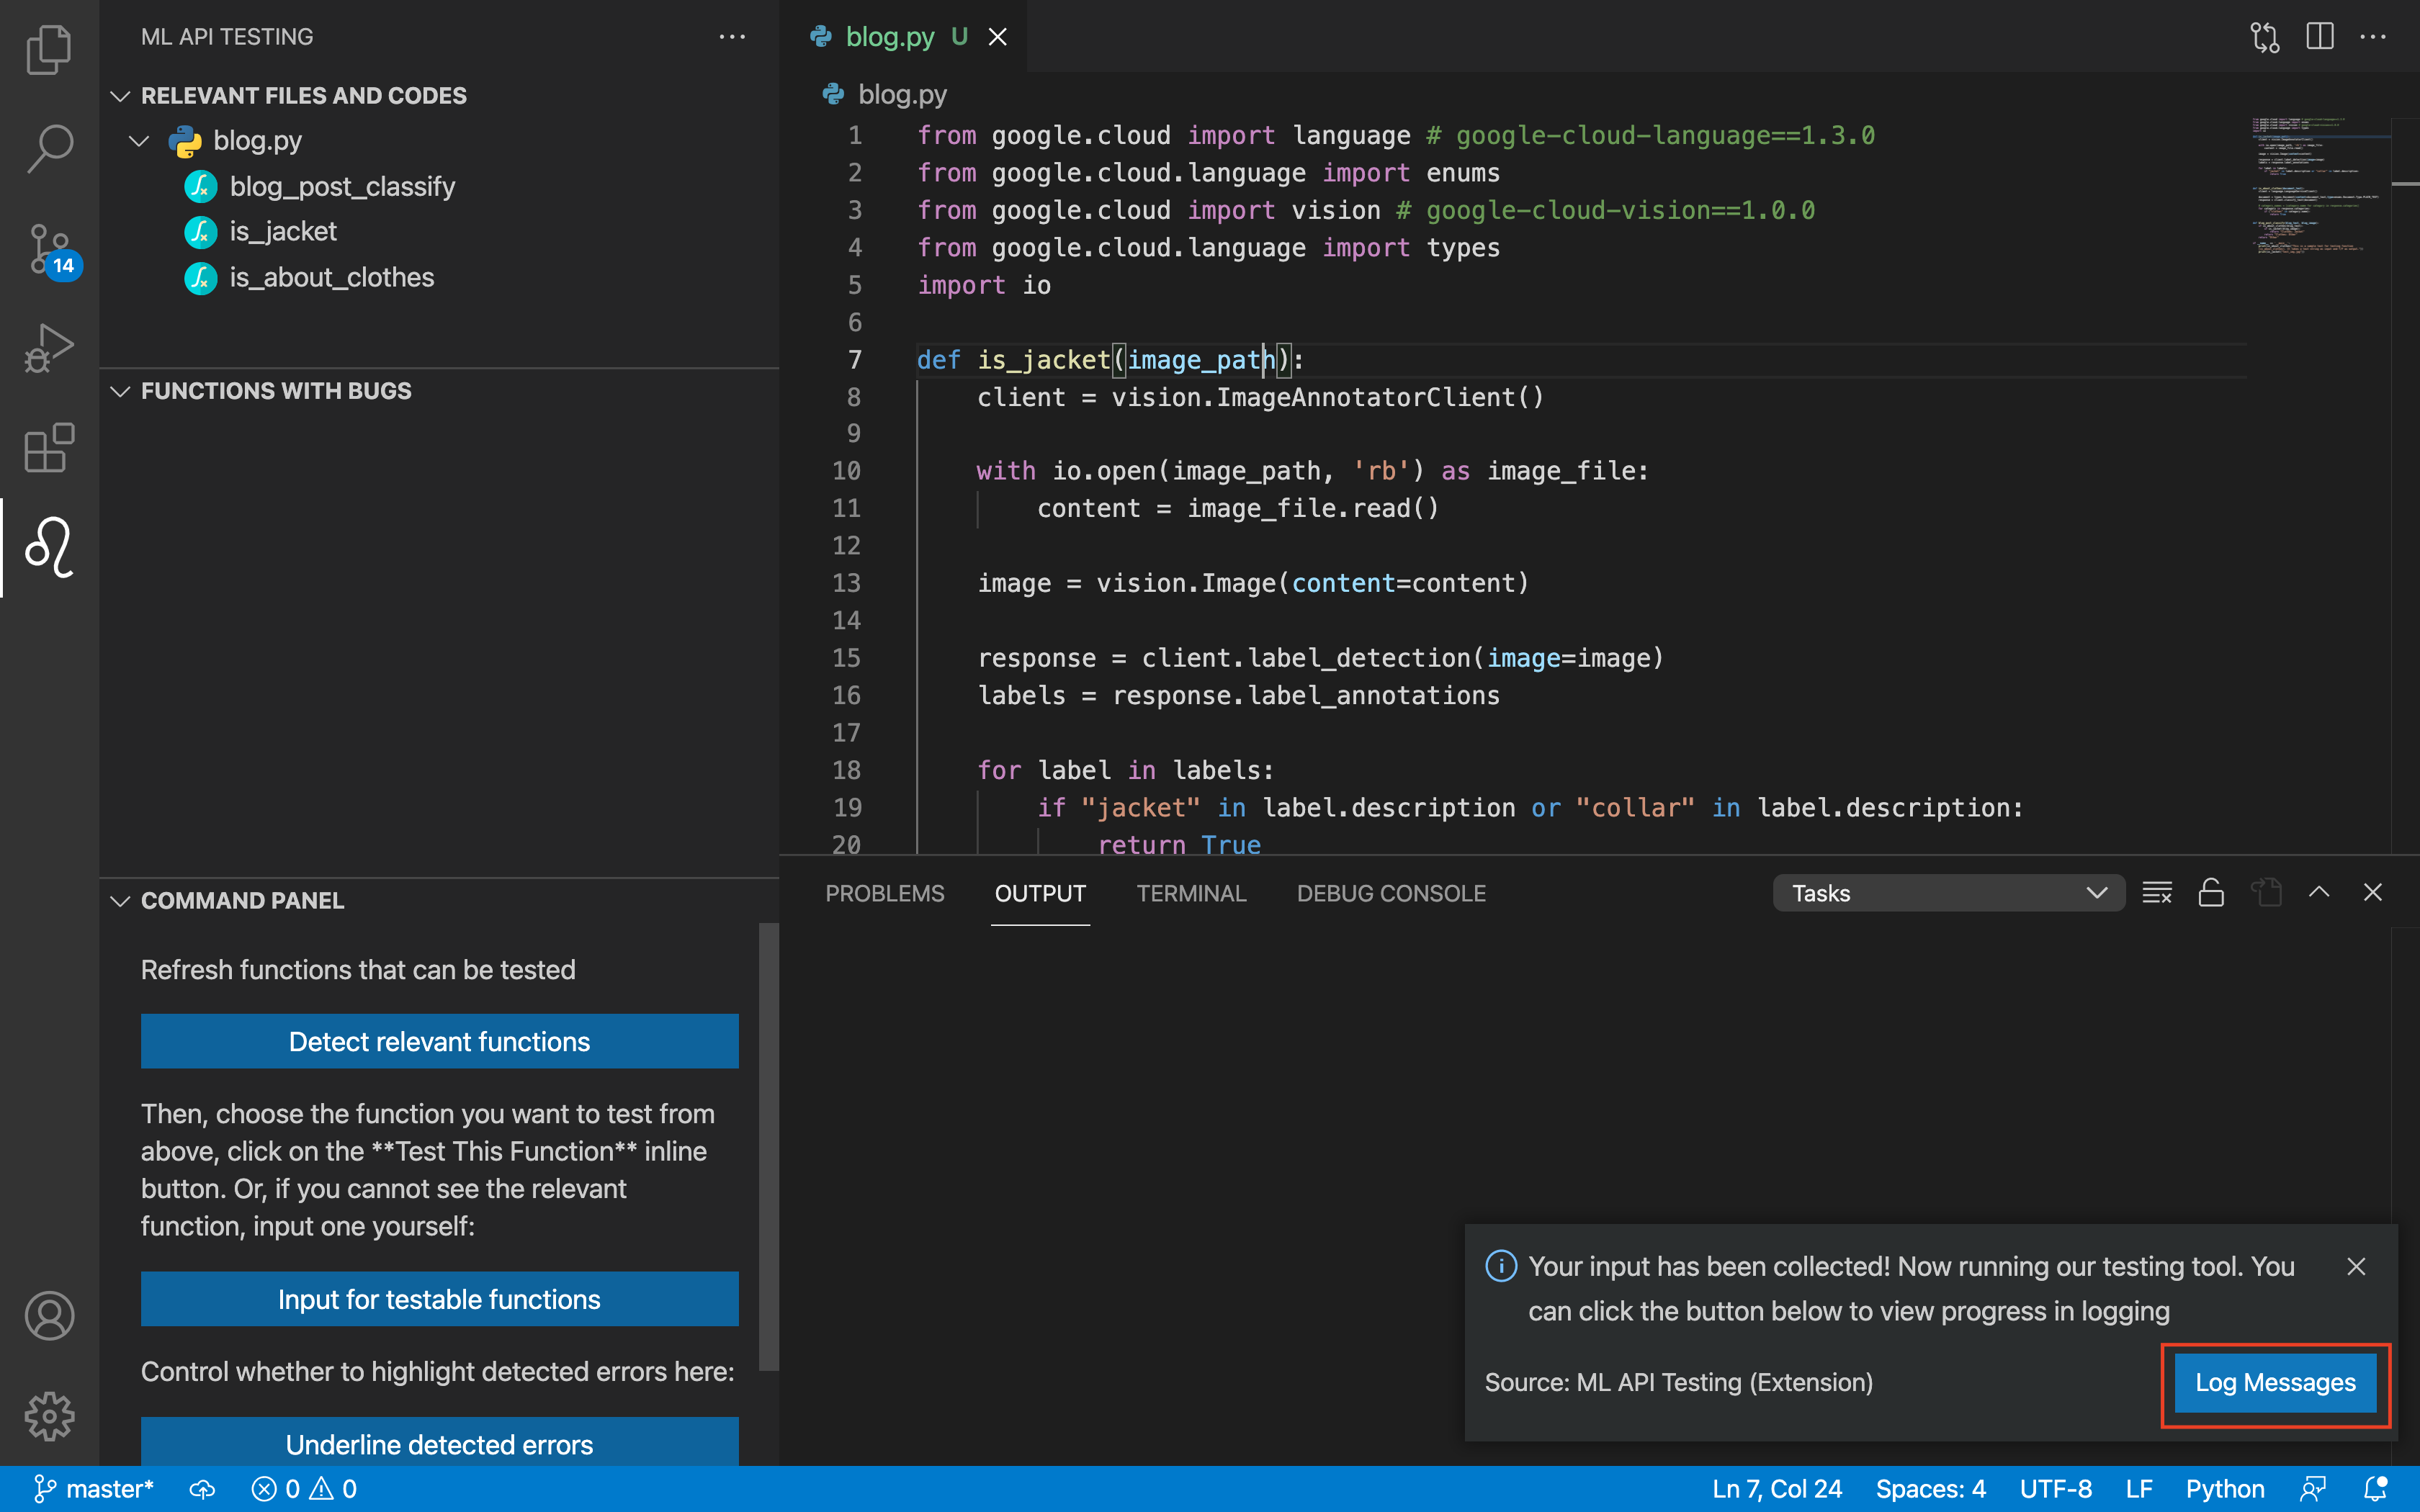
- Once the types have been inputted you will see a pop-up window where you can click the "Log Messages" button. Clicking this button will allow you to see the progress of our tool while it runs. Depend on the network and number of test cases, it may take several minutes to execute.
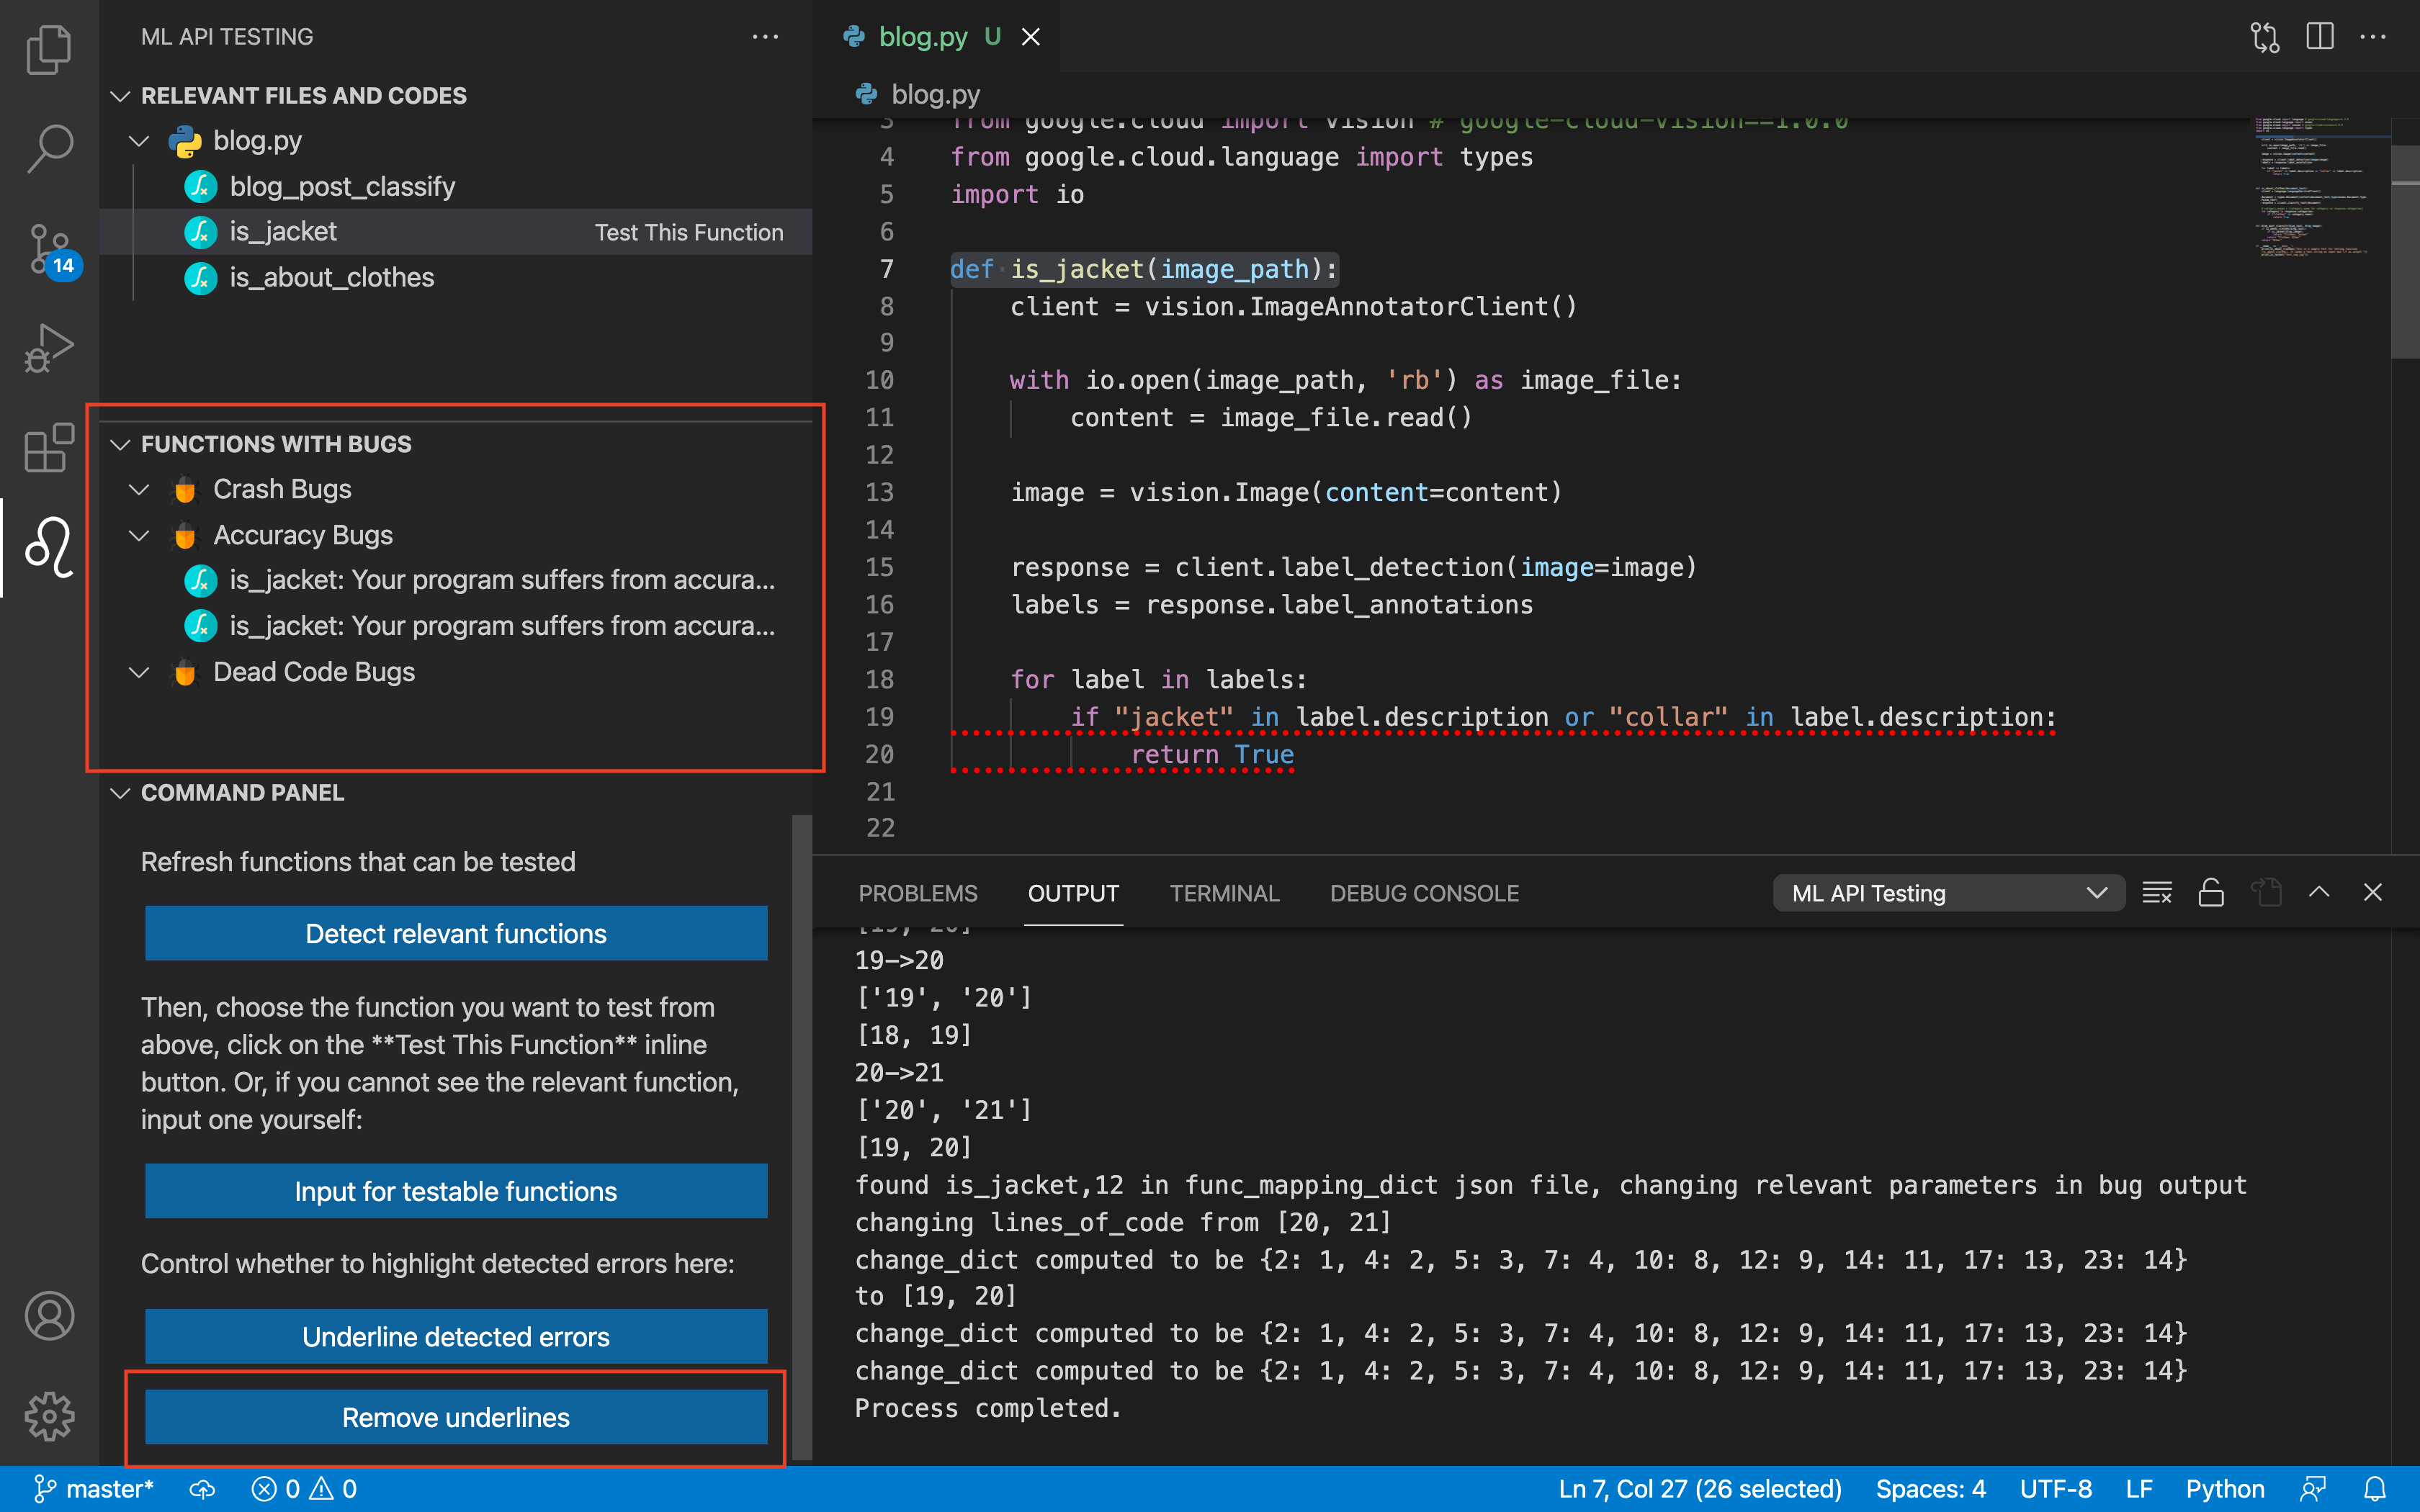
- Congrats! Right under the view for the testable functions you will see information about any bugs or inefficiencies your selected function has. You will also see the lines of code with bugs underlined for you! If you want to remove the underlines, click the "Remove underlines" button.
GIF demo
