| f534bf13-55d4-45a9-8f3c-c92fe64d6131 |
Financials.ReadWrite.All |
Allows the app to read and write financials data on your behalf. |
| ff91d191-45a0-43fd-b837-bd682c4a0b0f |
EAS.AccessAsUser.All |
Allows the app full access to your mailboxes on your behalf. |
| 7f36b48e-542f-4d3b-9bcb-8406f0ab9fdb |
Bookings.Manage.All |
Allows an app to read, write and manage bookings appointments, businesses, customers, services, and staff on your behalf. |
| 948eb538-f19d-4ec5-9ccc-f059e1ea4c72 |
Bookings.ReadWrite.All |
Allows an app to read and write Bookings appointments, businesses, customers, services, and staff on your behalf. Does not allow create, delete and publish of booking businesses. |
| 02a5a114-36a6-46ff-a102-954d89d9ab02 |
BookingsAppointment.ReadWrite.All |
Allows an app to read and write bookings appointments and customers, and additionally allows read businesses information, services, and staff on your behalf. |
| 33b1df99-4b29-4548-9339-7a7b83eaeebc |
Bookings.Read.All |
Allows an app to read bookings appointments, businesses, customers, services, and staff on your behalf. |
| 43781733-b5a7-4d1b-98f4-e8edff23e1a9 |
IdentityProvider.Read.All |
Allows the app to read your organization’s identity (authentication) providers’ properties on your behalf. |
| f13ce604-1677-429f-90bd-8a10b9f01325 |
IdentityProvider.ReadWrite.All |
Allows the app to read and write your organization’s identity (authentication) providers’ properties on your behalf. |
| 5a54b8b3-347c-476d-8f8e-42d5c7424d29 |
Sites.FullControl.All |
Allow the application to have full control of all site collections on your behalf. |
| 65e50fdc-43b7-4915-933e-e8138f11f40a |
Sites.Manage.All |
Allow the application to create or delete document libraries and lists in all site collections on your behalf. |
| ba47897c-39ec-4d83-8086-ee8256fa737d |
People.Read |
Allows the app to read a list of people in the order that's most relevant to you. This includes your local contacts, your contacts from social networking, people listed in your organization's directory, and people from recent communications. |
| 2219042f-cab5-40cc-b0d2-16b1540b4c5f |
Tasks.ReadWrite |
Allows the app to create, read, update and delete tasks assigned to you and plans (and tasks in them) shared with or owned by you. |
| f6a3db3e-f7e8-4ed2-a414-557c8c9830be |
Member.Read.Hidden |
Allows the app to read the memberships of hidden groups or administrative units on your behalf, for those hidden groups or adminstrative units that you have access to. |
| 8f6a01e7-0391-4ee5-aa22-a3af122cef27 |
IdentityRiskEvent.Read.All |
Allows the app to read identity risk event information for all users in your organization on behalf of the signed-in user. |
| 14dad69e-099b-42c9-810b-d002981feec1 |
profile |
Allows the app to see your basic profile (name, picture, user name) |
| 64a6cdd6-aab1-4aaf-94b8-3cc8405e90d0 |
email |
Allows the app to read your primary email address |
| f45671fb-e0fe-4b4b-be20-3d3ce43f1bcb |
Tasks.Read |
Allows the app to read your tasks |
| 7427e0e9-2fba-42fe-b0c0-848c9e6a8182 |
offline_access |
Allows the app to see and update your data, even when you are not currently using the app. |
| 37f7f235-527c-4136-accd-4a02d197296e |
openid |
Allows you to sign in to the app with your work or school account and allows the app to read your basic profile information. |
| 205e70e5-aba6-4c52-a976-6d2d46c48043 |
Sites.Read.All |
Allow the application to read documents and list items in all site collections on your behalf |
| 863451e7-0667-486c-a5d6-d135439485f0 |
Files.ReadWrite.All |
Allows the app to read, create, update and delete all files that you can access. |
| df85f4d6-205c-4ac5-a5ea-6bf408dba283 |
Files.Read.All |
Allows the app to read all files you can access. |
| 5c28f0bf-8a70-41f1-8ab2-9032436ddb65 |
Files.ReadWrite |
Allows the app to read, create, update, and delete your files. |
| 10465720-29dd-4523-a11a-6a75c743c9d9 |
Files.Read |
Allows the app to read your files. |
| d56682ec-c09e-4743-aaf4-1a3aac4caa21 |
Contacts.ReadWrite |
Allows the app to read, update, create and delete contacts in your contact folders. |
| ff74d97f-43af-4b68-9f2a-b77ee6968c5d |
Contacts.Read |
Allows the app to read contacts in your contact folders. |
| 1ec239c2-d7c9-4623-a91a-a9775856bb36 |
Calendars.ReadWrite |
Allows the app to read, update, create and delete events in your calendars. |
| 465a38f9-76ea-45b9-9f34-9e8b0d4b0b42 |
Calendars.Read |
Allows the app to read events in your calendars. |
| e383f46e-2787-4529-855e-0e479a3ffac0 |
Mail.Send |
Allows the app to send mail as you. |
| 024d486e-b451-40bb-833d-3e66d98c5c73 |
Mail.ReadWrite |
Allows the app to read, update, create and delete email in your mailbox. Does not include permission to send mail. |
| 570282fd-fa5c-430d-a7fd-fc8dc98a9dca |
Mail.Read |
Allows the app to read email in your mailbox. |
| 0e263e50-5827-48a4-b97c-d940288653c7 |
Directory.AccessAsUser.All |
Allows the app to have the same access to information in your work or school directory as you do. |
| c5366453-9fb0-48a5-a156-24f0c49a4b84 |
Directory.ReadWrite.All |
Allows the app to read and write data in your organization's directory, such as other users, groups. It does not allow the app to delete users or groups, or reset user passwords. |
| 06da0dbc-49e2-44d2-8312-53f166ab848a |
Directory.Read.All |
Allows the app to read data in your organization's directory. |
| 4e46008b-f24c-477d-8fff-7bb4ec7aafe0 |
Group.ReadWrite.All |
Allows the app to create groups and read all group properties and memberships on your behalf. Additionally allows the app to manage your groups and to update group content for groups you are a member of. |
| 5f8c59db-677d-491f-a6b8-5f174b11ec1d |
Group.Read.All |
Allows the app to list groups, and to read their properties and all group memberships on your behalf. Also allows the app to read calendar, conversations, files, and other group content for all groups you can access. |
| 204e0828-b5ca-4ad8-b9f3-f32a958e7cc4 |
User.ReadWrite.All |
Allows the app to read and write the full set of profile properties, reports, and managers of other users in your organization, on your behalf. |
| a154be20-db9c-4678-8ab7-66f6cc099a59 |
User.Read.All |
Allows the app to read the full set of profile properties, reports, and managers of other users in your organization, on your behalf. |
| b340eb25-3456-403f-be2f-af7a0d370277 |
User.ReadBasic.All |
Allows the app to read a basic set of profile properties of other users in your organization on your behalf. Includes display name, first and last name, email address and photo. |
| b4e74841-8e56-480b-be8b-910348b18b4c |
User.ReadWrite |
Allows the app to read your profile, and discover your group membership, reports and manager. It also allows the app to update your profile information on your behalf. |
| e1fe6dd8-ba31-4d61-89e7-88639da4683d |
User.Read |
Allows you to sign in to the app with your organizational account and let the app read your profile. It also allows the app to read basic company information. |
| 7b9103a5-4610-446b-9670-80643382c1fa |
Mail.Read.Shared |
Allows the app to read mail you can access, including shared mail. |
| 5df07973-7d5d-46ed-9847-1271055cbd51 |
Mail.ReadWrite.Shared |
Allows the app to read, update, create, and delete mail you have permission to access, including your own and shared mail. Does not allow the app to send mail on your behalf. |
| a367ab51-6b49-43bf-a716-a1fb06d2a174 |
Mail.Send.Shared |
Allows the app to send mail as you or on-behalf of someone else. |
| 2b9c4092-424d-4249-948d-b43879977640 |
Calendars.Read.Shared |
Allows the app to read events in all calendars that you can access, including delegate and shared calendars. |
| 12466101-c9b8-439a-8589-dd09ee67e8e9 |
Calendars.ReadWrite.Shared |
Allows the app to read, update, create and delete events in all calendars in your organization you have permissions to access. This includes delegate and shared calendars. |
| 242b9d9e-ed24-4d09-9a52-f43769beb9d4 |
Contacts.Read.Shared |
Allows the app to read contacts you have permissions to access, including your own and shared contacts. |
| afb6c84b-06be-49af-80bb-8f3f77004eab |
Contacts.ReadWrite.Shared |
Allows the app to read, update, create, and delete contacts you have permissions to access, including your own and shared contacts. |
| 88d21fd4-8e5a-4c32-b5e2-4a1c95f34f72 |
Tasks.Read.Shared |
Allows the app to read tasks you have permissions to access, including your own and shared tasks. |
| c5ddf11b-c114-4886-8558-8a4e557cd52b |
Tasks.ReadWrite.Shared |
Allows the app to read, update, create, and delete tasks you have permissions to access, including your own and shared tasks. |
| 89fe6a52-be36-487e-b7d8-d061c450a026 |
Sites.ReadWrite.All |
Allow the application to edit or delete documents and list items in all site collections on your behalf. |
| 02e97553-ed7b-43d0-ab3c-f8bace0d040c |
Reports.Read.All |
Allows an app to read all service usage reports on your behalf. Services that provide usage reports include Office 365 and Azure Active Directory. |
| 8019c312-3263-48e6-825e-2b833497195b |
Files.ReadWrite.AppFolder |
(Preview) Allows the app to read, create, update and delete files in the application's folder. |
| 17dde5bd-8c17-420f-a486-969730c1b827 |
Files.ReadWrite.Selected |
(Preview) Allows the app to read and write files that you select. After you select a file, the app has access to the file for several hours. |
| 5447fe39-cb82-4c1a-b977-520e67e724eb |
Files.Read.Selected |
(Preview) Allows the app to read files that you select. After you select a file, the app has access to the file for several hours. |
| f1493658-876a-4c87-8fa7-edb559b3476a |
DeviceManagementConfiguration.Read.All |
Allows the app to read properties of Microsoft Intune-managed device configuration and device compliance policies and their assignment to groups. |
| 0883f392-0a7a-443d-8c76-16a6d39c7b63 |
DeviceManagementConfiguration.ReadWrite.All |
Allows the app to read and write properties of Microsoft Intune-managed device configuration and device compliance policies and their assignment to groups. |
| 4edf5f54-4666-44af-9de9-0144fb4b6e8c |
DeviceManagementApps.Read.All |
Allows the app to read the properties, group assignments and status of apps, app configurations and app protection policies managed by Microsoft Intune. |
| 7b3f05d5-f68c-4b8d-8c59-a2ecd12f24af |
DeviceManagementApps.ReadWrite.All |
Allows the app to read and write the properties, group assignments and status of apps, app configurations and app protection policies managed by Microsoft Intune. |
| 49f0cc30-024c-4dfd-ab3e-82e137ee5431 |
DeviceManagementRBAC.Read.All |
Allows the app to read the properties relating to the Microsoft Intune Role-Based Access Control (RBAC) settings. |
| 0c5e8a55-87a6-4556-93ab-adc52c4d862d |
DeviceManagementRBAC.ReadWrite.All |
Allows the app to read and write the properties relating to the Microsoft Intune Role-Based Access Control (RBAC) settings. |
| 314874da-47d6-4978-88dc-cf0d37f0bb82 |
DeviceManagementManagedDevices.Read.All |
Allows the app to read the properties of devices managed by Microsoft Intune. |
| 44642bfe-8385-4adc-8fc6-fe3cb2c375c3 |
DeviceManagementManagedDevices.ReadWrite.All |
Allows the app to read and write the properties of devices managed by Microsoft Intune. Does not allow high impact operations such as remote wipe and password reset on the device’s owner. |
| 3404d2bf-2b13-457e-a330-c24615765193 |
DeviceManagementManagedDevices.PrivilegedOperations.All |
Allows the app to perform remote high impact actions such as wiping the device or resetting the passcode on devices managed by Microsoft Intune. |
| 87f447af-9fa4-4c32-9dfa-4a57a73d18ce |
MailboxSettings.Read |
Allows the app to read your mailbox settings. |
| 63dd7cd9-b489-4adf-a28c-ac38b9a0f962 |
User.Invite.All |
Allows the app to invite guest users to the organization, on your behalf. |
| 9d822255-d64d-4b7a-afdb-833b9a97ed02 |
Notes.Create |
Allows the app to view the titles of your OneNote notebooks and sections and to create new pages, notebooks, and sections on your behalf. |
| ed68249d-017c-4df5-9113-e684c7f8760b |
Notes.ReadWrite.CreatedByApp |
This permission no longer has any effect. You can safely consent to it. No additional privileges will be granted to the app. |
| 371361e4-b9e2-4a3f-8315-2a301a3b0a3d |
Notes.Read |
Allows the app to read OneNote notebooks on your behalf. |
| 615e26af-c38a-4150-ae3e-c3b0d4cb1d6a |
Notes.ReadWrite |
Allows the app to read, share, and modify OneNote notebooks on your behalf. |
| dfabfca6-ee36-4db2-8208-7a28381419b3 |
Notes.Read.All |
Allows the app to read all the OneNote notebooks that you have access to. |
| 64ac0503-b4fa-45d9-b544-71a463f05da0 |
Notes.ReadWrite.All |
Allows the app to read, share, and modify all the OneNote notebooks that you have access to. |
| 11d4cd79-5ba5-460f-803f-e22c8ab85ccd |
Device.Read |
Allows the app to see your list of devices. |
| bac3b9c2-b516-4ef4-bd3b-c2ef73d8d804 |
Device.Command |
Allows the app to launch another app or communicate with another app on a device that you own. |
| 818c620a-27a9-40bd-a6a5-d96f7d610b4b |
MailboxSettings.ReadWrite |
Allows the app to read, update, create, and delete your mailbox settings. |
| 367492fc-594d-4972-a9b5-0d58c622c91c |
UserTimelineActivity.Write.CreatedByApp |
Allows the app to report your app activity information to Microsoft Timeline. |
| 5d186531-d1bf-4f07-8cea-7c42119e1bd9 |
EduRoster.ReadBasic |
Allows the app to view minimal information about both schools and classes in your organization and education-related information about you and other users on your behalf. |
| a4389601-22d9-4096-ac18-36a927199112 |
EduRoster.Read |
Allows the app to view information about schools and classes in your organization and education-related information about you and other users on your behalf. |
| 359e19a6-e3fa-4d7f-bcab-d28ec592b51e |
EduRoster.ReadWrite |
Allows the app to view and modify information about schools and classes in your organization and education-related information about you and other users on your behalf. |
| c0b0103b-c053-4b2e-9973-9f3a544ec9b8 |
EduAssignments.ReadBasic |
Allows the app to view your assignments on your behalf without seeing grades. |
| 2ef770a1-622a-47c4-93ee-28d6adbed3a0 |
EduAssignments.ReadWriteBasic |
Allows the app to view and modify your assignments on your behalf without seeing grades. |
| 091460c9-9c4a-49b2-81ef-1f3d852acce2 |
EduAssignments.Read |
Allows the app to view your assignments on your behalf including grades. |
| 2f233e90-164b-4501-8bce-31af2559a2d3 |
EduAssignments.ReadWrite |
Allows the app to view and modify your assignments on your behalf including grades. |
| 8523895c-6081-45bf-8a5d-f062a2f12c9f |
EduAdministration.Read |
Allows the app to view the state and settings of all Microsoft education apps on your behalf. |
| 63589852-04e3-46b4-bae9-15d5b1050748 |
EduAdministration.ReadWrite |
Allows the app to manage the state and settings of all Microsoft education apps on your behalf. |
| 662ed50a-ac44-4eef-ad86-62eed9be2a29 |
DeviceManagementServiceConfig.ReadWrite.All |
Allows the app to read and write Microsoft Intune service properties including device enrollment and third party service connection configuration. |
| 8696daa5-bce5-4b2e-83f9-51b6defc4e1e |
DeviceManagementServiceConfig.Read.All |
Allows the app to read Microsoft Intune service properties including device enrollment and third party service connection configuration. |
| b89f9189-71a5-4e70-b041-9887f0bc7e4a |
People.Read.All |
Allows the app to read a list of people in the order that is most relevant to you. Allows the app to read a list of people in the order that is most relevant to another user in your organization. These can include local contacts, contacts from social networking, people listed in your organization’s directory, and people from recent communications. |


 over your Azure Active Directory tenant. Make sure to create an application secret and to copy its value for later use.
This will give the task the right of registering applications while not being able to interfere with other apps. Depending on the level of trust between application teams and operation teams within your organization, one
may also grant the Read and Write directory data permission, which is required to use the User & Group assignment. Unfortunately, this cannot be restricted to your apps only. Therefore, if the identity & access management team wants
to remain fully in control and has a low risk appetite, you should not grant this permission. The counterpart is that the second task (user and group assignment) will not work without this.
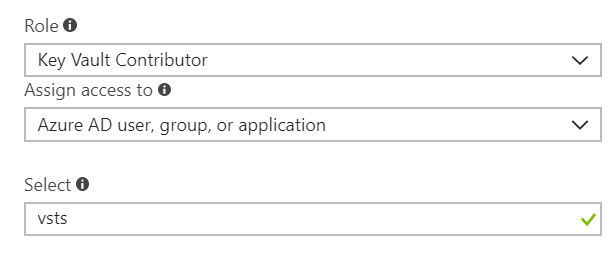
 In the select textbox, you should enter the application identifier of the app you created.
 You can click on the link labelled Verify connection to see if everything is setup correctly.
 Note that I blurred some values for privacy reasons but here is what these variables stand for:
 and the web client will be granted the following permissions:
 With 1 delegate permission over Azure Active Directory as well as 1 delegate + 1 application permission over the custom API.
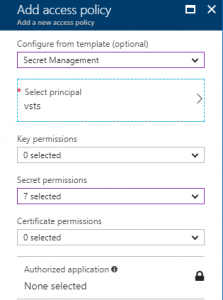
The application identifier of the webapi as well as the application identifier+secret of the web client will be pushed to Key Vault as shown below:


