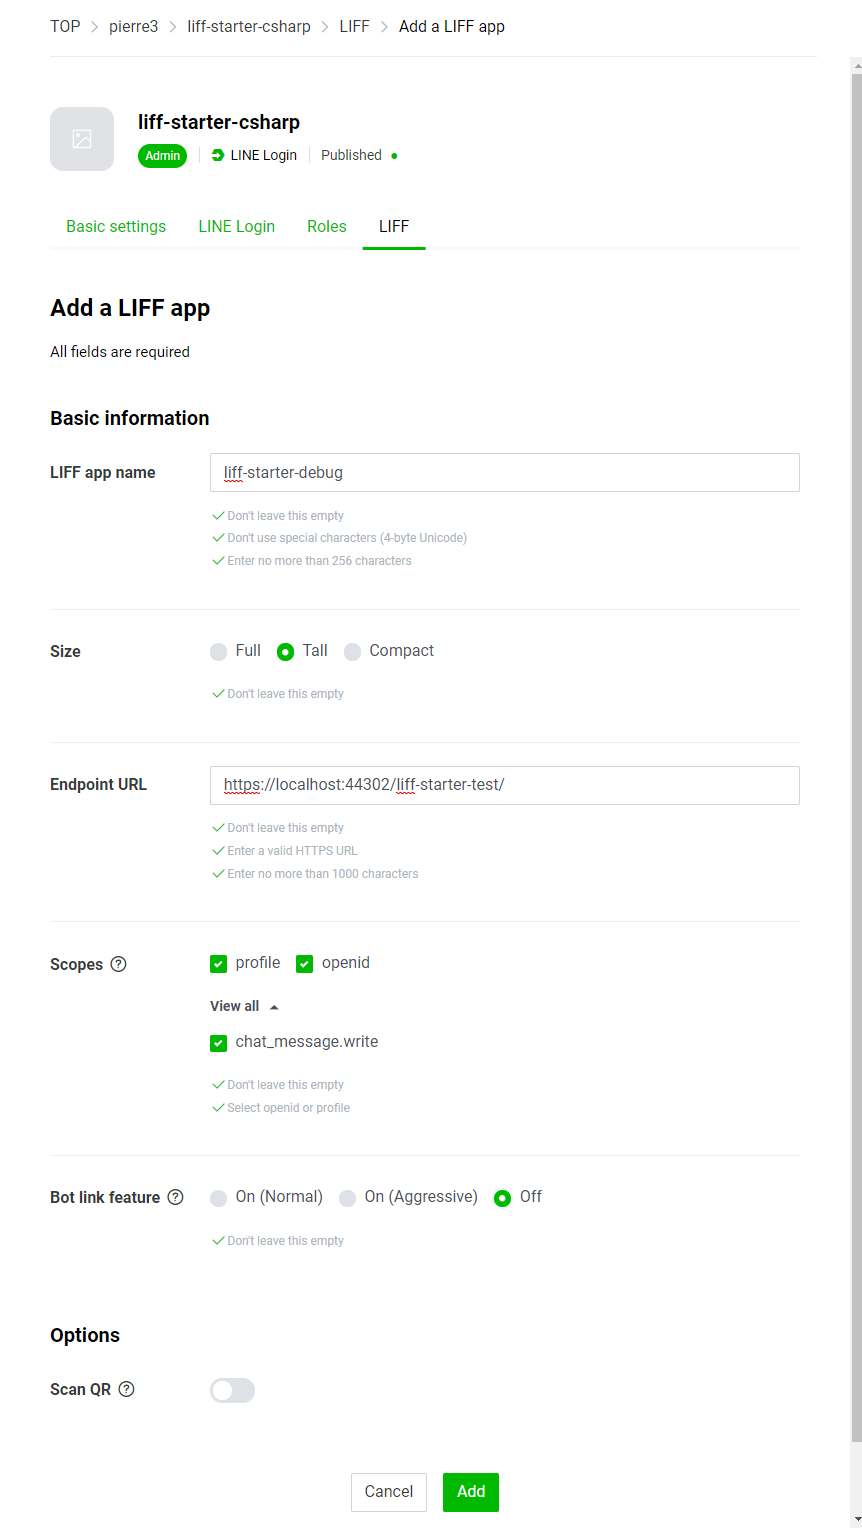
Scopes: Check all profile, openid and chat_message.write.
Setup a project
Create a project
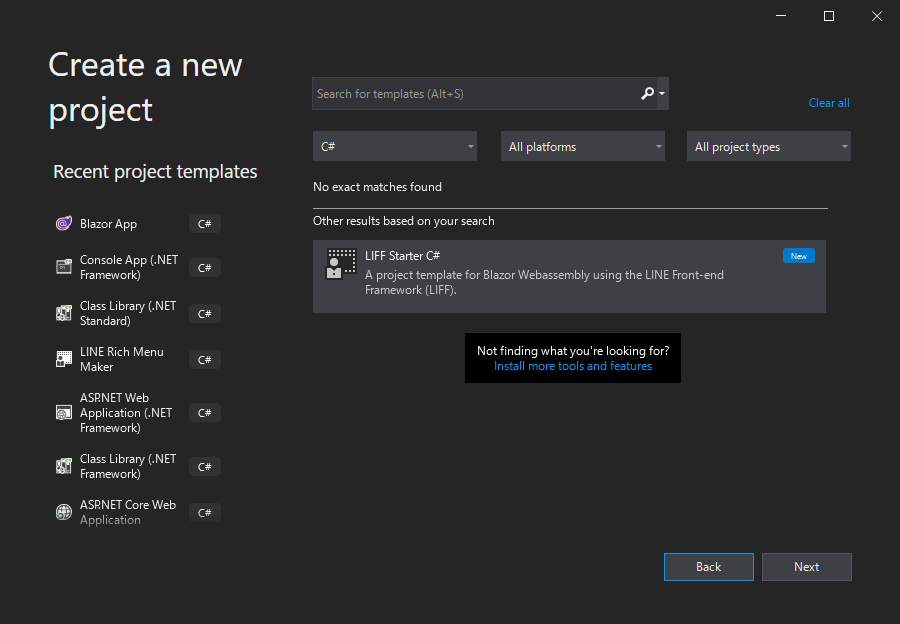
Launch the Visual Studio 2019 and select "Create a New Project".
Select "LIFF Starter C#" from the list of projects and click on the "Next" button.
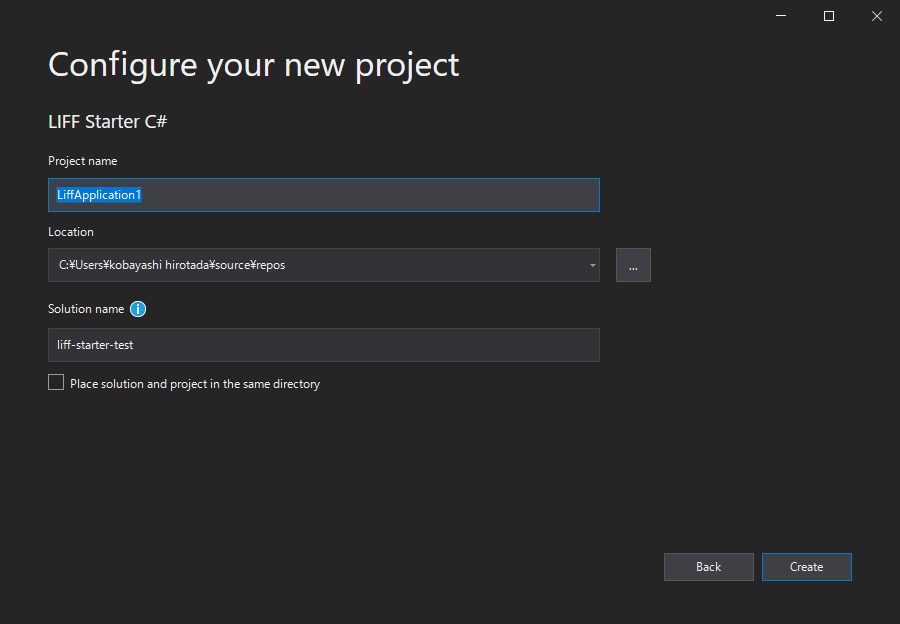
"Configure your new project" dialog, enter "project name" and "solution name" and click the "Create" button.
In the solution name, enter the name of the repository you want to create on GitHub.
Set the LIFF ID to the AppSettings
In "appsettings.Deelopment.json", set the LIFF ID for debugging to "DiffId", and set the LIFF ID for production to "DiffId" in "appsettings.json".
./wwwroot/appsettings.Development.json
./wwwroot/appsettings.json
{
    "LiffId": "1234567890-abcdefgh"
}
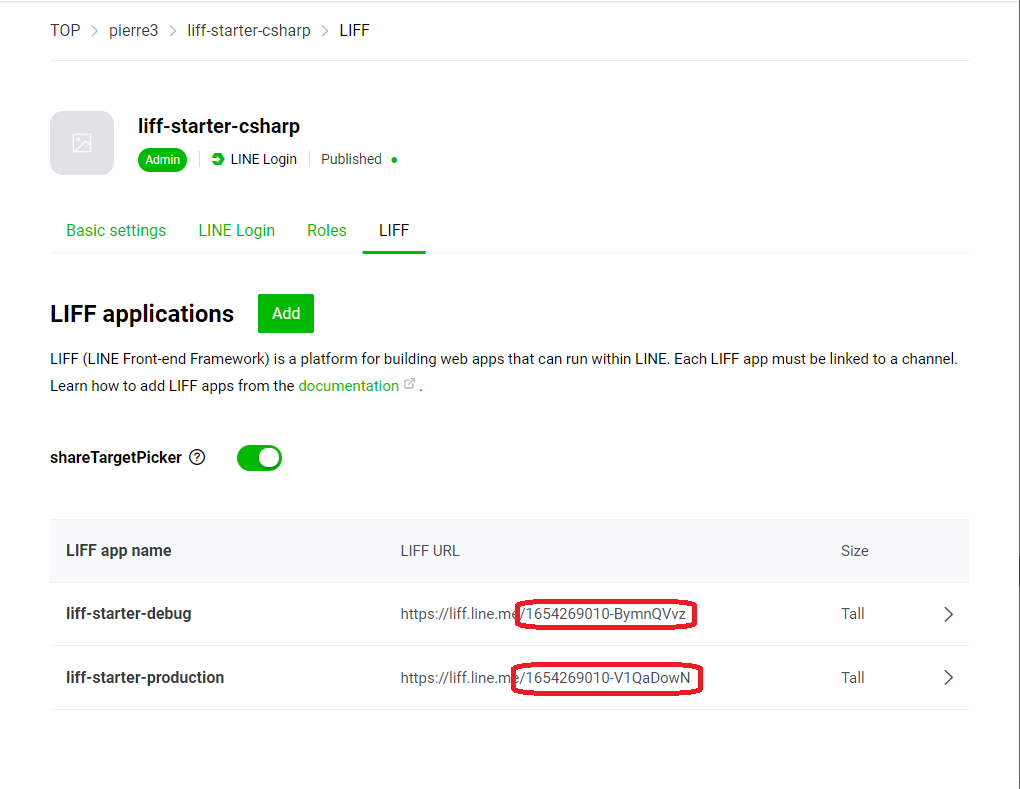
LIFF ID is a string excluding "https://liff.line.me/" from the LIFF URL.
Create a GitHub repository and push the project
Select the "Add to Source Control" from the "File" menu.
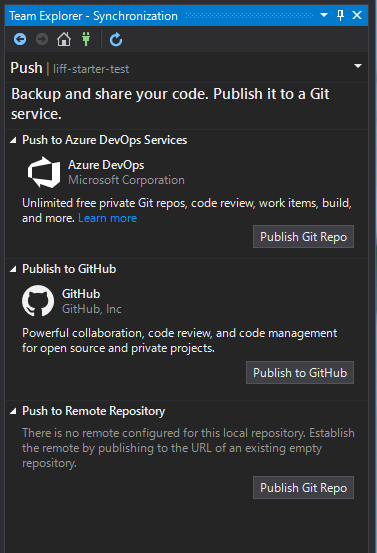
Select "Sync" in Team Explorer and click on the "Publish to GitHub" button.
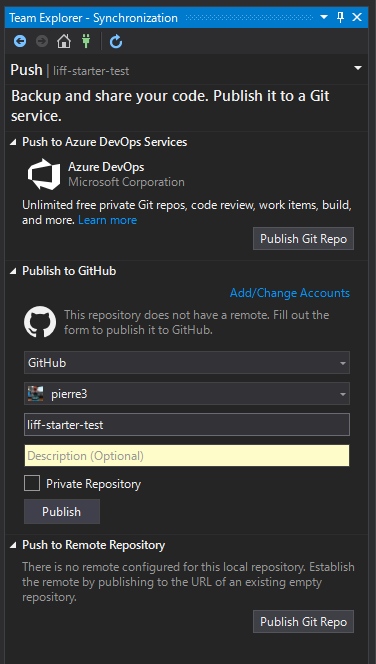
"Click on the "Add/Change Accounts" link and log in to GitHub.
Make sure that the following information is set in the input form and click "Publish".
"GitHub"
(your GitHub account name)
(Solution name (= GitHub repository name))
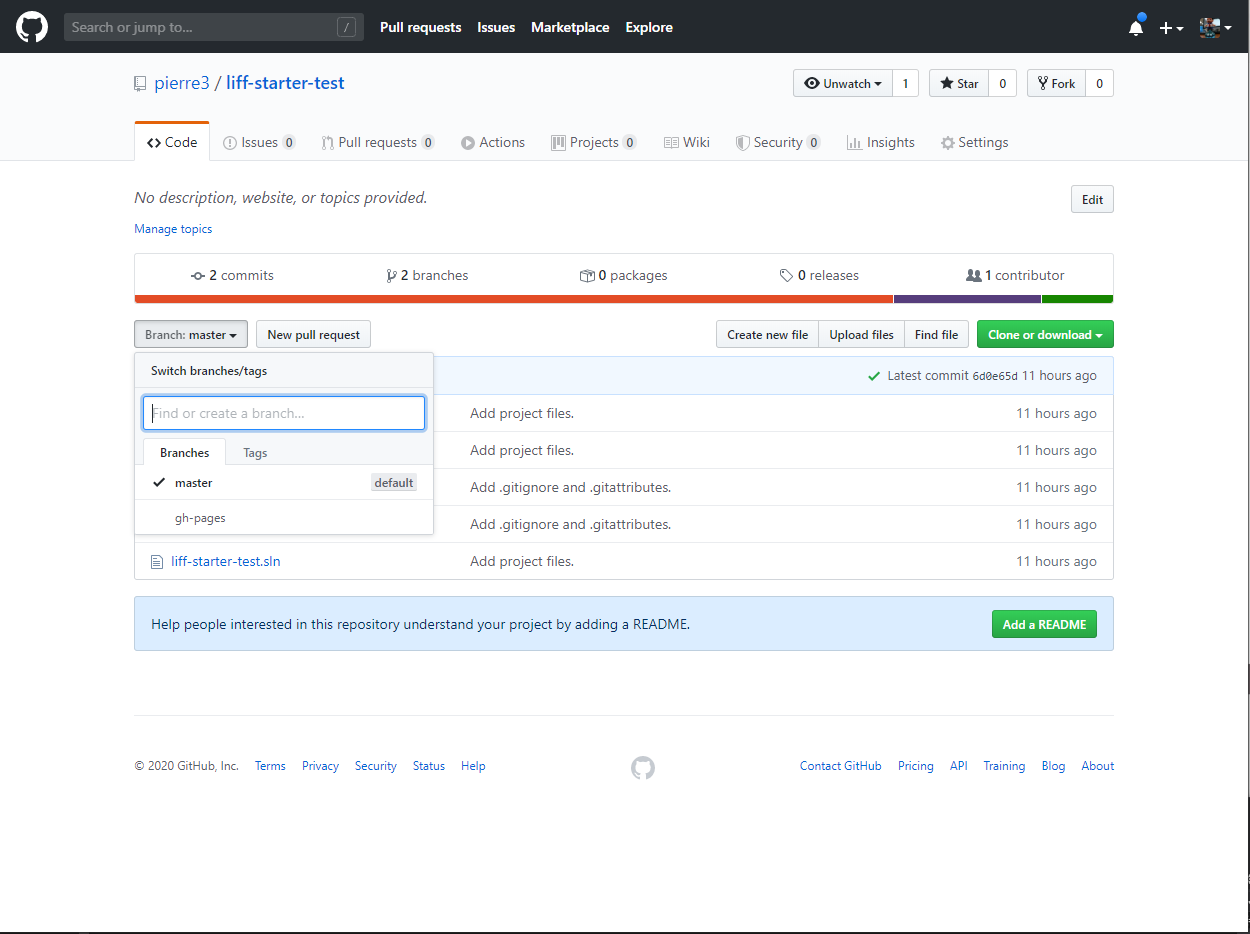
Go to the GitHub site and make sure the LIFF Starter repository has been created.
Click on the "Branch:master" pull-down and make sure that the gh-pages branch is created.
When you push your code to the master branch, GitHub Actions executes the build and pushes the build artifact to the "gh-pages" branch.
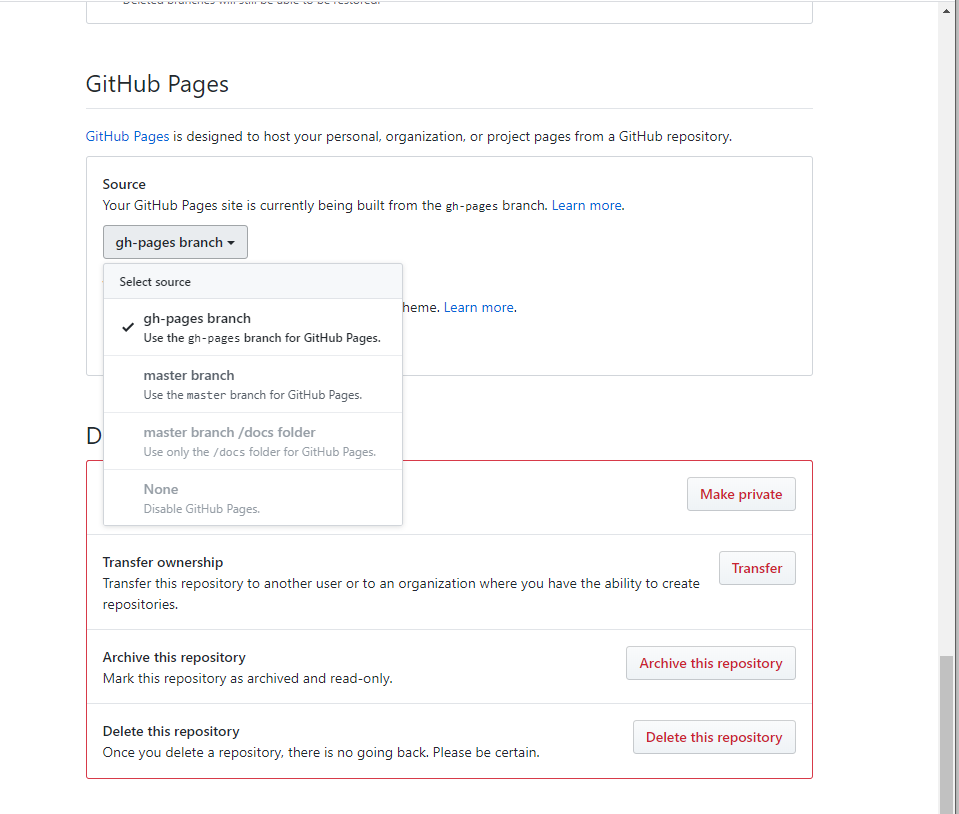
On your GitHub repository page, click on the Settings tab and check the GitHub Page section.
After selecting "master branch" in the "Source" field pull-down, select "gh-pages branch" again.
When you see "Your site is published at {URL}", click on the URL. This should take you to the LIFF Starter site you just created. (It will take a little while for the page to become accessible.)