Visual Studio Team Services build/release task for running OWASP ZAP automated security tests. Run active scan against a target with security risk thresholds and ability to generate the scan report.
Using OWASP Zed Attack Proxy Scan Task
Follow the instructions given below to add and configure OWASP Zed Attack Proxy Task in your build/release pipeline.
Prerequisites
Add the OWASP Zed Attack Proxy Scan Task
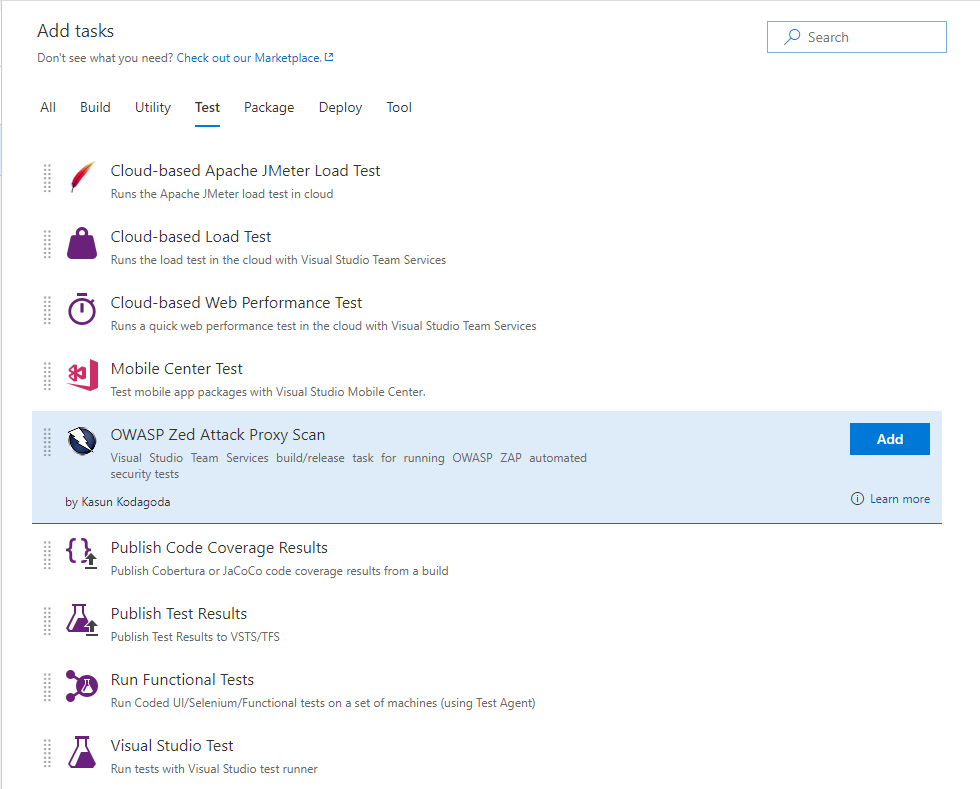
Install the OWASP Zed Attack Proxy Scan Task in to your Visual Studio Team Services account and search for the task in the available tasks. The task will appear in the Test section of the task list. Add it to your build/release task.
Required Configuration
OWASP Zed Attack Proxy Scan task has some required configuration options that needed to be provided.
These configurations are found in the ZAP API Configuration section.
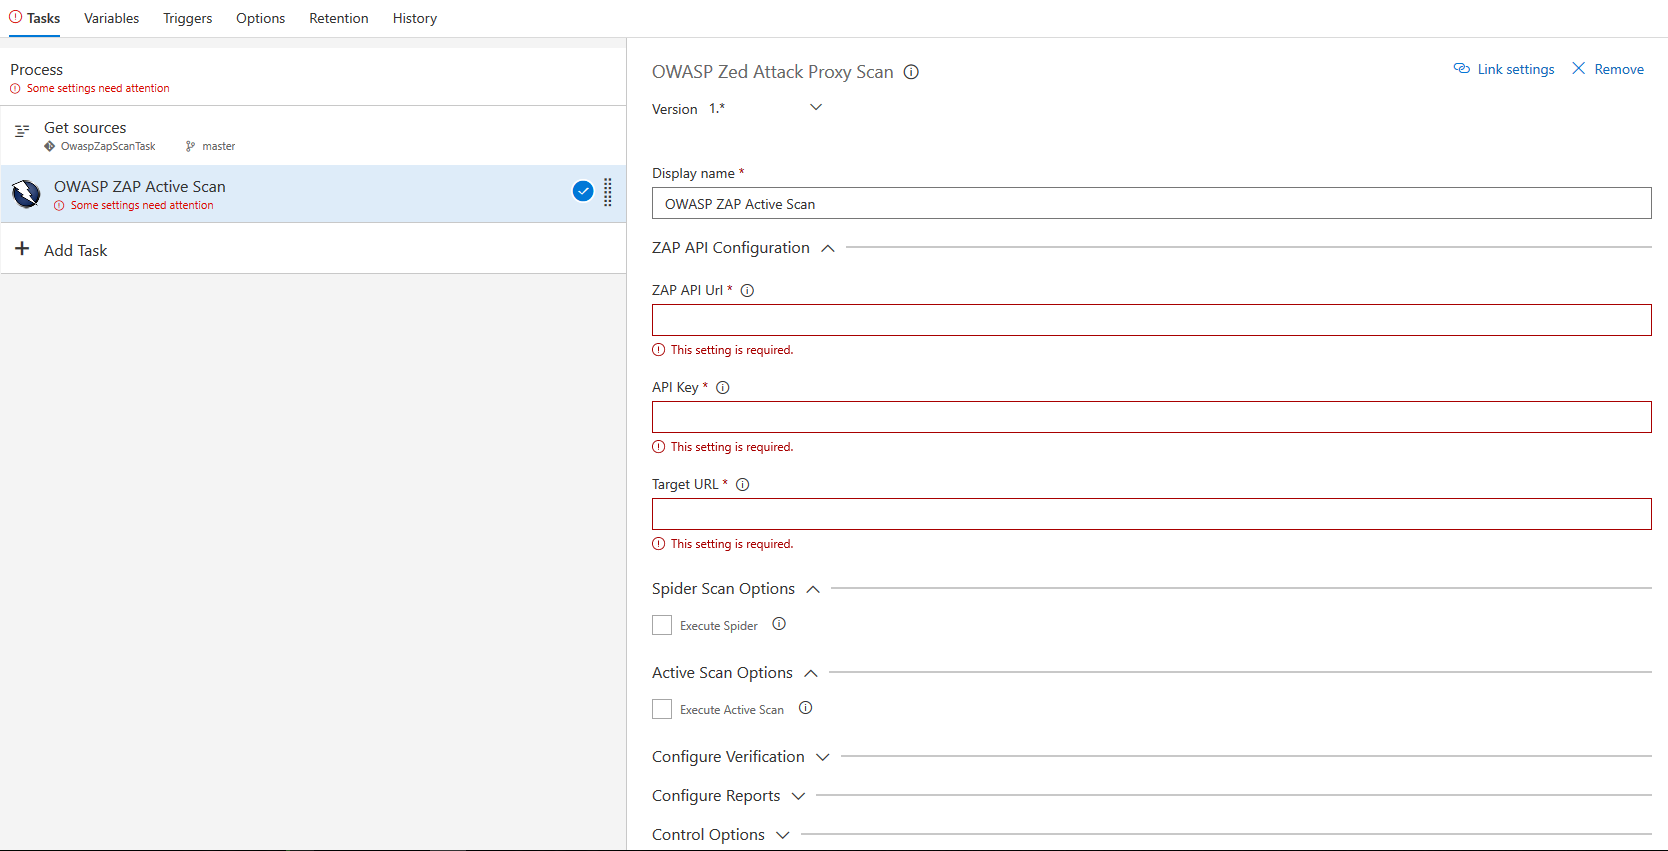
Required Options
- ZAP API Url : The fully qualified domain name (FQDN) with out the protocol. (Eg. zap.example.com)
- API Key : The API key for ZAP. Details about obtaining the API can be found on the Official Documentation
- Target URL : Target URL where the active scan is performed against.
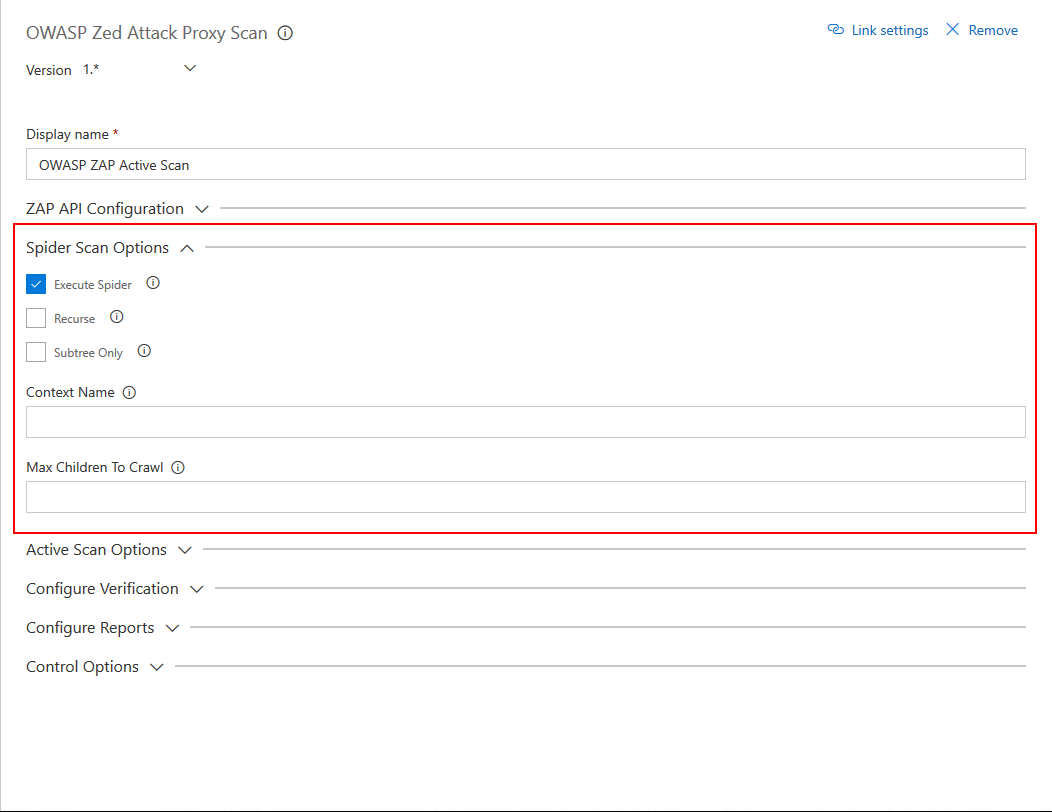
Spider Scan Options
This configuration section includes the parameters that need to be sent to perform the active scan against the target.
Available Options
- Execute Spider Scan : Enable to run a spider scan on the target.
- Recurse : (Optional) Enable to use the nodes underneath the one specified target to seed the spider.
- Subtree Only : (Optional) Enable to restrict the spider under the target url subtree.
- Context Name : (Optional) Set to constrain the scan to a Context.
- Max Children To Crawl : (Optional) Set to limit the number of children scanned.
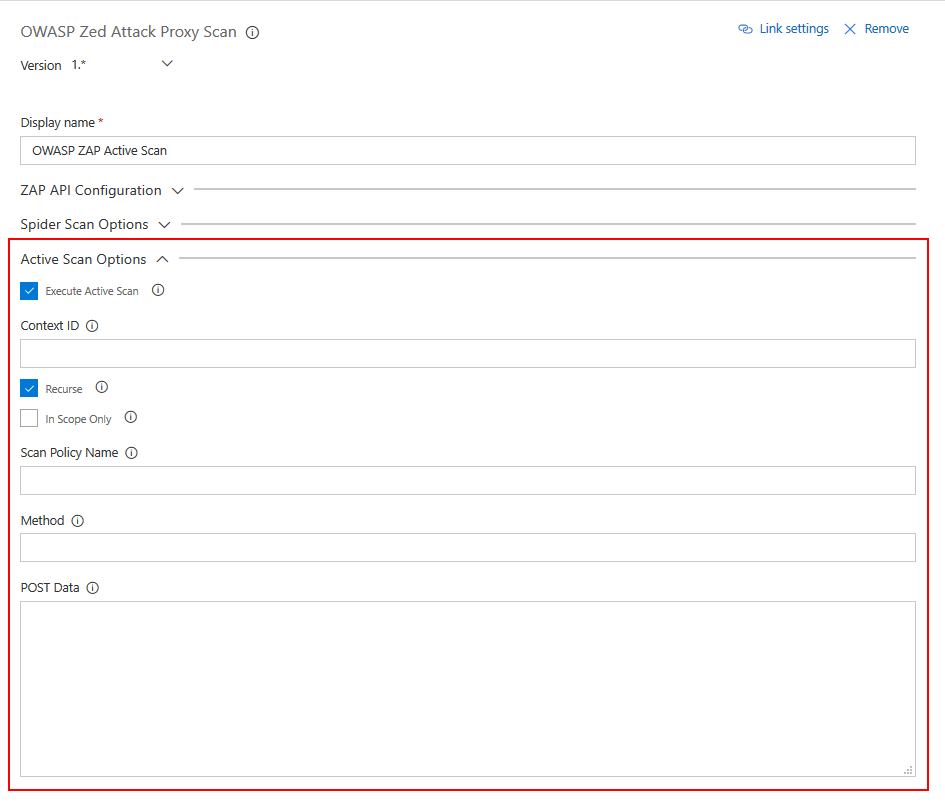
Active Scan Options
This configuration section includes the parameters that need to be sent to perform the active scan against the target.
Available Options
- Execute Active Scan : Enable to run a active scan on the target.
- Context ID : (Optional) Context identifier of the Scan context.
- Recurse : (Optional) Set recurse option to scan URLs under the given target URL.
- In Scope Only : (Optional) Set In Scope only to true to constrain the scan to URLs that are in scope (ignored if a Context is specified).
- Scan Policy Name : (Optional) Scan Policy Name allows to specify the scan policy (if none is given it uses the default scan policy).
- Method : (Optional) Allow you to select a given request in conjunction with the given URL.
- POST Data : (Optional) Allow you to select a given request in conjunction with the given URL.
This configuration section includes the parameters that need to be sent to perform the active scan against the target.
Available Options
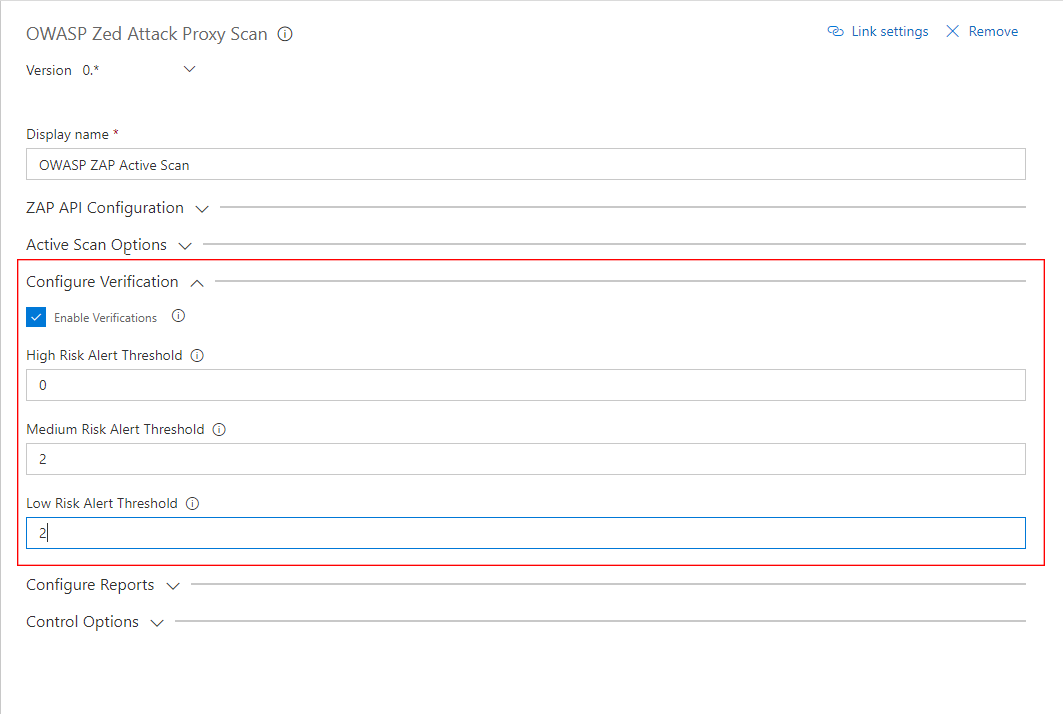
- Enable Verifications : Enable to add thresholds for security risk types and fail the build if the threshold is exceeded.
- High Risk Alert Threshold : Number of Maximum allowed High Risk Alerts. If the number of high risk alerts equals or exceeds, the build will fail.
- Medium Risk Alert Threshold : Number of Maximum allowed High Medium Alerts. If the number of high risk alerts equals or exceeds, the build will fail.
- Low Risk Alert Threshold : Number of Maximum allowed Low Risk Alerts. If the number of high risk alerts equals or exceeds, the build will fail.
This configuration section includes the parameters that need to be sent to perform the active scan against the target.
Available Options
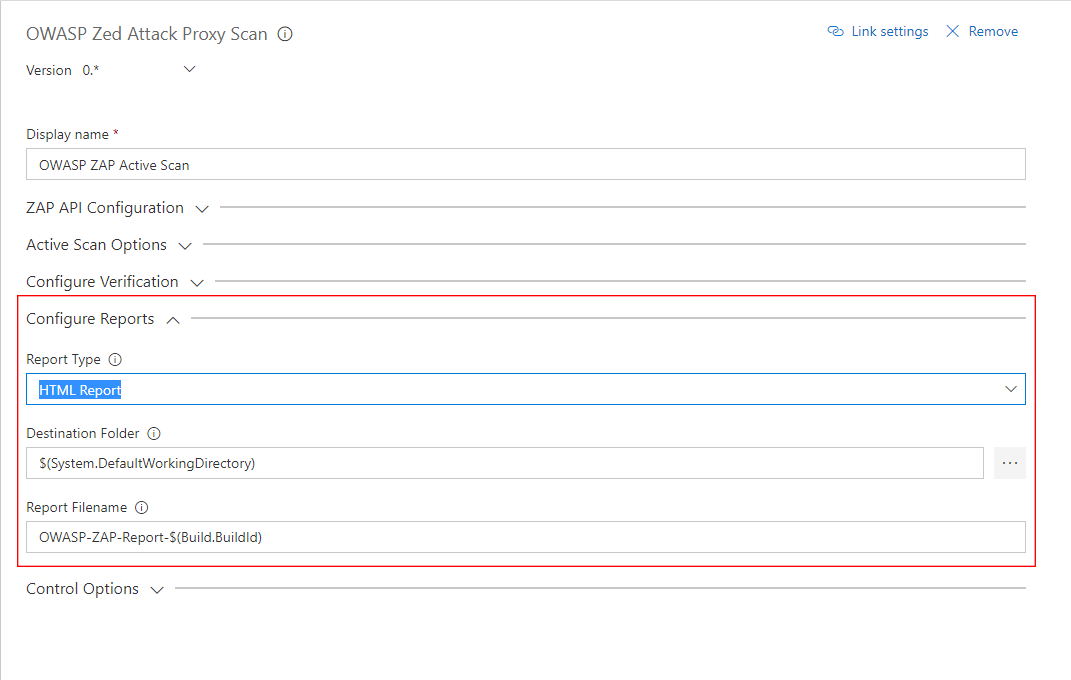
- Report Type : Select the type of report you want generated. Available types are HTML, XML & Markdown.
- Destination Folder : The destination folder that the report file is created. You can use variables. Eg. $(agent.builddirectory).
- Report Filename : Name of the report file, without the extension. Extension is determined by the Report Type. Eg. OWASP-ZAP-Report-2017-00-00.
