Conan Visual Studio Extension for Conan 2Conan, the C and C++ package manager, is now directly integrated into your IDE. List available libraries, install, and use them without leaving Visual Studio.
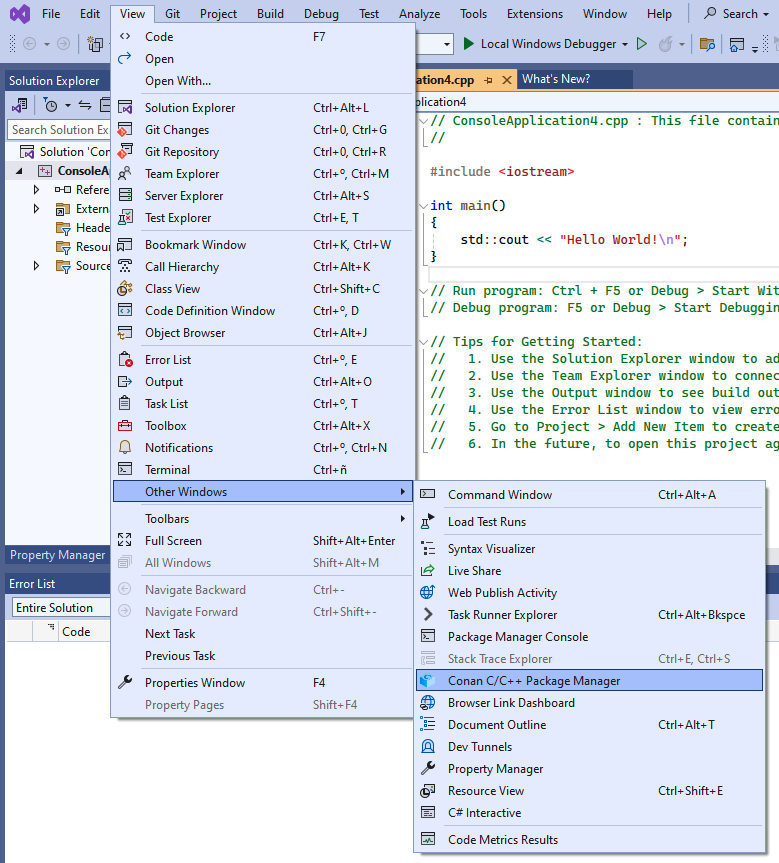
Using the ExtensionAfter installing the Conan extension, you can access it from the “Conan” tool window in Visual Studio. To do so, go to View > Other Windows > Conan C/C++ Package Manager. Initial Configuration
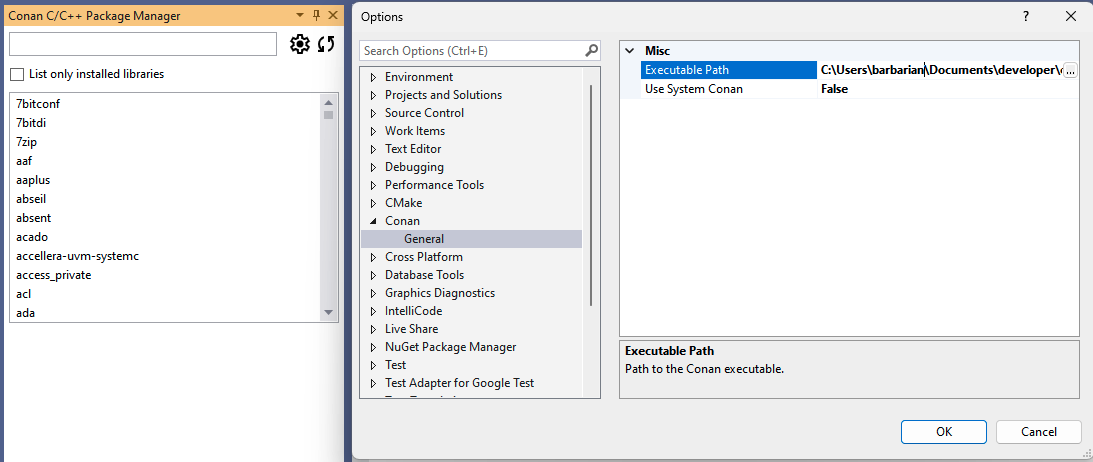
Initially, you will need to configure the Conan executable to be used by the extension. By clicking on the ⚙️ (wheel) symbol from the extension's window, you can set up the path to the Conan client executable. You can either specify a custom path or choose to use the Conan client installed at the system level.
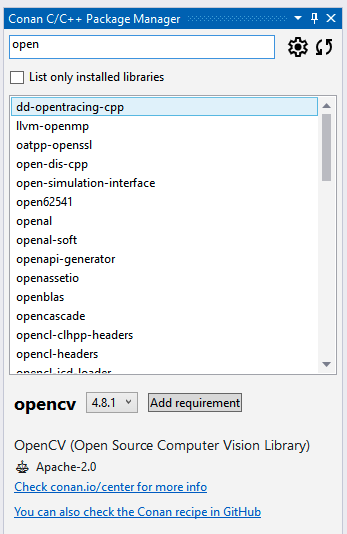
Once you have configured the Conan client, the extension is ready to use, and you can start adding libraries to your project. Searching and Adding LibrariesOnce configured, the library list in the Conan tool window becomes active, and you can search for Conan packages using the search bar. Selecting a library will allow you to view its details, including available versions and integration options.
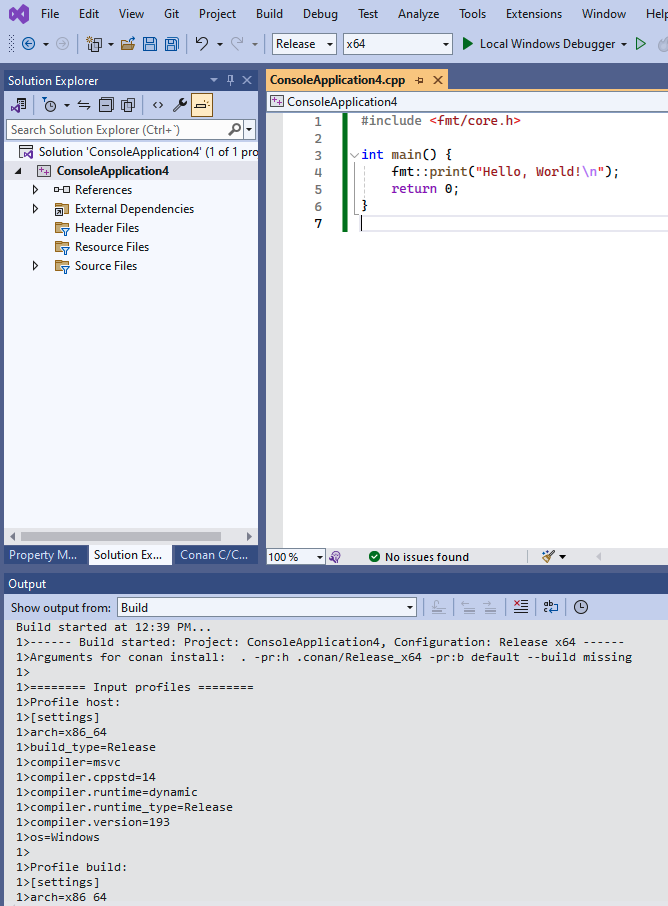
If you now click the At any point, you can also use the refresh button (🔄) to update the list of available packages in Conan Center. Now, if you initiate the build process for your project, the pre-build event will trigger Conan to install the packages and inject the necessary properties into the project, enabling Visual Studio to compile and link against those libraries.
InstallationThe Conan Visual Studio Extension can be installed directly from within Visual Studio:
Alternatively, you can download the latest release from our releases page and install it manually. If you have any questions or issues, please refer to our documentation or open an issue on our GitHub repository. |


