Optimizely XML Resource Builder
Optimizely XML Resource Builder is a Visual Studio extension that creates Optimizely language resource XML from content type classes in a selected project.
It is useful when a project has many page types or block types and you want a quick starting point for ContentTypes-en.xml, without manually copying every display name, description, and property caption.
Requirements
- Visual Studio 2022 or later
- An Optimizely CMS project containing C# content type classes
- .NET Framework 4.5 or later, which is normally already present with Visual Studio
Installation
- Close Visual Studio if it is running.
- Download
OptiXMLResourceBuilder.vsix.
- Double-click the VSIX file.
- Select the Visual Studio instance where you want to install it.
- Start Visual Studio.
Generate a language resource file
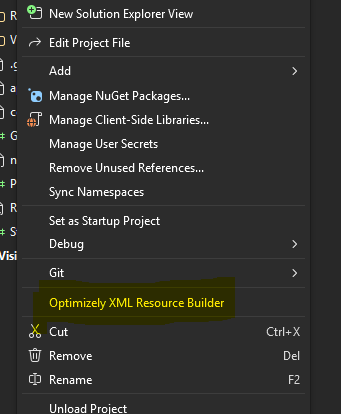
- Open your Optimizely solution in Visual Studio.
- In Solution Explorer, right-click the project that contains the content types.
- Select Build Optimizely XML Resource File.
- Review the settings and select OK.
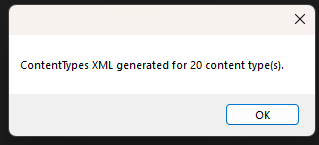
- The extension writes
ContentTypes-{language}.xml to the selected output folder.
By default, the output file is Resources\Translations\ContentTypes-en.xml within the selected project.
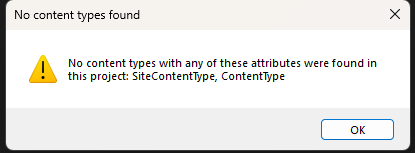
If no matching content type classes are found, the extension shows an error and does not create an XML file.
Settings
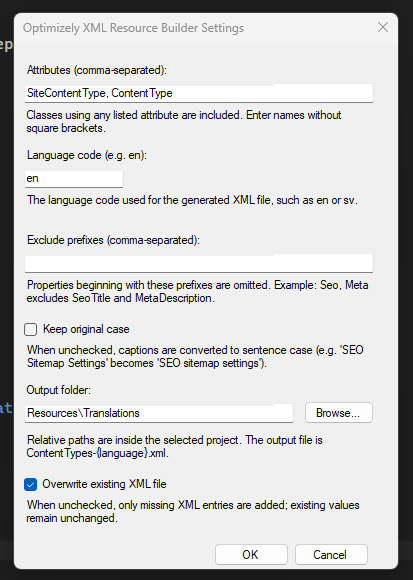
Language code
Sets the language identifier and output file name. For example:
en
sv
fr
Exclude prefixes
Enter a comma-separated list of property-name prefixes to exclude. For example:
Seo, Meta
This excludes properties such as SeoTitle and MetaDescription.
Keep original case
When selected, display names and property captions retain the exact case defined in your code.
When cleared, captions are converted to sentence case. Acronyms written in uppercase, such as CTA, HTML, PDF, and URL, remain uppercase.
For example:
| Source value |
Keep original case |
Sentence case |
CTA text |
CTA text |
CTA text |
SortIndex |
Sort Index |
Sort index |
SEO Sitemap Settings |
SEO Sitemap Settings |
SEO sitemap settings |
Content type <name> values always use title case, while preserving uppercase acronyms.
Output folder
Enter a project-relative folder, such as:
Resources\Translations
You can also use Browse... to choose an absolute folder. A leading single slash is treated as project-relative, so \Resources\Translations\ is safe to use.
Overwrite existing XML file
This option is off by default.
When it is off, the extension adds only missing XML entries. Existing content type entries, captions, help text, descriptions, and names are preserved.
When it is on, the existing output file is replaced with freshly generated XML.
Content type detection
Content type classes are detected automatically, with no configuration required. A class is included when both are true:
- It is decorated with an attribute whose name ends in
ContentType, for example [ContentType(...)], [SiteContentType(...)], or a custom [MyContentType(...)].
- It is not an
abstract class.
Abstract classes are treated as shared base classes rather than content types: their own [Display] properties are still collected into icontentdata for any content type that derives from them, but they do not get their own entry in the generated XML.
Generated XML
For each matching content type, the extension reads:
DisplayName and Description from the content type attributeDisplay(Name = ...) and Display(Description = ...) from properties- Properties inherited from custom base classes in the project
Properties from custom base classes are written once under icontentdata, which makes shared page or block settings available to all content types.
Example:
<contenttypes>
  <icontentdata>
    <properties>
      <metadescription>
        <caption>Meta description</caption>
      </metadescription>
    </properties>
  </icontentdata>
  <articlepage>
    <name>Article Page</name>
    <properties>
      <heading>
        <caption>Heading</caption>
      </heading>
    </properties>
  </articlepage>
</contenttypes>
Saved settings
The extension saves values after you select OK. They remain available after closing and reopening Visual Studio, and are separate for each solution.
Settings are stored beside the solution at:
<solution folder>\.vs\OptiXMLResourceBuilder\settings.xml
Troubleshooting
The command is not visible
- Ensure you right-click a project, not the solution or a folder.
- Confirm that the VSIX is installed in the same Visual Studio instance you are using.
- Restart Visual Studio after installation.
No content types are found
- Confirm the selected project contains the C# content type files.
- Confirm each content type class is decorated with an attribute ending in
ContentType.
- Confirm the class is not declared
abstract — abstract classes are treated as shared base classes, not content types.
A shared base-class property is missing
- The base class must be defined in the selected project.
- The property must have a
Display attribute.
- The property name must not match an excluded prefix.

