#Installing the Azure DevOps Plugin
##Step 1: Installing
- Open the Torque Plugin page in Visual Studio's Marketplace.
- Click Get it free.
- Log in to VisualStudio.com and select the organization that will use this plugin.
Click Install.
NOTE: If you are not the organization’s admin, you may send a request to the admin to install the plugin for you.
Your plugin is now installed.
##Step 2: Configuring the Azure DevOps Plugin
Open your VisualStudio.com project
- Open the Project Settings/Services page
- Click New service connection and select Torque.
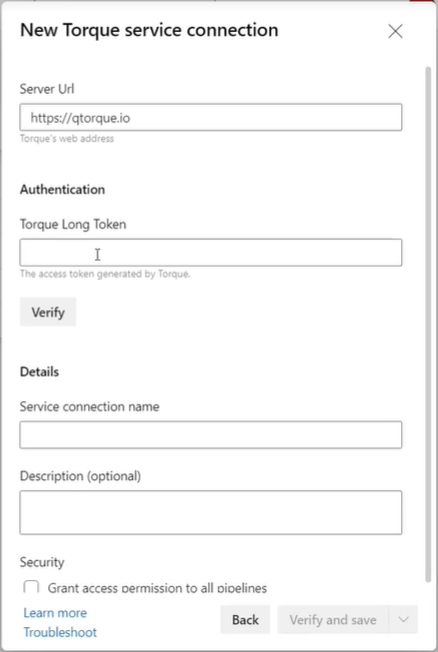
- To the Connection Name, enter "Torque".
In Torque, open the Settings page and click Integrations.
- Under the Azure DevOps icon click Connect Now.
- Copy the automatically generated token.
- Switch back to Azure DevOps Web UI and paste the token into this field.
NOTE: The token value is generated by Torque.
- Click Verify connection and make sure the connection succeeds.
#Launching a Sandbox from your Azure DevOps Pipeline
After installing and configuring the Azure DevOps plugin, you can launch sandboxes from your Azure DevOps Pipeline.
Use the available build steps to create a sandbox from any blueprint, retrieve its details, start your tests and end the sandbox when it's no longer needed.
##Preparing the Azure DevOps Build
- Open your visualstudio.com project.
- In the Build and release page, create a new build or edit an existing build.
- Create a New Task in one of your build agent’s jobs.
- In the New Task form search for Torque.
The following tasks are displayed:
- Torque End Sandbox (ends a sandbox with Torque).
- Torque Start Sandbox (starts a sandbox with Torque).
NOTE: If you do not see above tasks, it means that the plugin was not successfully installed.
##Launching a Sandbox
Add the Torque Start Sandbox task to your pipeline.
Open the task settings and enter the following parameters:
- Service Connection – Enter "Torque". This is the name of the connection that you entered when you created the Torque service connection during the plugin configuration.
- Timeout- Set the timeout for this step, if your sandbox will not be ready when the timeout is reached, Torque will abort the deployment.
- Space name - enter a name for your Torque space.
- Blueprint name - Enter the name of the blueprint you would like to use for creating this sandbox.
NOTE: To specify one of Torque’s sample blueprints, use a [sample] prefix.
- Sandbox name - Enter a name for the sandbox
- Inputs - If this blueprint has inputs, you may specify them in a comma separated list of input names and their values. e.g., input1 name=value1, input2 name=value2
Expand the Output Variable section and in the Reference name field, enter "Torque". Torque uses this variable to return the following sandbox details:
- Torque.Sandbox_Id– the identifier of the created sandbox. You will use this identifier to end your sandbox when needed.
- Torque.Sandbox_Details– All the sandbox details including instances' IP addresses, ports and other infrastructure details required to properly run your tests. You may query this parameter to get the required information.
##Ending a Sandbox from your Pipeline
Add the Torque End Sandbox task to your pipeline.
Open the task's settings and enter the following parameters:
- Service Connection – Enter "Torque". This is the name of the connection that you entered when you created the Torque service connection during the plugin configuration.
- Space name- Enter the name of your Torque space.
- Sandbox ID- Enter the ID of the sandbox you want to end. Use $(Torque.Sandbox_Id) to dynamically get the sandbox Id from the Torque object that was returned from a Start Sandbox task.